Sewing Elastic, the Easy Way
Today we are taking a close up look at an easy way to sew elastic onto fabric. This tutorial features a technique that some might find rogue because it is nearly pin free. You need to give it a try though because it is an amazingly free way to sew! With a little practice you’ll get a feel for pulling the elastic with a little tension as you stitch to get the right stretch on your projects. Sewing elastic is a great way to finish some garment edges and this technique simplifies it!
You will find it’s:
- fast and easy.
- great for 1/4″ elastic and other narrow elastics that are tedious to pin.
- a non-bulky finish for doll clothes.
Getting Started
Supplies:
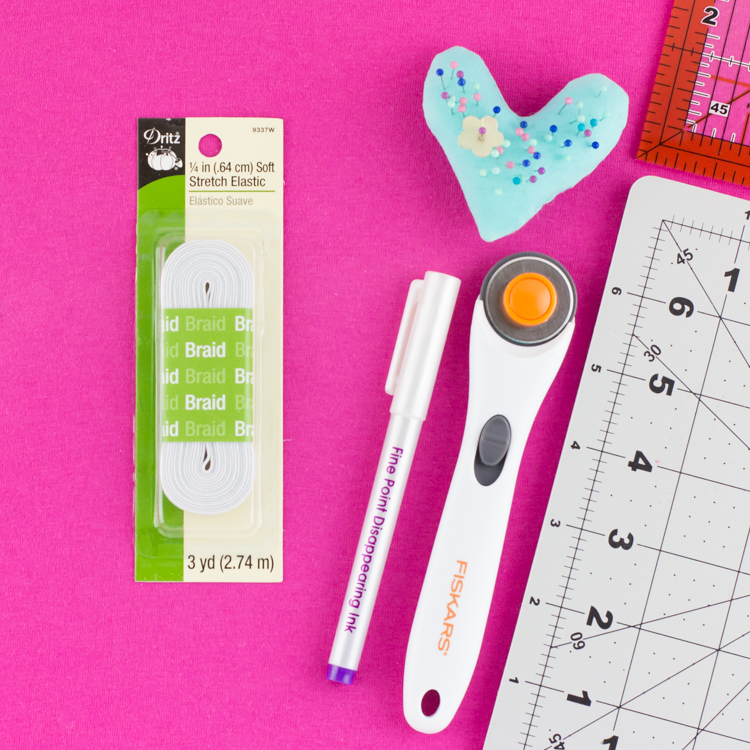
- Elastic
- Ball point needle
- Pins
- Thread (That matches your project. I use a contrasting thread so you can see the stitches.)
- Rotary cutter, self-healing mat and acrylic ruler or scissors
- Disappearing Ink Marking Pen
*This post includes affiliate links that I can earn a small commission on, to help pay for running this site.
1. Cut the elastic 1/2″ longer than needed for the project (check your pattern, it may already account for the extra length if it uses this technique).
It’s easy to measure accurately and cut the ends straight with a rotary cutter and self healing mat. You can also use scissors.
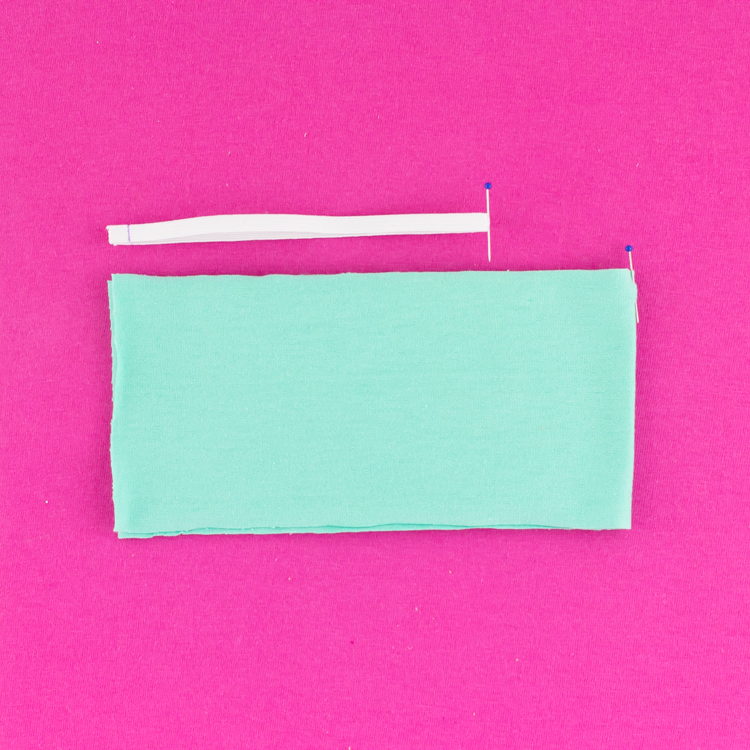
2. Mark the elastic 1/4″ from each end with a Disappearing-Ink Marking Pen.
3. Fold the fabric in half and mark the halfway point with a pin. Do the same with the elastic. (This is an optional step for projects that are longer than 10″.)
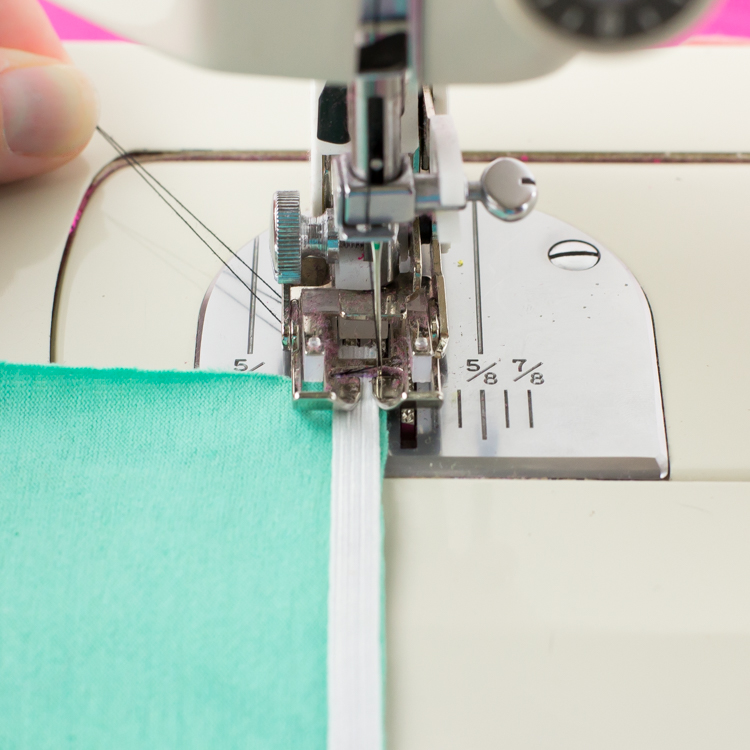
4. On the wrong side of the fabric, overlap the elastic end 1/4″ over the fabric edge. Place the elastic length on the edge of the fabric with a sliver of fabric (about 1/16″) showing. You do not want the elastic length overlapping the fabric edge.
If your elastic is short you may want to place one pin in the elastic to secure it while you get started. I found I didn’t need the pin on this example.
5. Use a regular zigzag stitch on the edge of the elastic. Back stitch a few stitches to anchor the elastic to the fabric.
Pull the tail threads to guide the fabric as you get started stitching.
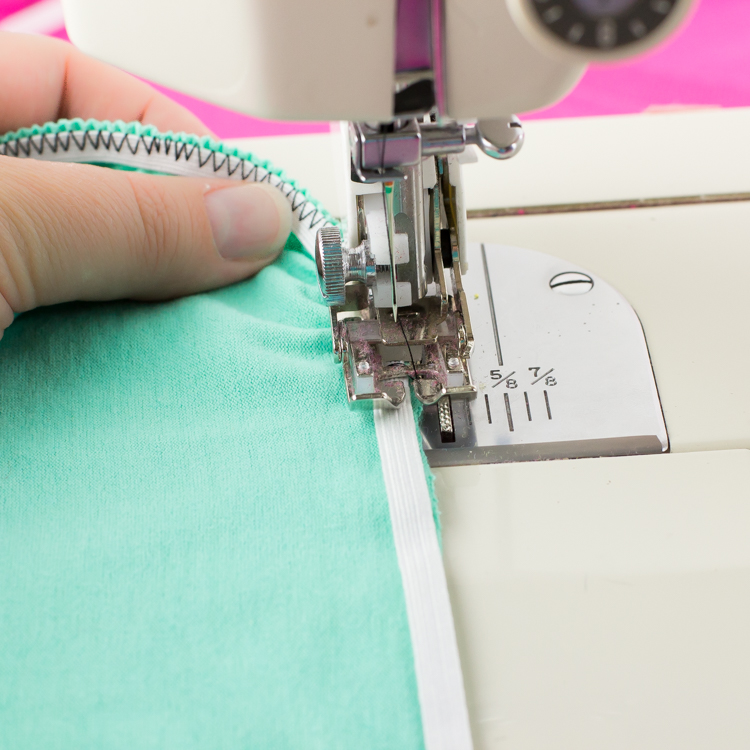
6. With the sewing machine needle down, pull the elastic to match the center pins of the elastic and fabric. You can pin the two center points together or just hold and match them as you stitch. Continue stitching on the edge of the elastic.
Pull the elastic to match the fabric length as you stitch. If you are stitching on a knit take care to not stretch the knit fabric, only the elastic.
Tip: Hold the fabric a few inches behind the presser foot as you stitch. It helps to ease the tension between the front and back of the fabric since you are pulling the elastic forward.
The elastic is sewed to the fabric and there is a lovely little gather on the right side of the fabric. That was a cinch! Now we’ll finish the edge with a simple fold that will encase the elastic.
Encasing the Elastic Edge
7. Fold the elastic edge towards the wrong side of the fabric. Working with a few inches at a time, stretch the elastic to the length of the fabric and pin through the layers.
8. Using a regular straight stitch, sew with a scant 1/4″ seam allowance, stitching inside the edge of the elastic. I am stitching on the wrong side but depending on your project you can stitch on the right or wrong side of the fabric. Use a few back stitches to anchor the folded edge.
Pull the tail threads to guide the fabric as you get started stitching.
9. With the sewing machine needle down, pull the elastic to match the length of the fabric, so there are no wrinkles in the fabric. Continue stitching inside the edge of the elastic.
Tip: Keep the fabric taut against the folded edge as you sew. In the example above the fabric is making a lump on the fold. Stop and pull the fabric taut periodically if this is happening.
We used a straight stitch to give the edge a cleaner look. What’s cool is that this straight stitch actually has some stretch, because we stretched the elastic as we sewed. The straight stitches don’t break even on knit fabric. The example here is sewn on a knit fabric with moderate stretch. If you have super stretchy fabric you may need to use a narrow, long zigzag stitch in place of the straight stitch.
All finished!
There you have it! I hope you found it helpful to take a close up look at this little technique for sewing elastic onto fabric. Now you have all of the little details you need to try it yourself, confidently and successfully!
-Anna









Hi Anna! Thanks for this tutorial.
Just wanted to say that I received my copy of My Doll My Style. It’s a beautiful book, and I look forward to working with it.
Have you used decorative elastic? I have quite a stash of it, but I haven’t been able to find tips for using it.
Kathy, Thank you, I’m so glad you are enjoying the book! 🙂
I love suggestions for what sewing topics you are interested in. Decorative elastic is something I’m interested in too. Maybe this can be one of our upcoming topics!