I have been saving a stash of fabric for doll clothes ever since my daughter had her first 18″ doll in 2007. Each piece I save I dream up a list of possibilities of what doll clothes it will become. Do you know what my favorite part of the stash is? It is the pieces that are in the shape of pants, shorts, skirts, shirts, and dresses. Yep, it is regular clothing I plan on repurposing for doll clothes! At first I saved everything. It seemed like a boundless resource. With the change of the seasons I was sorting through my kids drawers and pulling out what didn’t fit or what was worn out. If it was going to go to the thrift store it took a detour to my fabric stash. As I started sewing for dolls I started to realize that certain clothes make better candidates for doll clothes. What I have learned has set a new standard to be admitted to the fabric stash. Don’t worry this isn’t an exclusive club! 🙂
- Fabric Weight- This is the most important factor. I don’t always get this right but when I do I am always, always 100% happier with the end result. I am often lured into the prospects of the cute colors or what my imagination wants this fabric to be and become. When it comes down to it, the weight of the fabric is the #1 thing that effects this. The weight is what it is, don’t fight it, go with it and if it just isn’t right don’t spend any more time on it.
- The Little Details-Clothing these days is full of details. Details like ruffles, prints, pleats, tucks, embroidery, and sequins to name a few! Can the details be incorporated into doll clothes? Look for the details and sew to make those details shine!
- To scale- Let face it, we are using clothing for a child or and adult and repurposing it for an 18″ doll. It’s adorable on a 3′ child but does it look realistic on something only 18″ tall? This applies to the print on the fabric, the stripes, and the details you want to incorporate. Are the flowers small enough to be to-scale for doll clothes? Is the ruffle going to be a realistic size for a doll dress? If you consider this before you start the project you are going to be that much more pleased with the outcome!
Don’t be frighted off by my list! The way to really get a feel for this is to carefully consider what clothing to use and then try it! It is this hands on experience that will give you the best feel for what end product you are happiest with! I enjoy the challenge sewing for dolls but I also like low risk with the projects I try. If my project flops I am not out a whole lot. Let’s see, a shirt I was already getting rid of and the time to make it. The projects are small so there is usually not a whole lot of time involved and it’s guaranteed I’ve learned a thing or two from my mistakes!
Now for the project! We have gone over my top tips for repurposing clothing now let’s make something! Of course it is a great repurposing clothing project! It is an elastic band skirt. An elastic band skirt is a great skirt for dolls! It doesn’t add bulk at the waistline, it is so quick and easy to make, and it is a flexible style to incorporate some repurposed clothing details!
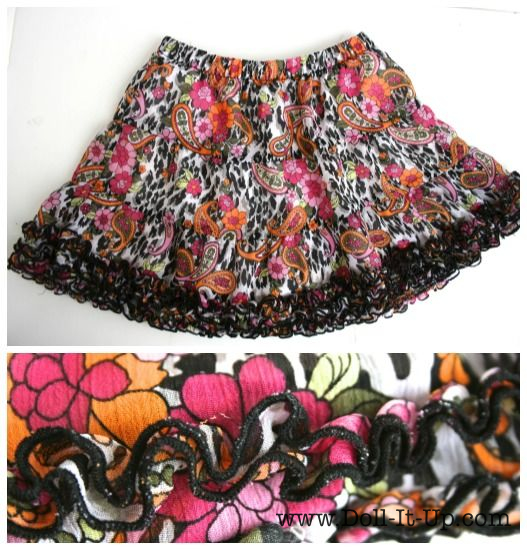
Below is the skirt I found at the thrift store for this project. It is size 10/12 for girls. I am going to go through my check list with you for this piece.
- Fabric Weight- This is a very lightweight sheer fabric.
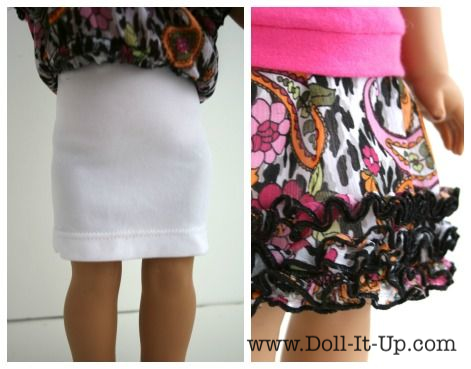
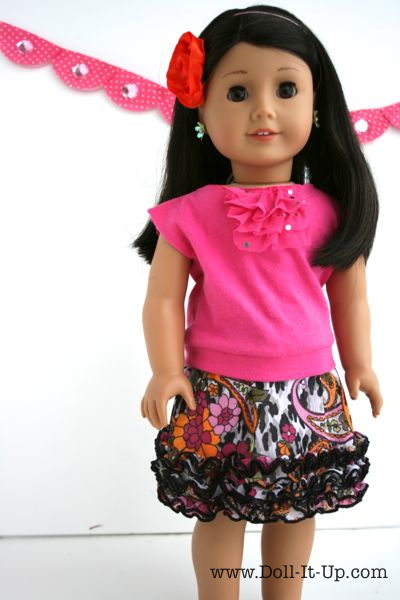
- The Little Details- I love the way the bottom of the skirt is finished! Lots of little ruffles serged on the edge with black thread.
- To Scale- The flowers, leopard pattern and paisley are a great size for 18″ dolls. The ruffle band along the skirt bottom is a great size to work as a band across the bottom of a doll skirt.
1. Yes! 2. Yes! 3. Yes! I’ve got a great canidate for doll clothes!
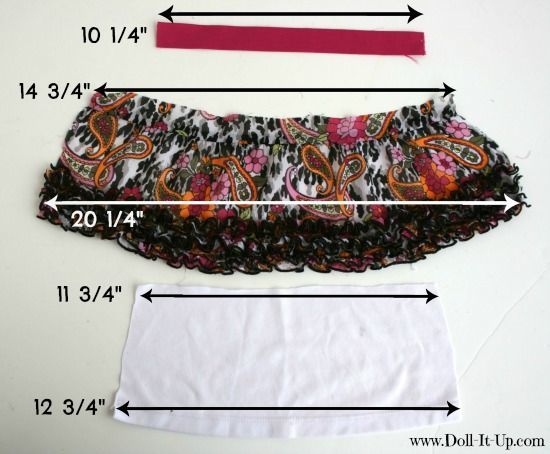
Now for the how to’s for this project! Here are the measurements for the skirt and a few more details about the fabric.
- Elastic- 1″ elastic cut 10 1/4″ long.
- Skirt- I followed the curve of the original skirt bottom while cutting it out. It ended up that the top part of the skirt is 14 3/4″ and the bottom is 20 1/4″. The height is 5 1/2″. The skirt comes to just below the knee on the doll. In the pictures I pulled it up on her waist so it hits mid knee. Check the skirt length on your doll with a measuring tape. Be sure to account for the elastic and decide if you want to make any adjustments. The bottom edge was already finished on my skirt. Be sure to add a little if you need to finish the bottom edge of your skirt.
- Underskirt- The original skirt had an underskirt because the fabric is sheer. I used the same underskirt fabric to cut a doll underskirt. It is a knit and easily stretches. I wanted it fitted so it wouldn’t add bulk to the skirt. If you are not using a knit be sure to increase the measurements accordingly. If your fabric is not see through then skip the underskirt! Mine measures 11 3/4″ across the top and 12 3/4″ across the bottom. The height is 5 1/4″. I used the finished edge of the underskirt to simplify things. If you need to finish yours you may need to add a little.
I used 1/4″ seams for this project.
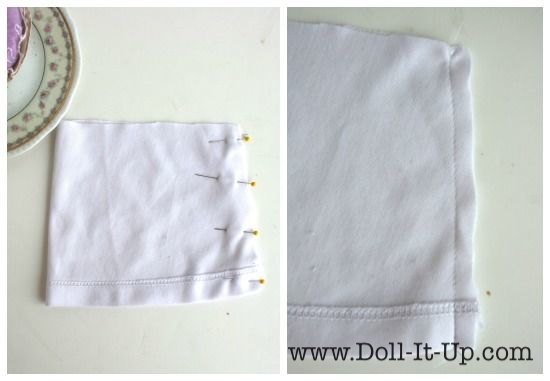
Starting with the underskirt, fold it lengthwise right sides together. Pin the edge and sew.
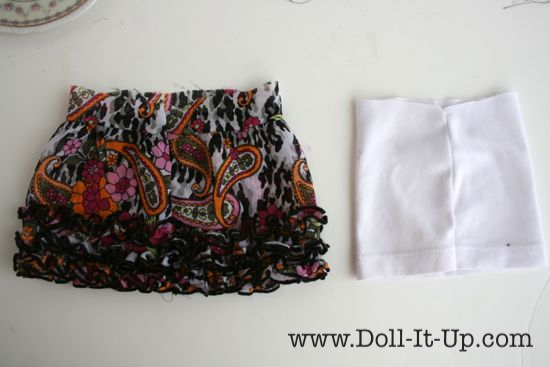
It is the same with the skirt. Fold it lengthwise with the right sides together and pin the edge. I matched the ruffles on the bottom section of the skirt. This sheer fabric easily unravels so I used a straight stitch and then a zig zag stitch on the edge. I trimmed the seam so it was even.
Now this little skirt and underskirt need to be joined together.
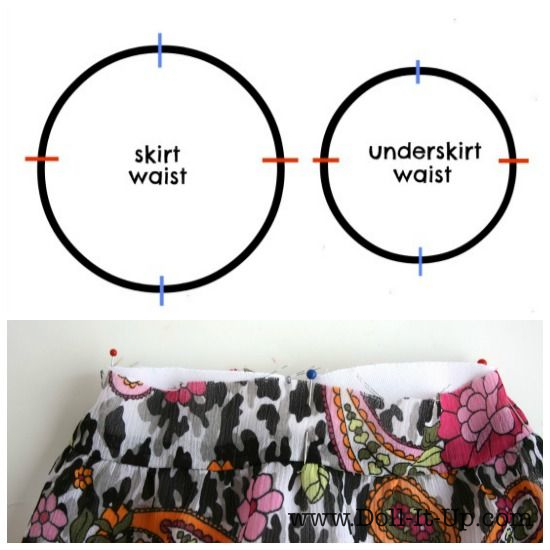
Before we join them we need to mark the waistband of each with pins. Lay the skirt out and pin at the fold on each side. Then match up the 2 pins on the sides in the center and pin the 2 new folds on either side. The picture under the diagram shows the pin placement with the skirt lying out flat.
Do like my little diagram? 🙂 Well I hope it makes this a little clearer!:) Each skirt has a different diameter at the waist. We want to join them together. Pinning at different points on each skirt (the blue and red lines) helps us divide the waist into quarters. Now if we set the underskirt into the skirt we can match up pins and evenly match up the two skirts. Join the two skirts together by pinning these spots together. Pin more points around the waist. Take two points (a red pin and a blue pin) and stretch them until until the fabric is even. Place a pin between the two pins. Continue around the waist the same way, further subdividing the waist.
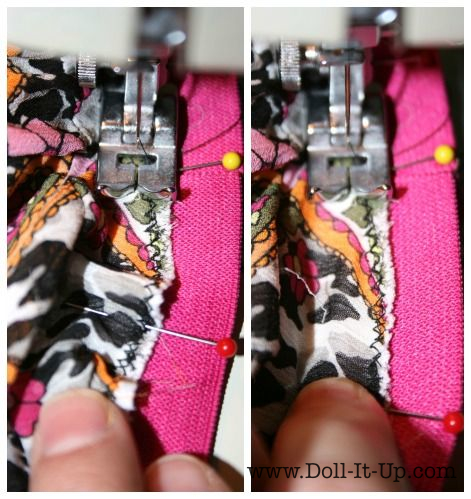
I didn’t get pictures of sewing the two skirts together. The process is similar when we add the elastic and I did get pictures of that! So keep that in mind as you read this and check out the pictures to come! Now to the sewing! The underskirt is stretchy and the skirt is not. Basically you are going to sew from pin to pin. You will pull the section of fabric between pins until the fabrics are flat to one another. This is usually a two hand process. One hand on the fabric behind the foot. This creates some resistance to the forward pull by the other hand. This way the fabric can still move through at a steady rate. After using a straight stitch I came back a few times with a zig zig stitch. This fabric frays easily so I wanted to be sure it was secure. 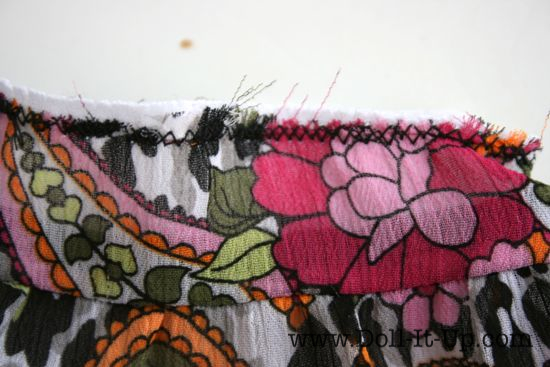
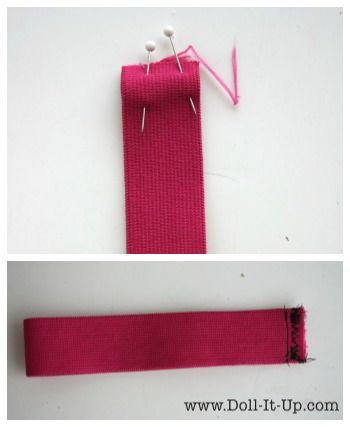
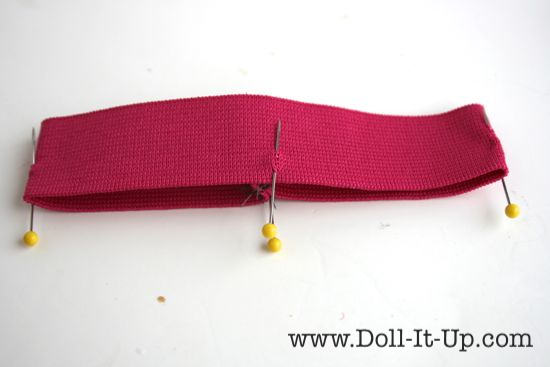
Now for the elastic, pin the two ends together. Stitch with a straight stitch and a zig zag.
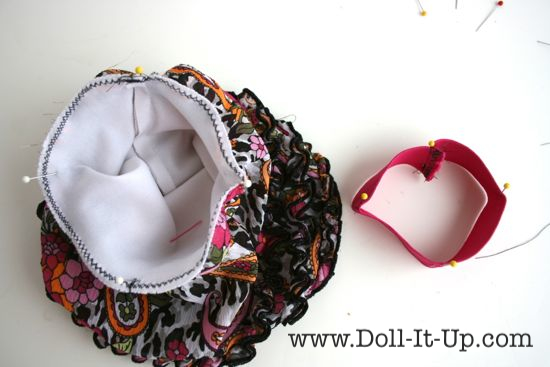
To add the elastic to the waist we are going to mark the elastic in quarters just like we did to the skirts before joining them.
Here I set out the skirt and the elastic all pinned and ready to be joined together. This picture really shows the difference in size of the two diameters.
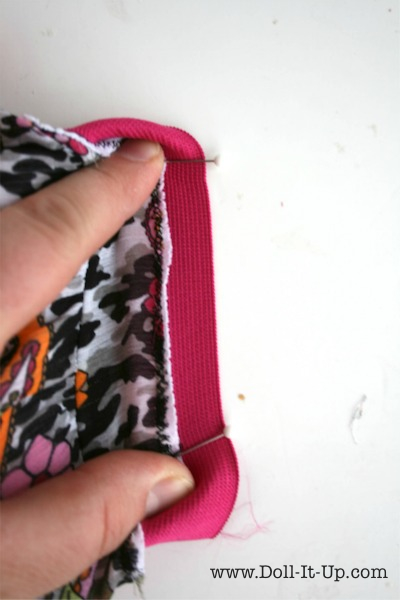
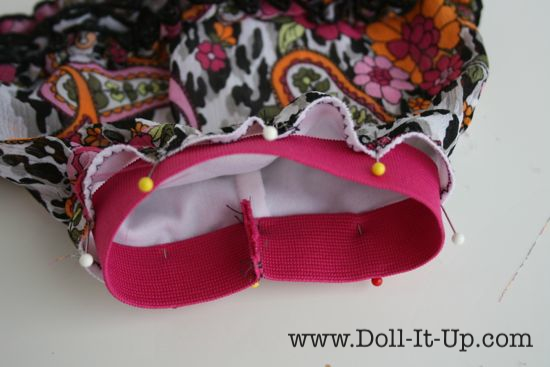
The pins are going to match up in the same way as we did with the skirt and underskirt. Just overlap the skirt onto the elastic about a 1/4″ and pin together. Join the skirt and the elastic with a pin where the pins match up. You will see in the last picture in this collage that the skirt fabric drapes between pins.
To add more pins stretch out the fabric between two pins and pin. Work your way around the skirt pinning.
Spacing the pins this way will make it easier to sew. Notice the gaps in the skirt along the elastic are still there. Just as we stretched out the fabric to pin we will need to stretch as we sew to get an even smooth fit to the elastic.
Just as I described earlier while joining the two skirts, this step uses both hands. I am not able to fully show this because I am also behind the camera!:) I set these two photos side by side to show what the fabric looks like as you sew. In the first picture there is a wrinkle in the skirt. In the second picture you see how I pull the fabric and elastic together. Keep one hand behind the foot. As you sew pull against the tension of the other hand that is pulling the fabric and elastic forward. Sew around the waist basically sewing from pin to pin.
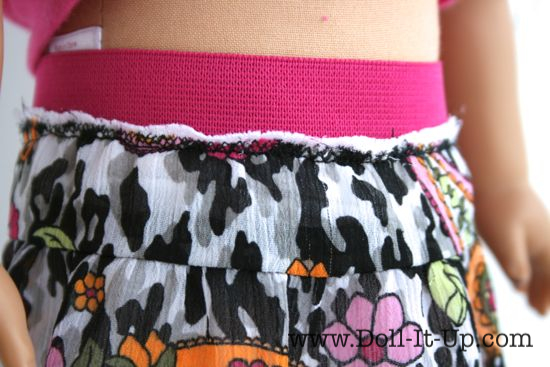
If the hem of the skirt is finished (like mine) then you are done! The skirt easily slips on and off.
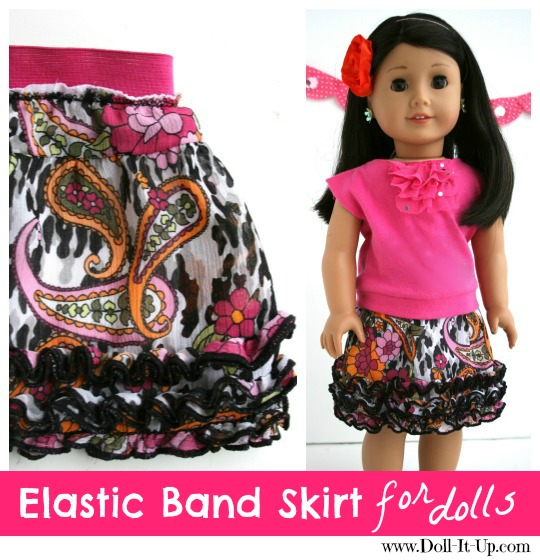
The knit underskirt is fitted. The skirt hangs perfectly over it!
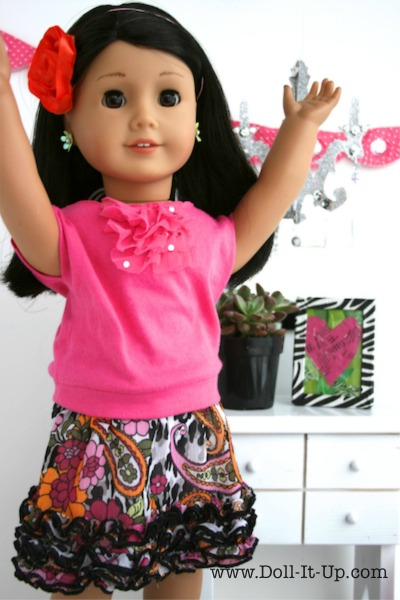
Making an elastic band skirt is a super easy and quick way to make a doll skirt! It doesn’t add bulk to the waist line and it’s simple design shows off those cute ruffles!
Of course you could make your skirt out of plain fabric using the basic measurements. But what about trying your hand at repurposing a girls skirt for a doll skirt. Go ahead, dig through that stash and maybe you will come across something that meets the checklist for repurposing into doll clothes. Then you will have a quick project that is so cute! You will marvel that you made it because all those details shine and make your project fabulous! And isn’t that the fun of it? 🙂
Use what you have and enjoy making something beautiful!
Anna



OK, that is FREAKY WEIRD!!! I saw that exact skirt at goodwill today. Very cute, by the way.
That is funny! Thanks for stopping by!
Fabulous way to repurpose clothes that may have stains but the rest of it maybe salvageable. Thanks!
It looks like the elastic is on the underside of the skirt!!??.. do you fold it over or leave it that way? Can you sew it to the front instead for a more finished look?
Yes, you can fold the elastic over or attach it from the other side.
Awesome… I hadn’t thought about putting an underskirt with it. I’ve been repurposing kids and even adult clothing for dolls for about two years (think you have a head start on me). But if you want to check out one of my favorite patterns (I adapted a doll pattern and use adult sweatshirts as material and binding), you can just click here!
https://www.etsy.com/listing/493490935/custom-hoodie-outfit-sweatshirt-pants