The pattern featured in this tutorial, the Lucy Gown is in the shop here.
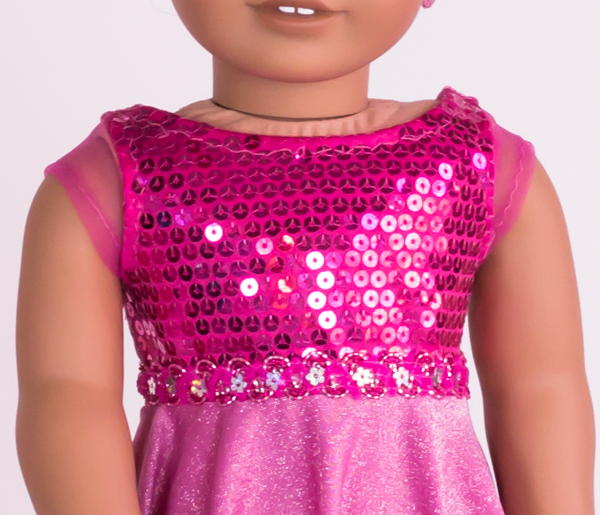
I love sewing on different types of fabric. There are so many fun fabrics out there and they can add a different look to your projects. Today we are going to zoom in on sequin fabric and take a look at how to sew with it, so you can add it to your projects.
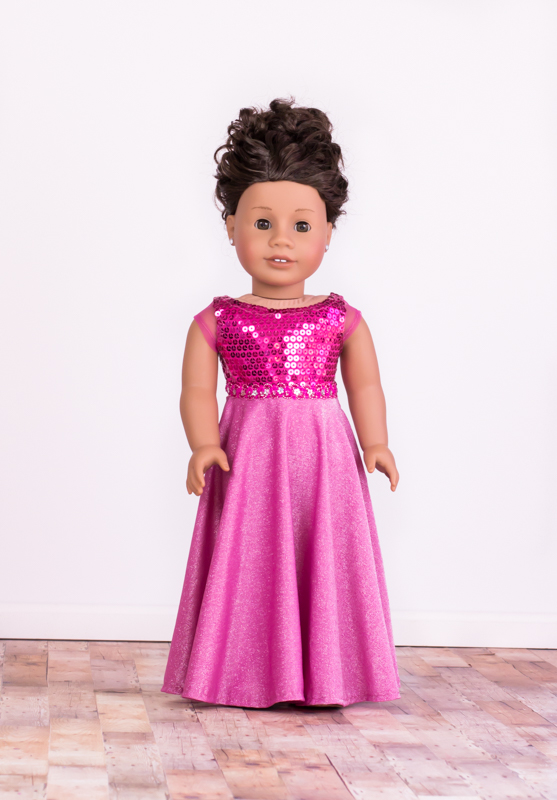
Ooo, did you spy all that sparkle and shine?!
If you haven’t sewn sequin fabric before you might find it intimidating. I’m going to take you through the steps to work with sequin fabric, so you can dress up your projects with a little sparkle and shine!
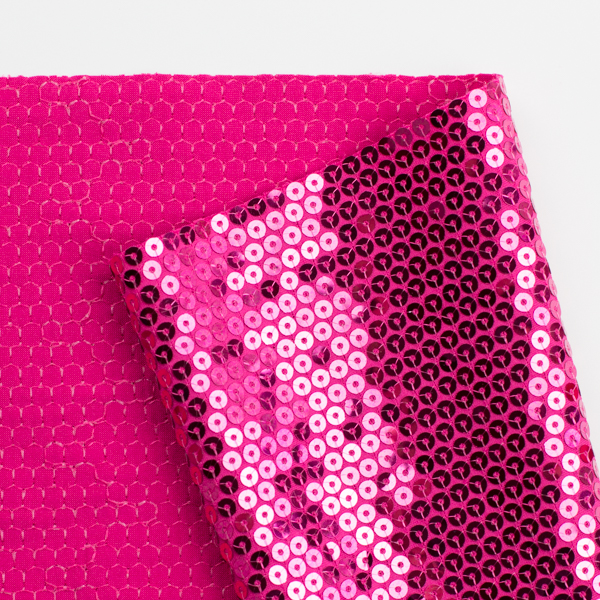
Choosing Sequin Fabric
Sequin fabric is sequins stitched to different fabric backings. Today we are looking at sequin fabric with a knit fabric backing. To easily spot this fabric, look for the sequins stitched (not glued) down flat in rows or in patterns and then check the wrong side of the fabric for the stretch knit backing. While the fabric is in your hand, you’ll also notice it has some stretch.
You can find this knit sequin fabric at your local fabric store or look for clothing with knit sequin fabric that you can repurpose for your doll clothing sewing projects.
What projects are good for sequin fabric?
See Getting Started with Sequin Fabric for a list of what projects work best with sequin fabric.
The Fabric for the Project
Since you are replacing 1 pattern piece with sequin fabric you need to plan out how all the fabric will coordinate. I will show you the fabric I used but your fabric will vary depending on your project.
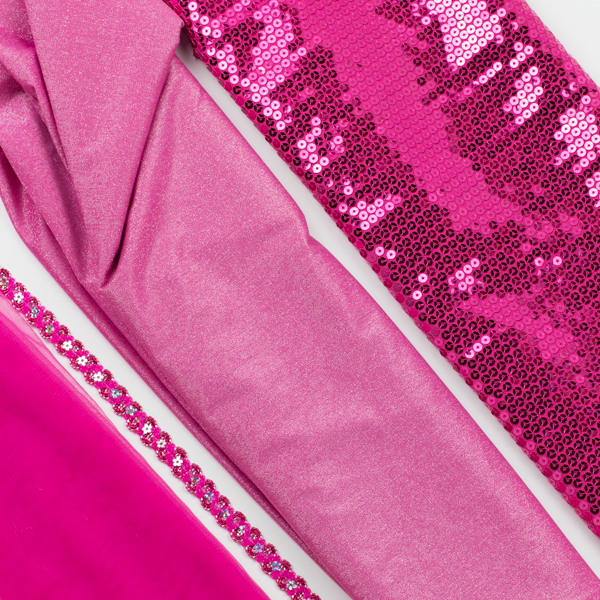
Here’s a break down of the fabric I used in the Lucy Gown example. (From left to right.)
- Sequin fabric with a knit backing for the Bodice Front.
- Lightweight to medium weight knit for the Bodice Back and the Skirt Front and Back.
- Ribbon/trim for the belt.
- Lightweight mesh or tulle fabric for the sleeves. (Or you could also use the lightweight to medium weight knit fabric that you are using for the Bodice Back and Skirt.)
What you need to get started
Materials
- Sequin fabric with a knit backing
- Ruler (Sliding Gauge ruler is recommended)
- Invisible sewing machine thread or coordinating thread
- Scissors
- Hand sewing needle
Preparing the Seam Allowance
Now we are ready to jump into the how-to of working with sequin fabric on a knit backing. Before we can get to the sewing we need to remove the sequins in the seam allowance. Sequins are bulky and stiff and will leave your seams misshaped if you don’t remove them first!
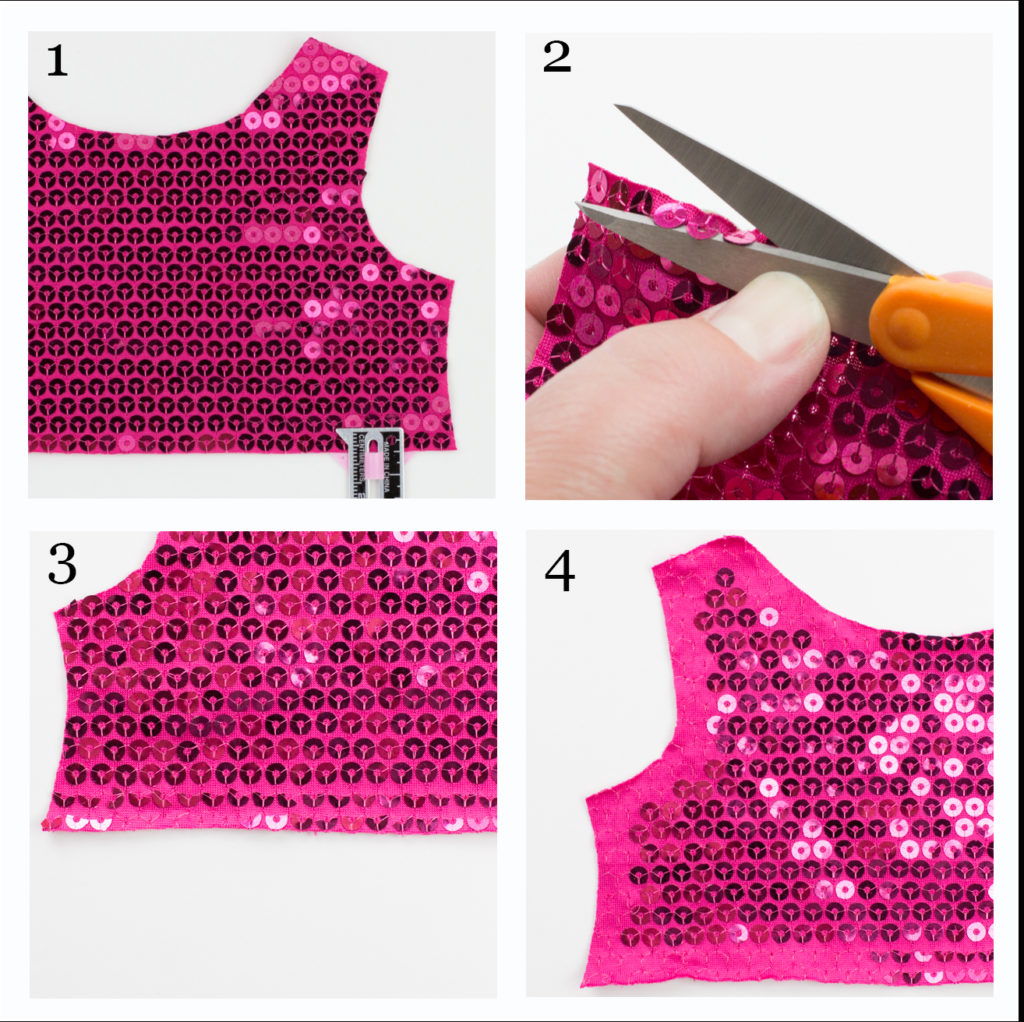
- Determine which sequins to remove by measuring with a ruler, 1/4″ from the edge of the fabric. Note: As pictured above, 2 rows of sequins are in or overlapping the 1/4″measurement.
- In one hand, bend the fabric to lift the sequins off the fabric. With the other hand, cut across half of each sequin, clipping through the center hole. If the sequins are in a row, you can cut through several sequins at a time. Note: Take care to not clip the fabric or the threads that attach the sequins.
- Remove each sequin half still attached to the fabric by hand.
- Repeat step 2 and 3 until all the sequins are removed that are in the seam allowance.
Sew the Project
Sew the project using your sewing machine with the sequin fabric in place of the regular fabric following the pattern instructions. Use invisible thread when stitching on the right side of the fabric. If there is top stitching, stitch slowly over the sequins to avoid breaking your needle. You can also use a thicker gauge needle if needed.
The project is sewn together but as you can see there are spaces and gaps in the sequin pattern around the neck and arm lines. We will fill in these gaps by hand stitching on sequins.
Stitching on Sequins
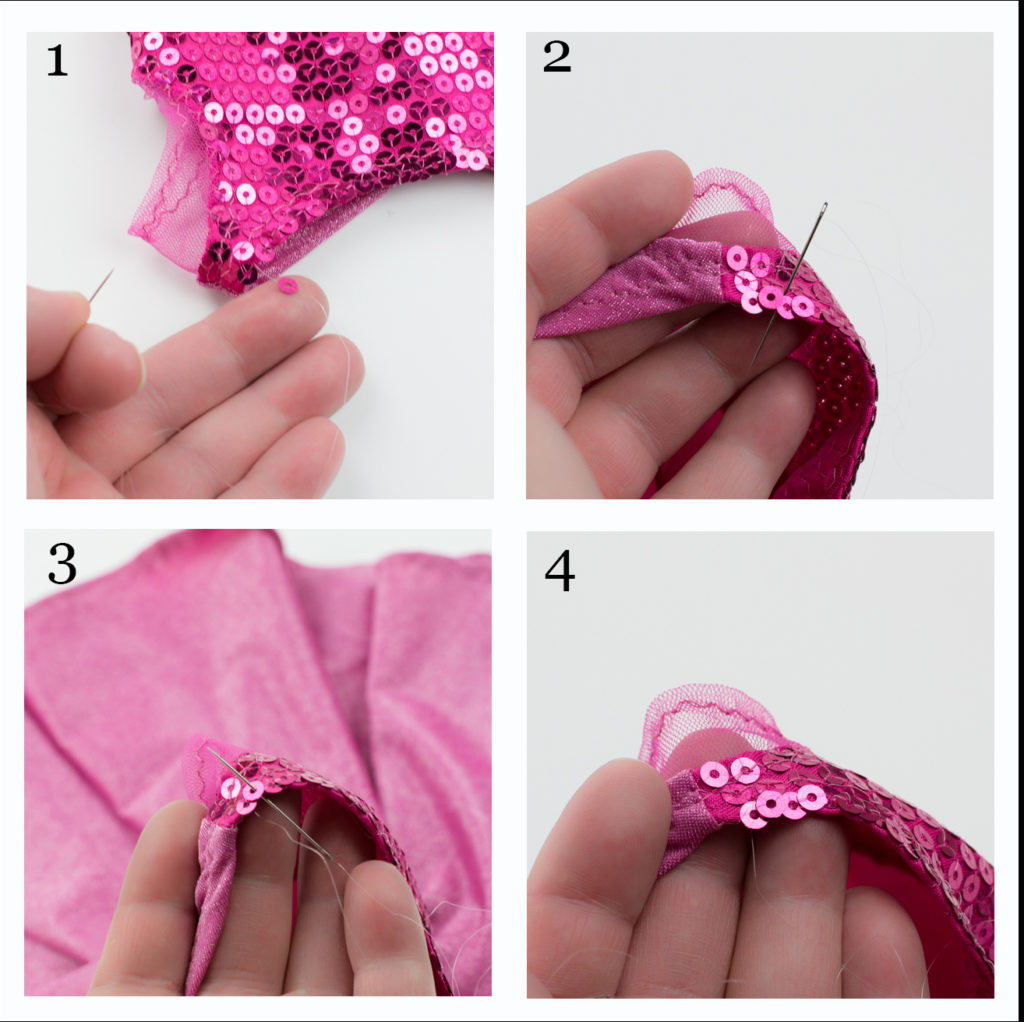
- Thread a hand stitching needle with invisible thread. Tie a knot in the end of the thread. Anchor the thread by stitching a few times in the same spot on the wrong side of the bodice. Stitch towards the right side of the fabric where you want to place a sequin. Place a sequin on the thread.
- With the sequin against the fabric, stitch on the outside of the sequin to the wrong side of the fabric.
- To add another stitch, come up through the center of the sequin from the wrong side of the fabric to the right side of the fabric.
Repeat step 2, but stitch at a different point on the outside of the sequin. - To add a third stitch repeat step 3.
Now the sequin has been stitched with 3 evenly placed stitches.
Continue stitching on each sequin using these instructions to fill empty spaces in the sequin pattern or to add a sequin border around curved edges like the neckline and sleeve line.
Your project is complete and the sequin fabric is a stunning addition!
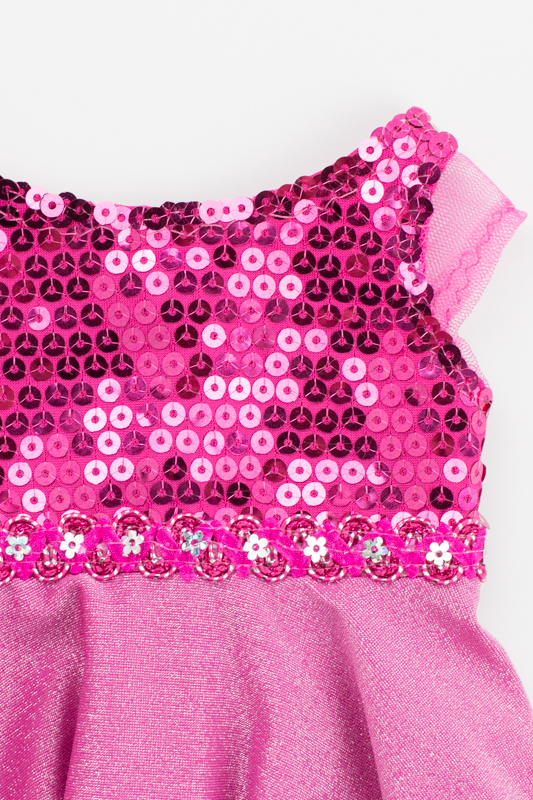
I would love to see what you make! Tag me on Instagram @_doll_it_up_ to share what you make!
If you want to create the dress in this post you will find the pattern in the shop. As a bonus with the pattern, I’ve also included the instructions to sew the sequin fabric bodice for this dress. It is a step by step, easy to follow PDF download. If you already purchased the Lucy Gown pattern you’ll will receive an email with the the bonus download.
Enjoy!
Anna
Pattern- Lucy Gown Pattern Instructions and pattern pieces
I’m sharing my fabric sources if you find it helpful. These fabrics may not be available online but my local JoAnn’s store still carries a variety of colors of all these fabrics. Online they don’t show the pink but the colors listed are the same fabric. Also keep an eye out for the Knit sequin fabric, the Stretch Metallic Knit and the tulle in a peach color. I have some and it is amazing!
Knit Sequin Fabric-
Stretch Metallic Knit Fabric for Dress-
Tulle for the Sleeves-

thanks for the helpful info. Any hints for sewing with sequins that is glued on?
Nancy, I love the question and to see what you are interested in. I have also had some trouble sewing fabric with glued on sequins, needles breaking, gummed up needle, it’s a mess, but I would love to know how to sew on that fabric too. I’ll keep looking into it! I love the adventure of sewing!
Is there any other way to pay than PayPal?
Hi Jane, You can also purchase the patterns in the shop with a credit or debit card. This is a secure payment hosted by Paypal but you don’t need to have a Paypal account. Hope that makes sense.