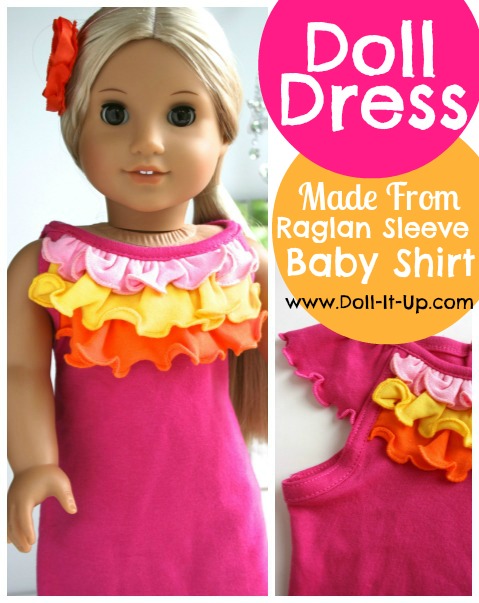
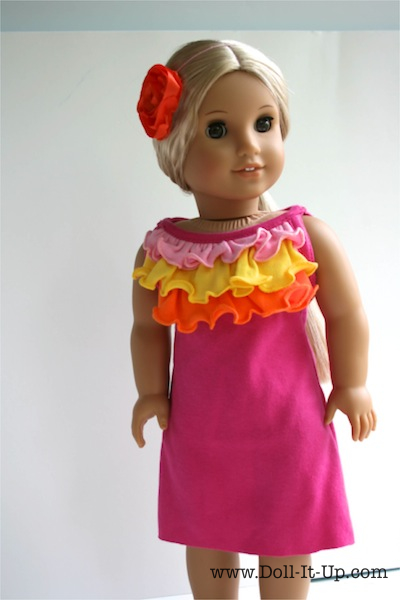
With the warm weather upon us I wanted to sew some summery doll clothes. Something fit for the beach. Let’s see, a swimsuit was one option, but what I really wanted to sew was a sundress. Now I have to pause and say I am always willing to sew from scratch but what I rather do is repurpose sewing. Maybe it’s just a phase I’m in, but I just love it! Yes, I enjoy the challenge. Yes, I enjoy all the details in the end product! So, when I spied this little baby shirt I knew it was a perfect match for a summery doll sundress. This little sundress has a secret to it’s simplicity. It’s that it started as a raglan sleeve baby shirt. If raglan sleeve doesn’t sound simple, don’t fret. The term refers to the shoulder seam connecting to the neckline. It is popular with athletic style shirts. I always think of a red and white baseball shirt. Now can you picture it? Many more styles use this type of sleeve and that is good for us! It turns out there is a simple way to repurpose a raglan sleeve shirt into a doll dress!
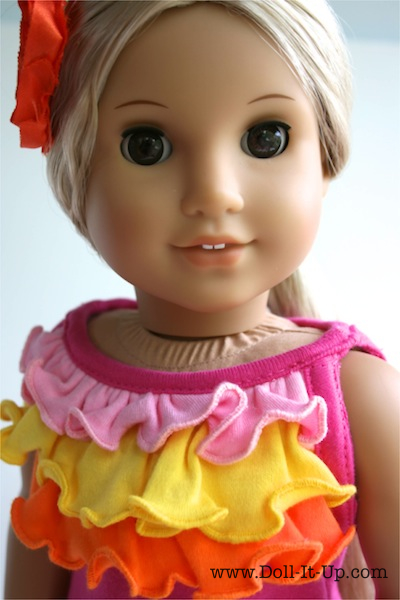
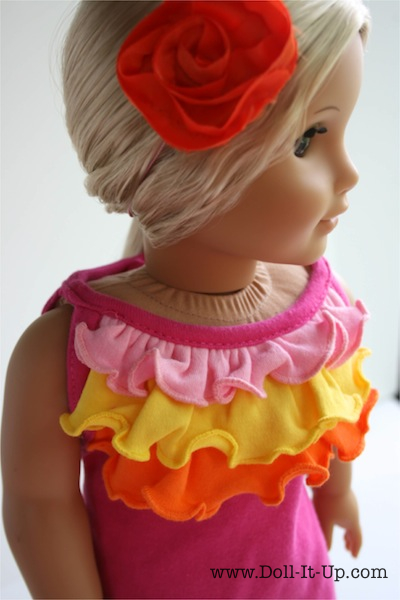
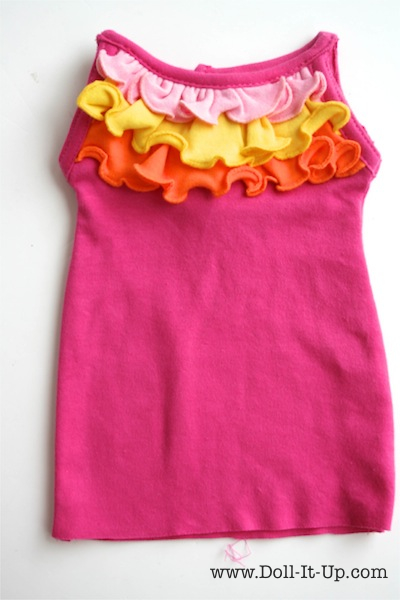
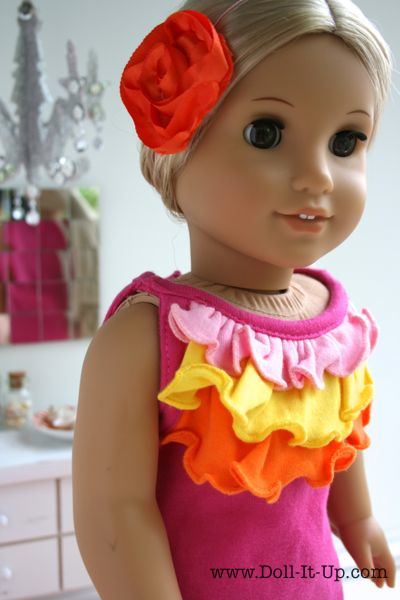
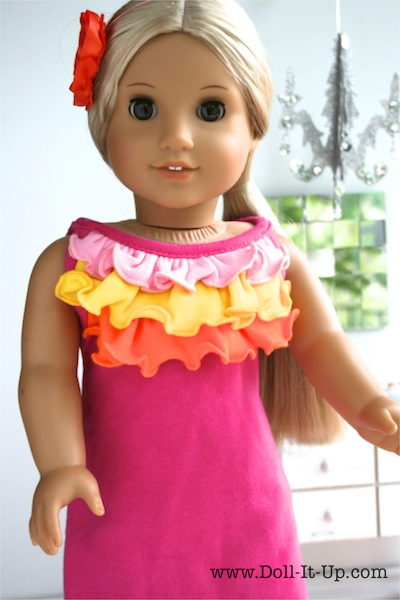
Now for the part about the little details. How about these sweet ruffles!! The awesome thing is I didn’t have to work for these details. They were already awesome and cute and sweet on the baby shirt. Now they are awesome and cute and sweet on the doll dress!
Yes, the sundress was calling to me to be made and now it will be a fun addition to our summery doll clothes! Ready for hot weather. Ready for summer play!
And I just can’t get over these ruffles! Simply loving the details!
If you would like to see the transformation from baby shirt to doll sundress, keep reading! If you’d like step by step instructions to transform a baby shirt into a doll dress, keep reading!
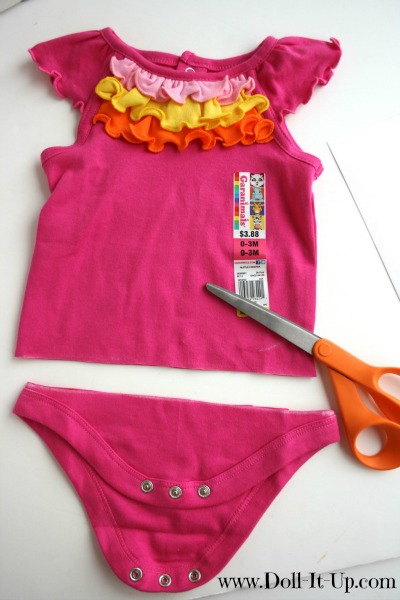
Let’s take a closer look at the baby shirt I started with. Apparently I didn’t take a picture before I cut off the snap portion of the shirt, so just imagine it is whole! There are a couple key elements that make this baby shirt work for this style of doll dress.
- The baby shirt has a raglan sleeve. This is when the shoulder seam goes into the neckline.
- It is size 0-3 months. I am only taking in the side seams so the smaller the size the better!
- We are working with a knit fabric. It doesn’t unravel or fray and it stretches! Different considerations would need to be taken when using a different type of fabric for this project. It’s not that it can’t be done. You just need to be aware so you can plan for the differences or changes that would need to be made.
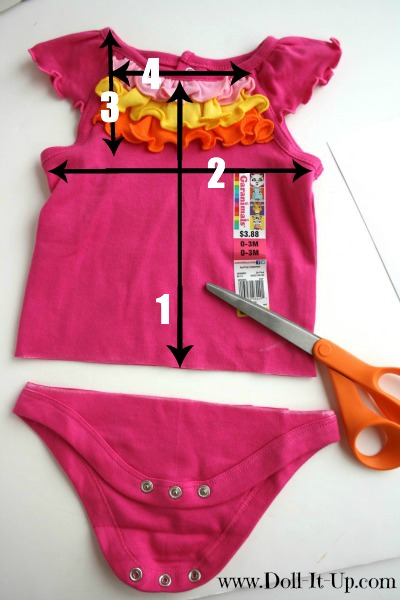
Here are some basic measurements from my shirt so you can compare the baby shirt you have to work with!
- 9 1/4″
- 9″
- 4 3/4″
- 4 1/2″
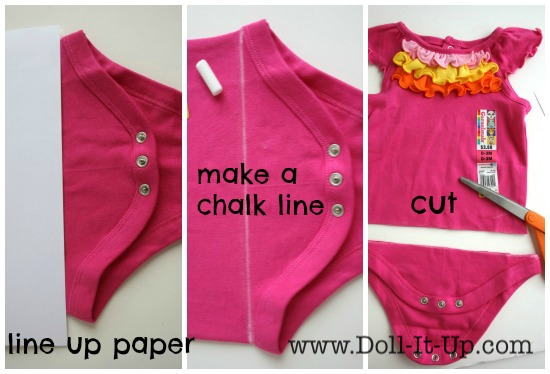
To get started I cut off the snap portion of the shirt. A simple piece of cardstock was my straight edge. Line it up with the ribbing on the lower part of the shirt. Follow the straight edge, marking a line with the chalk. Using the chalk line as a guide, cut the snap portion off of the shirt.
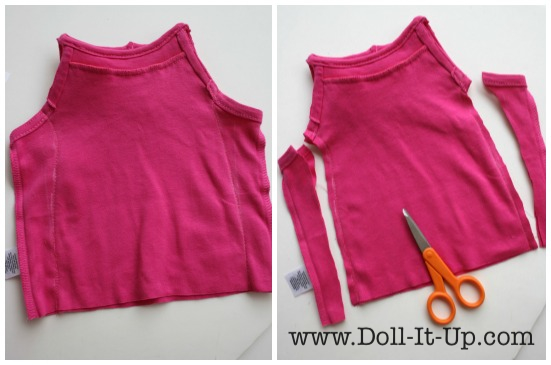
Let’s take a closer look at the raglan sleeve. See the underarm seam? Follow it up and you can see it bumps right into the neckline. This is where the shoulder seam meets the neckline. This is what makes the raglan sleeve the raglan sleeve!
Let’s make it fit a doll! Pick out the neck seam on the neckband from the front shoulder seam to the back shoulder seam. 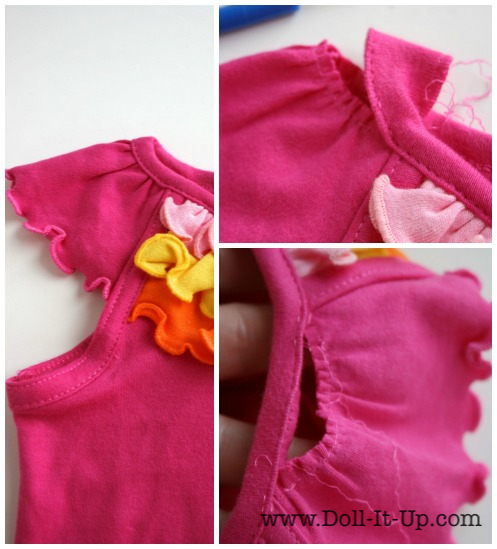
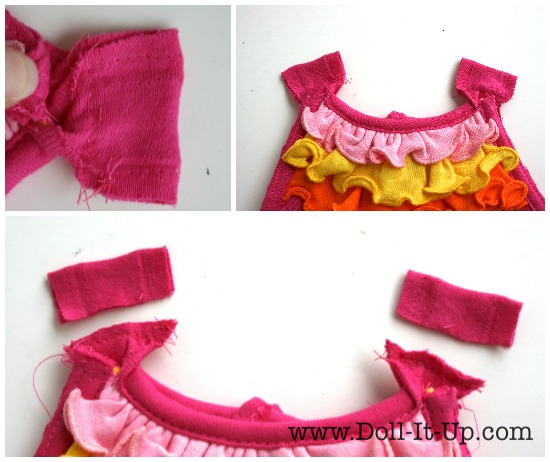
We are going to completely remove the sleeve. Since we removed some stitches on the neckband, the top of the sleeve is no longer connected to the neckband. Cut the rest of the sleeve out, cutting the sleeve close to where it is connected to the shoulder seams. 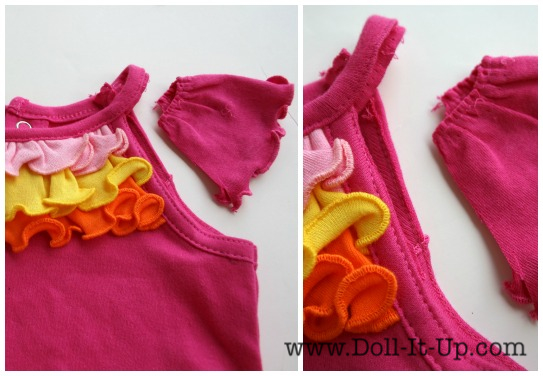
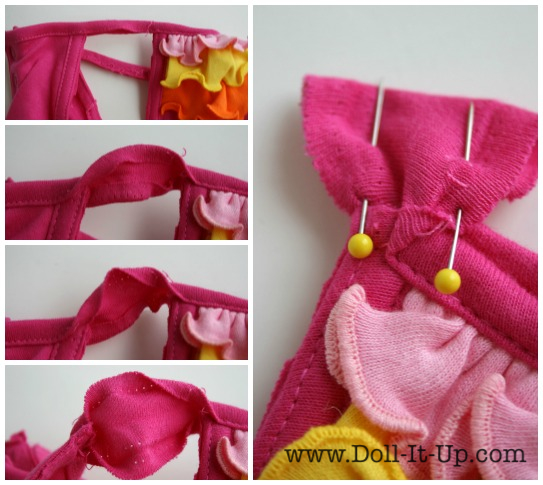
Now there is a portion of lone neckband, connecting the front and back of the shirt. Unfold the neckband in this section. Turn it inside out and pin it together, joining the front to the back.
Stitch close to where the front meets the back. Don’t sew through the front or back, only through the strap. Trim off the extra fabric on the strap.
Turn the newly stitched neckband right-side-out and pin it in place.
Stitch the neckband back together. Now the neckline is doll sized!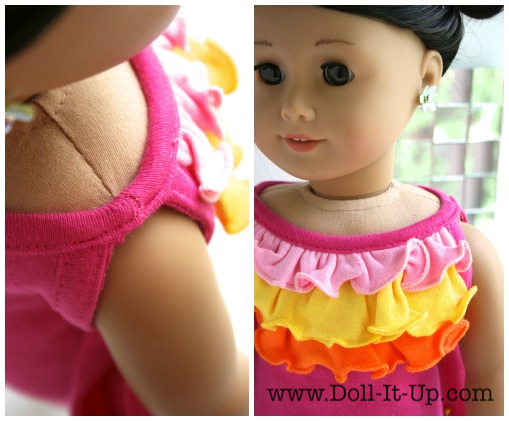
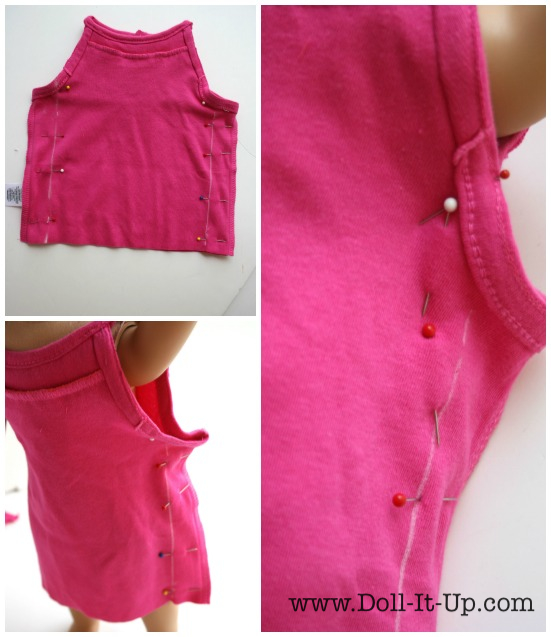
Next, we need to figure out how far to take it in on the sides. Pin the sides. Take care to notice the fit and adjust accordingly. 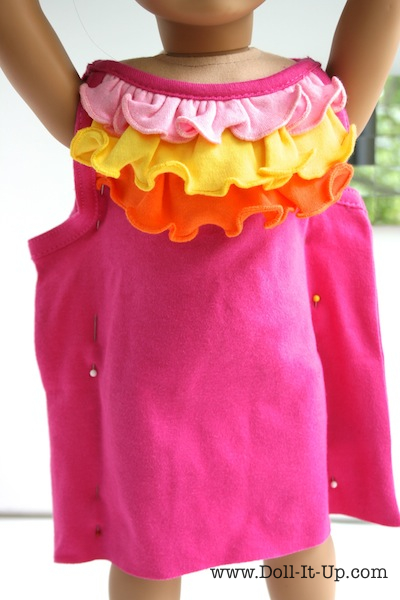
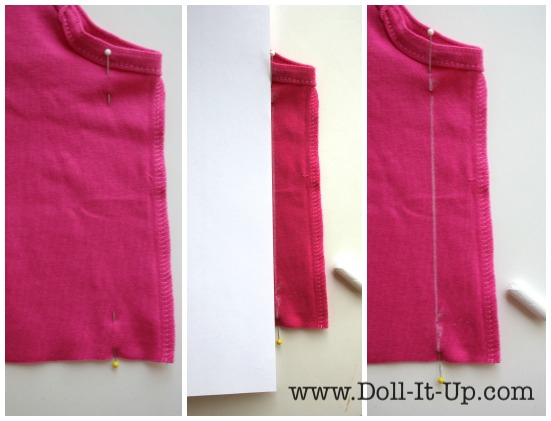
Carefully take off the dress and measure how far the pins are coming in. My pins are at about 1 3/8″ from each side. Remove the pins and turn the dress inside out. Mark the top and bottom of the sides at 1 3/8″ (or your measurement) with a pin. Line up a straight edge with each pin. As you can see by the middle photo my straight edge is again a piece of cardstock. With a piece of chalk draw a line along the straight edge from pin to pin.
Pin along the chalk line on both sides. Carefully try the dress on the doll. In the bottom left picture you can see it is way too baggy in the armpit. Pin under the arm, transitioning smoothly to where the side seam will be. Move the arm around to make sure it is a good fit.
Take the dress off and lay out the dress. Compare the left and right sides and make sure the pinning is fairly even and the transition into the future side seams are the same. Repin and try it on again if needed. Once the pins are where you want them, sketch a chalk line along the pin line. Turn the pins horizontal to get ready to stitch.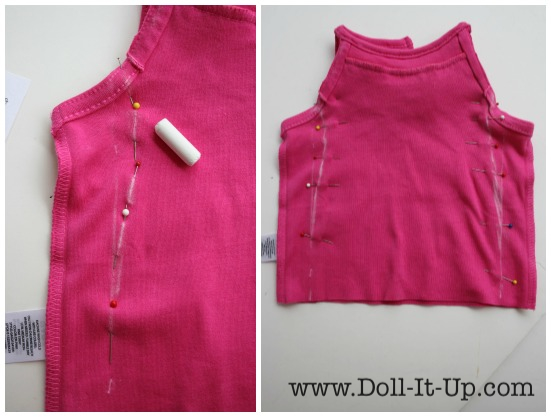
Stitch along the chalk lines. Try on the dress to make sure you don’t need to make anymore adjustments. You can always pick out a seam and resew a section if needed. When the stitching is completed, trim off the extra fabric on each side.
Turn it right-side-out. You can clearly see the basic shape of the sundress. I am not going to hem the skirt edge. With a knit you don’t need to because is won’t fray. In this case it would only add bulk, so I am going to leave it unfinished.
The baby shirt had snaps in the back. They incorporated nicely into the doll dress. They are not needed though because the dress easily slips on and off over the dolls head.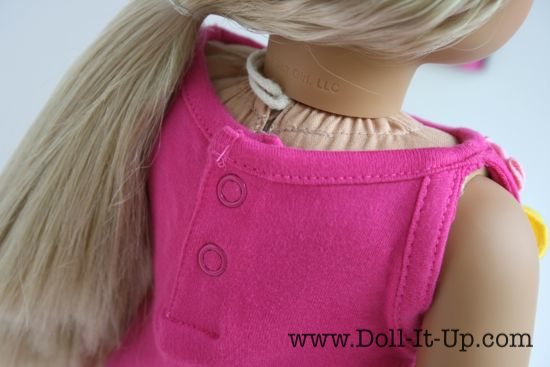
The finished length of the dress from the shoulder to the bottom is 9 3/4″. This length was perfect on my doll for a sundress. If the skirt length needs adjusting, just trim it off at the length you want it.
Let’s not end without taking one more peak at the lovely details. Yes, these ruffles that first caught my eye and made me pause and wonder and dream if they could be transformed and repurposed for a doll.
The ruffles are what caught my eye but in the end the raglan sleeve is what made this repurpose so quick and easy! It was a quick transformation from a baby shirt to a doll dress!
Hope you will catch the repurpose bug! It is really a lot of fun!
Just in case you are interested here are the nitty gritty details of todays sewing project.
- Baby shirt size 0-3months.
- Cost $3.88
- Garanimals brand from Walmart
Sew for a doll!
Anna

Hello Anna,
I’m just a kid, but I love arts and crafts! This does take up your time, but it costs less! I also love the bed, nightstand, the other dress, and the scarf (In Senioa, these people were doing the same thing with the scarves to fit people to raise money for Uganda!)! I just got 3 sleeping bags and pajamas from this lady named Linda. You should go to http://www.ebay.com and type in Sleeping Bag Pillow & pajamas and I got 3 of those. Her ebay name is southernstitches6! My dad is planning on making doll beds for me because I have 4 dolls and 1 canopy bed so… thats why I got sleeping bags! I want to know where you got the awesome bedding for the bed and the lamp and the light fixtures….I really want to get a t.v., computer, fire place, and light fixates, and a doll house for my 18″ dolls! If you could just email me than I’d be happy to know where you would find all those things!! Thanks! God bless you!!
Keep creating! The lamp in the pictures with the night stand is a book light from the dollar store. I just bent the flexible tubing in a shape that looked like a lamp! It sounds like you are having fun with your dolls and making a special place for them! I would be happy to email you back with anymore questions you might have! Thanks for stopping by!
I found this very same baby shirt and had the same idea! I left the sleeves on though and shortened it to a shirt length. My daughter loves it! She loved it some much I went back and bought the other 3 they had. Now she has matching shirts for all of her dolls. Baby clothes are the best for repurposing for dolls!
Jennifer, Awesome! I love that the same shirt sparked similar ideas! Baby clothes are my favorite repurposed for dolls! That is so adorable you made 3 to match!
This is fantastic!! My daughter just received am AG doll, and with the over abundance of cute baby clothes I have around here,after 3 kids there is a lot that I can do with your ideas. Thank you so much!!!
dear Ann I’m from Ireland and I’m 11 and me and my cousin love your website so far I made the locker and wardrobe I own Emily
and I’m getting a my american girl doll soon I’m naming it Sarah my cousin owns sage and is getting Julie I’m always on the lookout for material because you have inspired me your’s truly Emily and Sarah