This is the 3rd mini project for a doll kitchen I’m calling “bite size” crafts. Don’t miss the first 2 days of fun, Frosted Sugar Cookies and Cookies Ready to Bake. —————
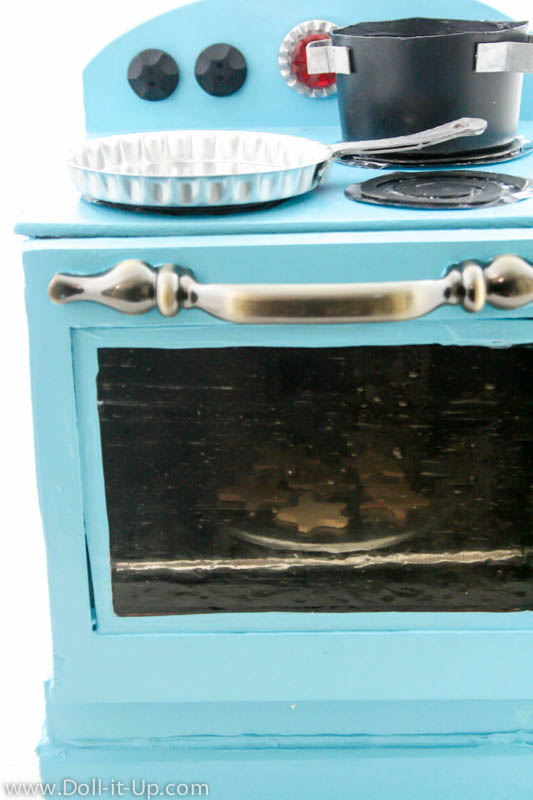
I made a little stove/oven for my daughter’s birthday and accessories for play to go with it. The cookies on the baking sheet were perfect for the oven. For the stovetop I made a few pots and pans!
These pots and pans for dolls are a quick and easy project that you may already have the supplies for around your house. Let’s get started!
Supplies for the Pots and Pans
- round lid, or small container (i.e. a yogurt cup)
- cardboard
- scissors
- glue
- paint
- paint brush
Doll Size Skillet
You only need a small container like a yogurt cup for the skillet base. Simply trim the cup down to 1/2″ to 3/4″ deep. Paint it and allow it to completely dry before attaching the handle.
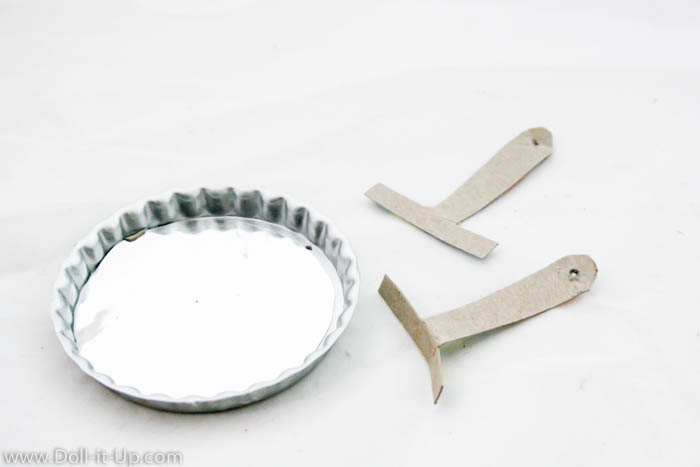
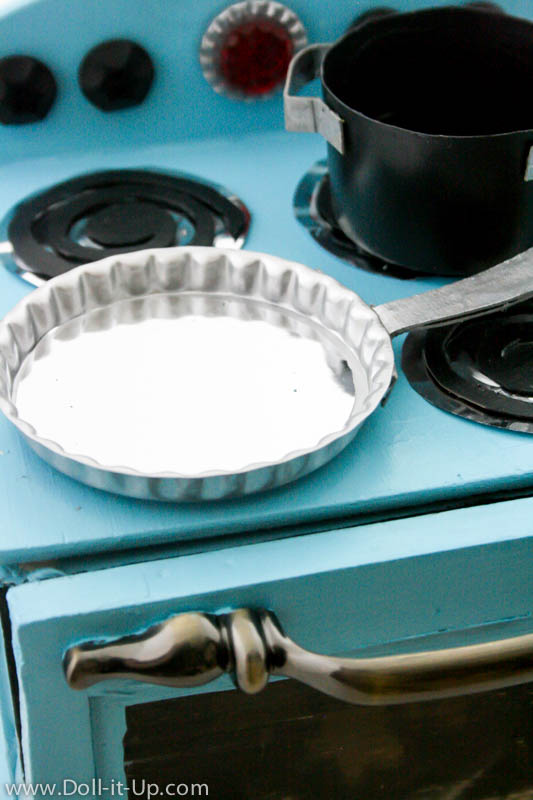
For our skillet I ended up using something from my crafting stash. It is a coaster for drinks shaped like a bottle cap. I picked it up on the dollar row at target a few years ago for doll crafts.
To make a handle for the skillet cut a “T” shape out of cardboard. Round the edges of the bottom of the “T”. Trace and cut out a second “T” that is the same as the first.
Layer together the “T’s” and bend them where the two lines meet as pictured above. Glue together the two pieces of cardboard to make a handle and paint them to match the skillet base. Punch a hole in the end of the handle. When the paint dries glue the handle to the skillet base.
Now it’s ready for play!
Doll Size Cooking Pot
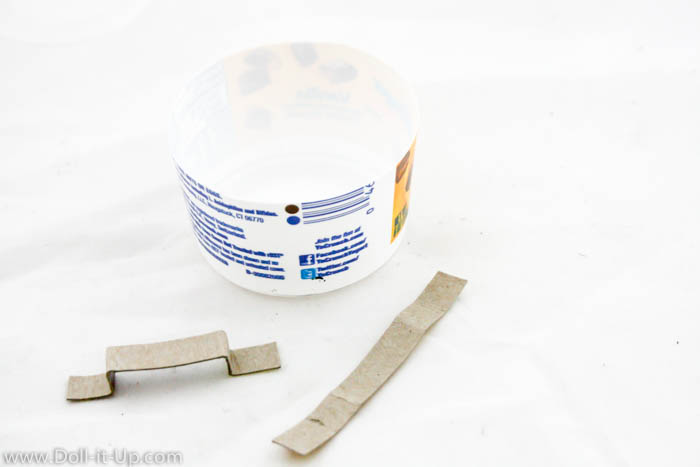
For the cooking pot we will use another small container like a yogurt cup. Cut it down so the sides are 2″ deep. Paint and allow it to dry completely.
Cut 2 strips of cardboard the same length and fold them as pictured above. Paint the handles to match the cooking pot.
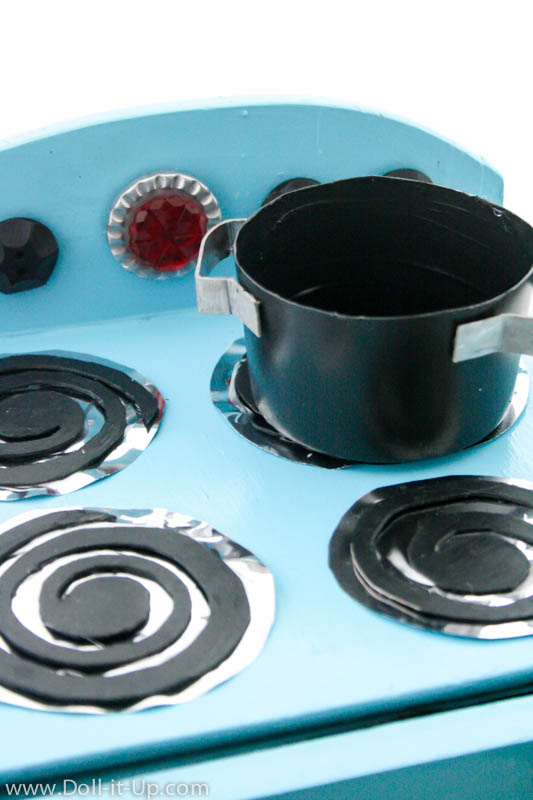
When the paint is completely dry, glue the handles onto the pot.
Time to cook up something tasty!
It’s fun to have a few pots and pans for the stove!
We have been cooking “pancakes” in the skillet this week with little wooden circles.
It has been fun sharing these different little crafts around a theme because all together they make a great little accessory set for dolls!
I plan on sharing more about the stove I made sometime soon. It is a repurpose project that I actually started 3 years ago and finally sat down to figure out what had me stumped and add the finishing touches! It has been a lot of fun!
It turned out to be a crafty week and we’ll end it with something fun for Fashion Friday tomorrow! See you then!
Create, Craft, Play!
-Anna


Love the name of this project: “Bite sized crafts”! So cute and I’m so trying this! GREAT work Anna.
Thanks! I’m glad you liked the name of all the mini projects this week! 🙂
Are you just using acrylic paint? Does it chip on the plastic? Everything looks great!
Nonna, I used acrylic paint for the project. The paint doesn’t chip or flake off. I just tried scratching it with a fingernail and the paint will scratch off. I don’t think the project is fragile. My daughter is young and rough on stuff so I plan on just touching it up with paint once in a while. Hope that helps!
Do you know of any kinds of paint that won’t scratch off? Everything I have painted with acrylic paint seems to chip a lot and need frequents touch ups.
That is frustrating. I will have to think about it. Maybe there is a way to adapt crafts when the paint isn’t working for you!
I love this craft! Where did you get the stove from?
Thanks Abby! I made the stove. I plan on showing more about how I made it next week!
How cute! Duct tape might work instead of paint. I can’t wait for the stove!
Yes, duct tape is a great idea! Thanks Rebecca!
The ideas on this website are just awesome! I am a 72 year old grandma who still loves dolls and making things for them.
Thanks Suzanne you made my day! Yes, we are never too old to love dolls and make things for them!