Update: Thanks for letting me know the PDF link was not working! I have updated the links so you should be able to access the pattern!
———————————————————————–
Yesterday I posted the royal doll throne I made for Camp Doll Diaries. To complete the royal look in the photos, I made a tiara for our dolls. I decided to draw up a pattern so you could easily make one too!
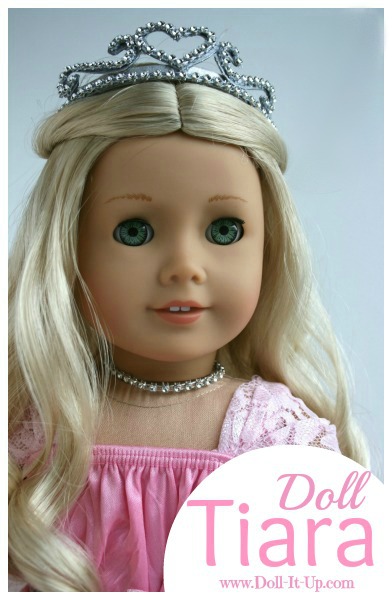
It is sparkly and shiny and oh-so-royal! On the front half are all those jewels and on the back half is a piece of thin of elastic chord. The elastic helps the tiara have a good fit and helps it stay on the dolls head.
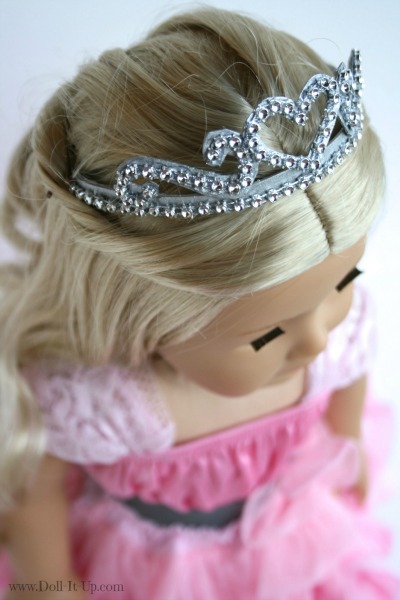
For different looks it can be worn at different angles on the dolls head. In these photos, Caroline is wearing it on top. To get this look, style a small section of hair back. Put the elastic section of the tiara under the section of hair. Pull the tiara up to the angle you want it. If needed use a bobby pin on each side of the tiara elastic to secure.
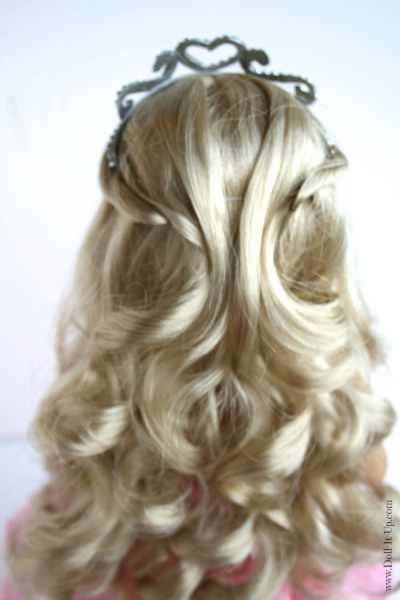
Here is an example with another hairstyle.

Marie-Grace has her original half-up hairstyle. the elastic easily slips under her braids and up onto her head. No bobby pins are needed. I hope that gives you a few ideas to get you started!
Now we better get onto how to make this little gem! Let’s take a look at what we’ll need.
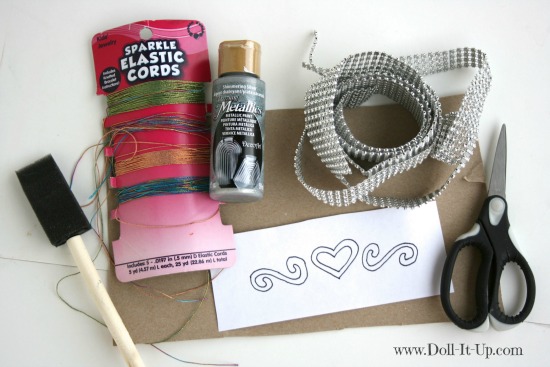
Supplies:
- Tiara Pattern PDF
- paint brush
- thin elastic chord
- silver craft paint
- Bling on a Roll (or other trim or embellishments like jewels and sequins)
- scissors
- thin cardboard (the kind use for cereal boxes)
- tape (not pictured)
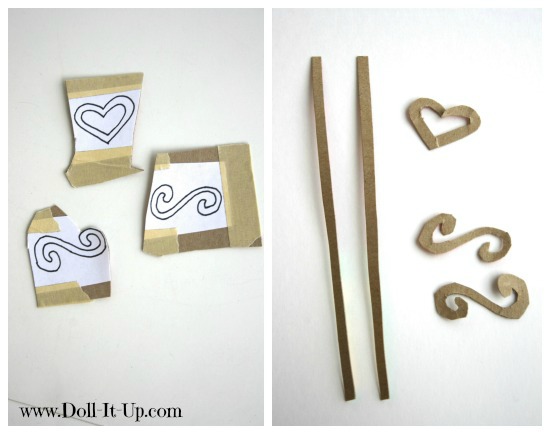
To get started print out the Tiara Pattern PDF and cut around the tiara design as pictured below. Cut around the tiara base pattern and tape both pattern pieces to thin cardboard. 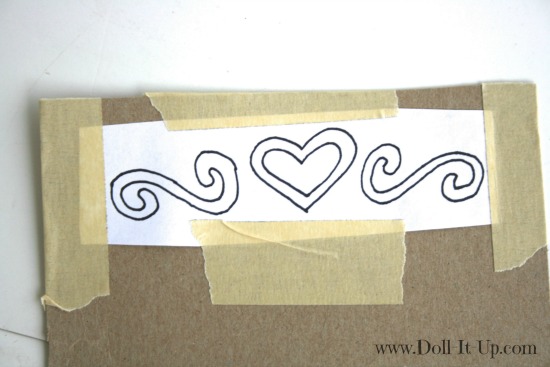
Making it easier to cut out, you can separate the pieces by cutting between them, as long as there is some tape on each section. Cut out each piece. To cut out the center of the heart, carefully cut through the top of the heart. Be sure to cut 2 of the tiara base pattern.
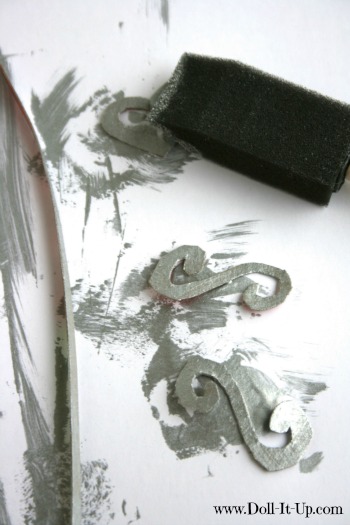
Paint the cardboard pieces on both sides the color you want the tiara. Allow time for them to dry.
Cut a piece of thin elastic chord using the pattern on the printout as a guide. Glue and sandwich one end of the elastic between the ends of 2 tiara base strips. Gently curve the base to a half circle. After the glue sets up completely on the first side, repeat with the other side. 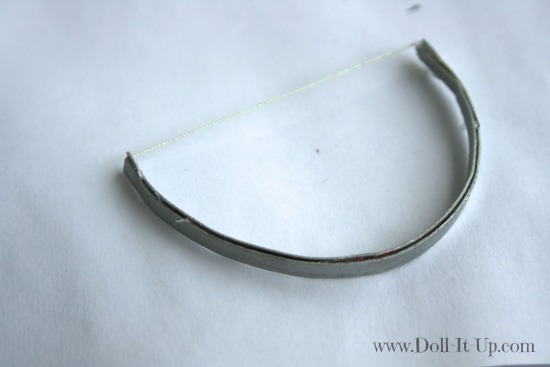
Glue the heart in the middle of the tiara base. Position it so the point of the heart is overlapping 2/3 of the base strip.

Glue on the 2 curly swirls. Overlap them on the base the same as the heart. Also overlap them slightly with the heart and glue the overlapping sections together. This will make it a little stronger. 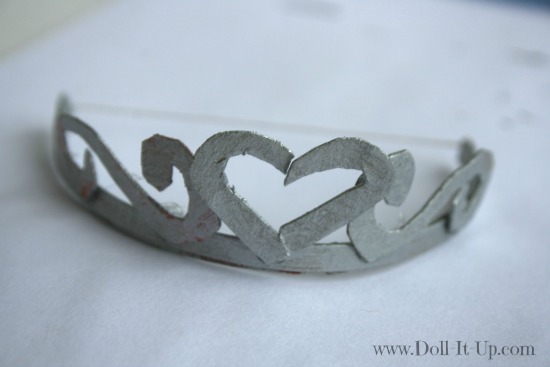
To add a little sparkle I am using Bling on a Roll. It is a wide roll so I am cutting it into strips. Any trim about 1/8″ wide will work. You could also decorate the tiara with jewels, sequins or anything small and sparkly!
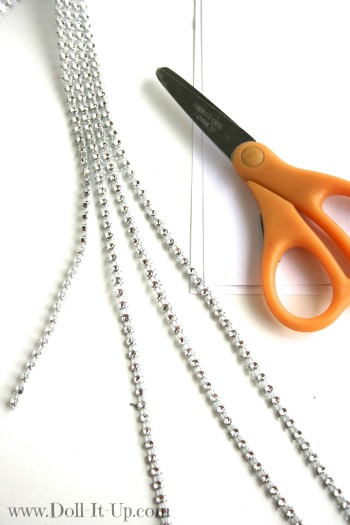
The Bling on a Roll is on a thread mesh so it easily bends and follows the decorative shapes on the tiara.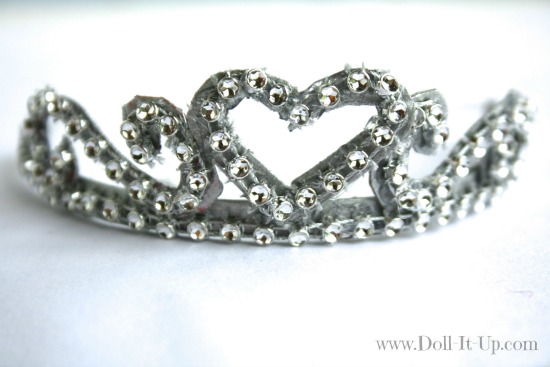
Choose a hairstyle for your doll and add the tiara to it!
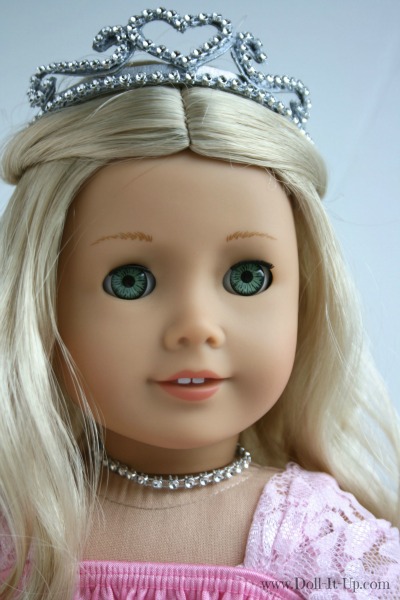
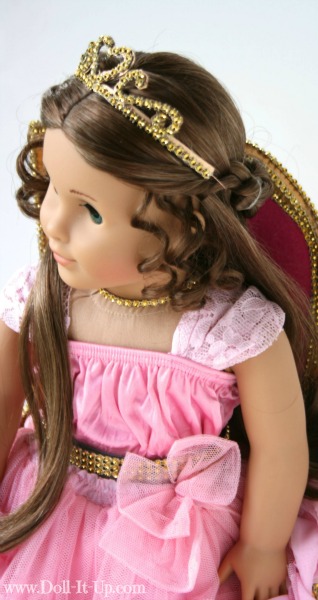
Even though Caroline left her curls down the sparkle on top of her head really dresses things up!

I hope you enjoy this little tiara for your dolls!
Just in case you are interested here are a few more details from today’s post!
- Doll-Caroline, AG Historical Character. Marie-Grace, AG Historical Character.
- Outfit-Skirt tutorial is here. Shirt is made by Anna
- Scene– Throne tutorial is here.
Now that there’s royalty in the doll house, play queen for the day!
Anna
Amazing! You always take the best photos!!!
WOW!
Very nice. I wonder if it could be adapted to Barbie dolls.
Thanks Maurine! Yes, if you resize it smaller you can make it for smaller dolls!
OMG! How completely adorable is this!!!! Found you via Doll Diaries. 🙂
Angie, Thanks for stopping by!
Which AG dolls do you have? I know Kit, Morgan, Caroline, Saige, Julie, and Marie-Grace, but are there any others?
Hi Anna,
The link for the tiara pattern pdf does not seem to be working, it just brings me back to the same page. I was wondering if you could try re-linking or sending it to me?
Thanks!
I cannot get the pdf either. Are you able to send it to my email or repost? Thank you
The PDF did not work for me either. Would you mind emailing it to me. Thank you so much,
I will fix the link! Thanks for letting me know!
OMG, so cute. I know some grand daughters that are going to LOVE this!!
Thanks! Dolly dress up isn’t complete without a sparkly tiara!:)