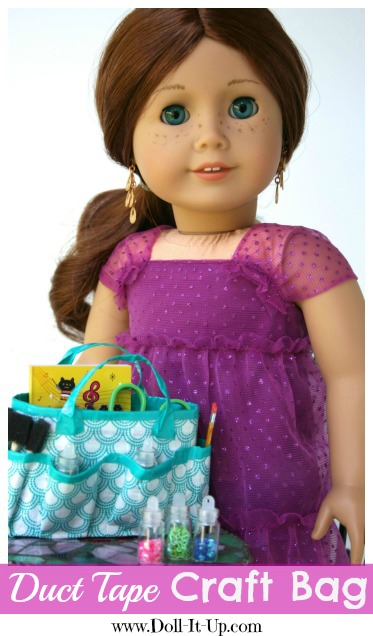
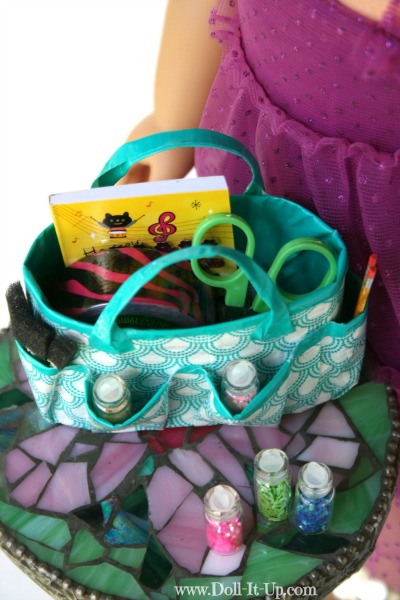
Since you know I love all things crafting and creating you will not be surprised that I have a little stash of crafty accessories for dolls. Wee bottle of this, sheets and rolls of that, all suited for a doll sized craft project. The exciting news is that now my stash has a home in this doll size craft bag! My favorite part about this little bag is all of the pockets! Lots of pockets for lots of crafty goodness!
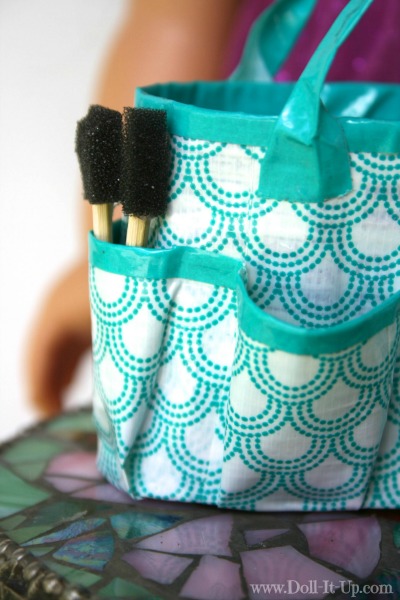
Besides the main compartment the craft bag boasts six pockets! The craft bag itself is crafted from duct tape and a little secret ingredient…
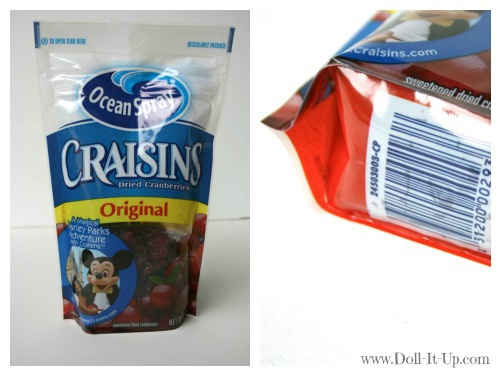
No, not the Craisins! It’s the flat bottom Craisins bag that is the star! Of course, Craisins aren’t the only food sold in these awesome-to-repurpose bags! If you take a look in your pantry you may find them storing snack foods, candy, nuts or dried fruit. The flat bottom on the bag makes this a super quick and sturdy repurpose project! Yipee! (If you follow the crafts I make for Doll Diaries, you may remember the duct tape backpack I made using another little Craisins bag!)
Would you like to make a little craft bag for your dolls? Come along and I’ll show you how to craft a little craft bag!
Making the Bag
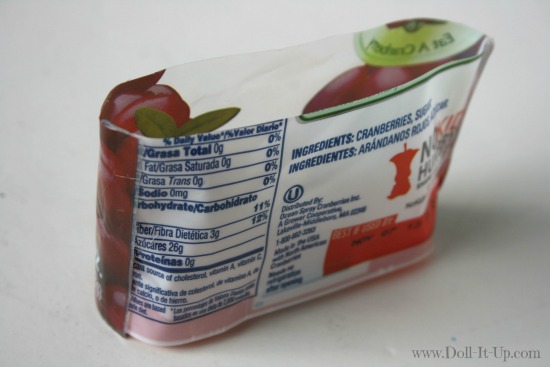
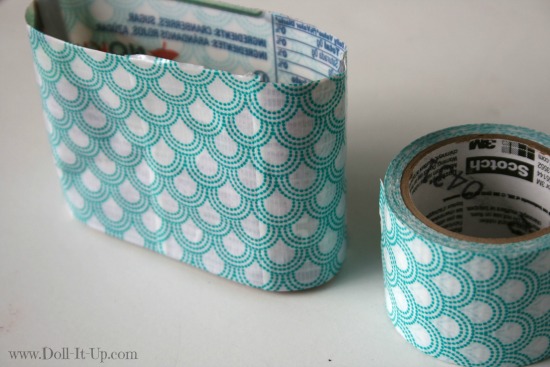
Lay the Craisin bag, or another flat bottom bag, flat. Cut it to 2 3/8″ tall. On the sides of the bag are flanges where the bag is sealed together. Glue the flanges flat against the bag.
On a side note, I just have to say, that while shopping out of town the other day, I came across this Scotch brand of duct tape. I live in a smallish town that does not have a Target (boo!) and I haven’t seen this brand of duct tape before. I just love the color and pattern!
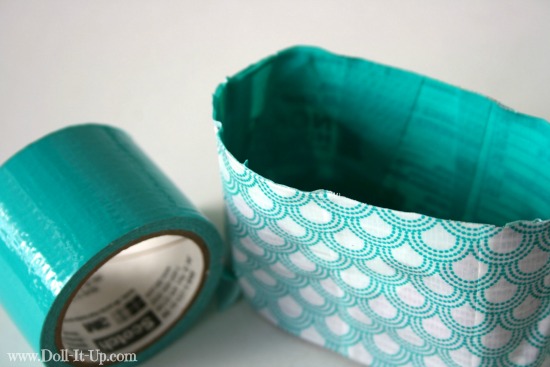
Okay back to the project! We are going to make this little craft bag with two different tapes to give it more detail. Cover the outside in a patterned duct tape.
Cover the inside in a solid duct tape. Of course you could also use two contrasting colors of tape instead of the patterned tape.
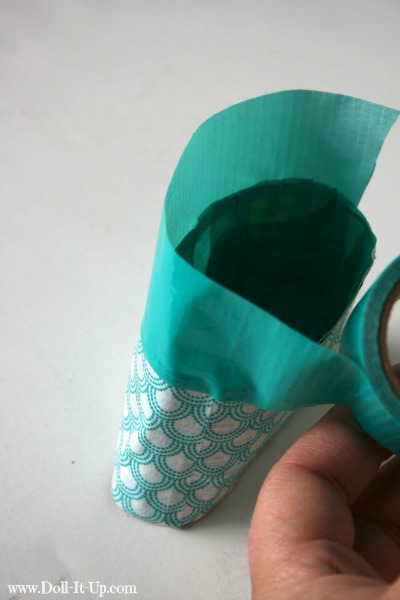
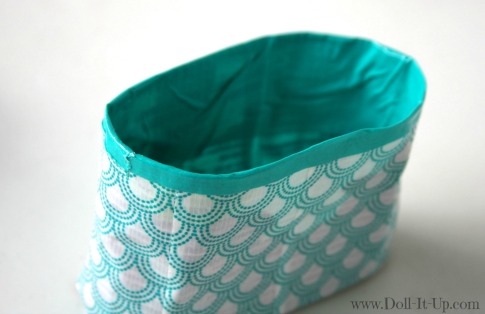
We are making a border of solid tape on the top edge of the craft bag. Overlap the tape on the outside top edge at least 1/8″.
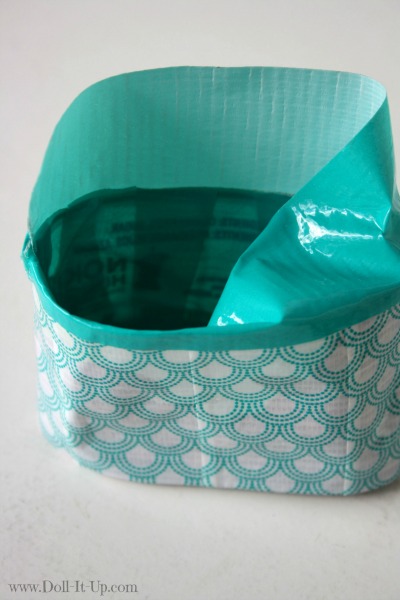
Fold the extra tape down toward the inside of the bag. Work around the bag slowly so the tape doesn’t stick to itself while you are folding it down into place.
Mine has little wrinkles on the inside but it is not that noticeable. No worries! They’re on the inside and the plan is to have it loaded up with craftiness, so those little wrinkles are just fine.
Adding the Handles
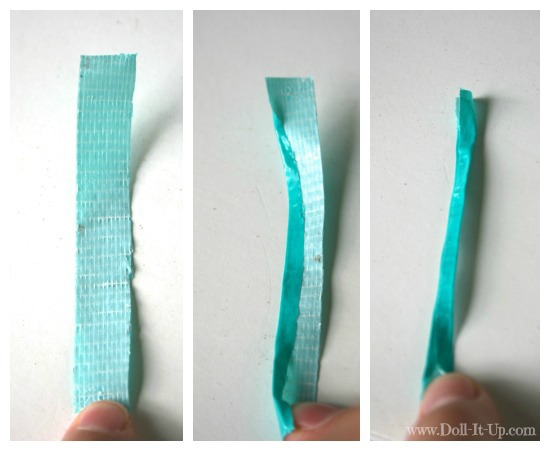
Cut two strips of duct tape 5/8″ x 4″. They will make the two handles for the craft bag. We are folding the middle of the strip into thirds and at the same time keeping each end unfolded. This will leave a nice little sticky section at each end to attach the handle to the bag. To keep the ends from folding in, keep a finger on each end of the strip as you fold.
Details from the picture-
- Hold one strip, sticky side up, with a finger.
- Fold one side over, touching the tape together right in the middle, folding the strip into thirds. Hold each end with a finger, keeping it from folding in. Press the strip flat up to where you are holding the sticky ends.
- Fold the other side over and smooth flat. Take care to keep the two ends from folding in. We need the ends open and sticky to stick the handle on.
To attach each handle, place the two sticky ends of the strip on one side of the bag.
Lots of Pockets
Our craft bag needs lots and lots of pockets. After playing around with the duct tape for a while I came up with an easy way to make all of those pockets! I’m demonstrating how to do it with different duct tape.
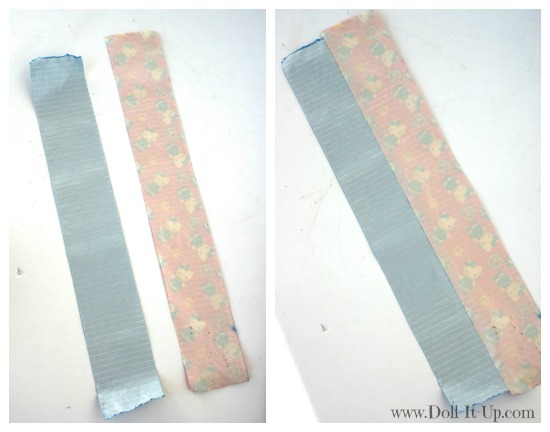
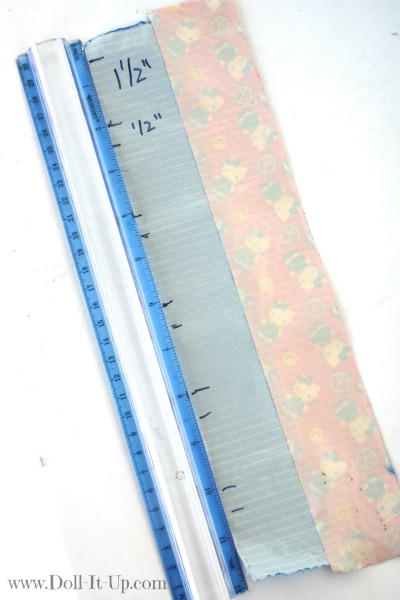
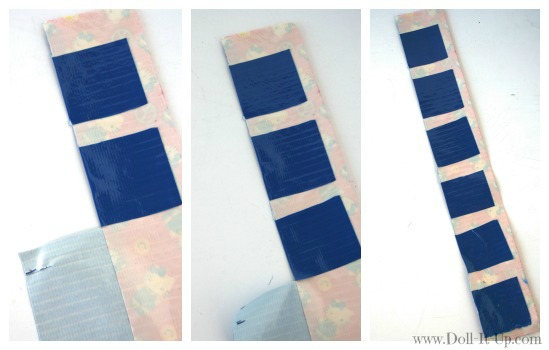
- Cut 12″ of your solid color and 13″ of your patterned duct tape. We are cutting the patterned tape a little larger than in the photo to leave extra room for the beginning and ending placement of the pocket strip. At the end you my need to trim any extra patterned tape off.
- Stick the two strips together, overlapping the patterned tape onto the sticky side of the solid tape about an 1/8″.
Lay a ruler next to the edge of the solid duct tape. With a sharpie, mark the edge in a pattern of 1/2″, 1 1/2″, 1/2″, 1 1/2″, all they way down. There will be six 1/2″ sections and six 1 1/2″ sections.
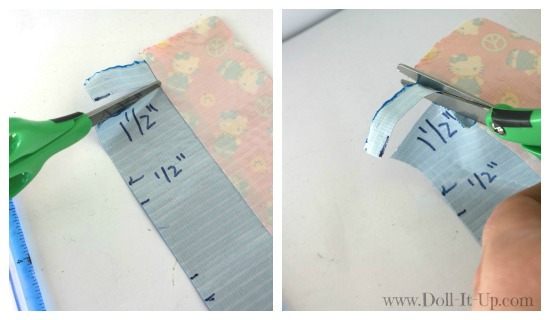
With a pair of scissors, cut along the first mark until you reach the patterned duct tape.
- If it is the 1/2″ section, then cut across the edge of the patterned tape to cut it completely off.
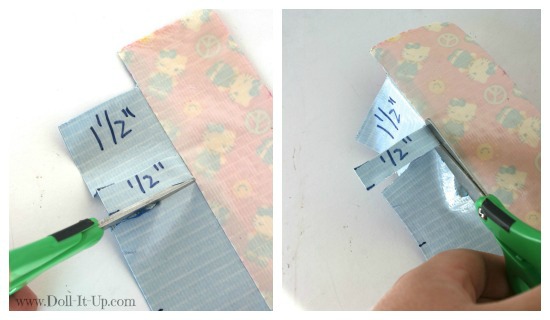
- Cut at the next two marks to isolate another 1/2″ strip. Cut the strip off again along the edge of the patterned tape.
- Now the 1 1/2″ flap is standing alone.
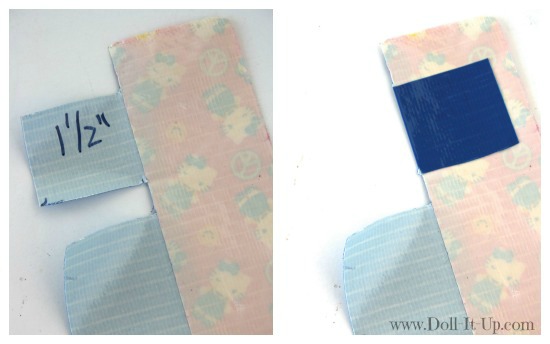
- Fold it completely over onto the sticky side of the patterned tape.
- Continue down the solid side of the tape, cutting off the 1/2″ strips and folding the 1 1/2″ flaps over.
- When you are done there will be six tabs on the sticky side of the patterned tape.
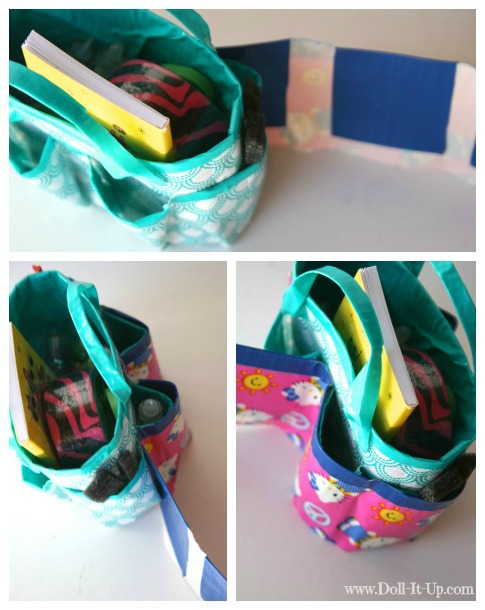
I’m using the demonstration tape we just made and taping it right over the real bag so you can see how to place the pockets. On the craft bag there are two pockets on the sides and one on each end. Each of the six solid color tabs is going to be a different pocket on our bag.
- As you are placing the “pocket” strip keep in mind it needs to hang over the bottom edge of the bag at least 1/4″.
- Taking the strip we just made, pick a 1/2″ sticky section of the tape between the “pockets” and center it on the side of the bag.
- Arch the pocket and place the next 1/2″ sticky section toward the corner of the bag. This is the actual pocket starting to take shape!
- Work around the bag in the same way, positioning the pockets around the bag. The tape is forgiving and you can peel up a little section and stick it on again if needed.
- When you get to the last pocket, overlap the end of the sticky tape with the sticky tape you placed first. If it is too long, trim it to fit.
- Now the pockets nicely loop around the bag.
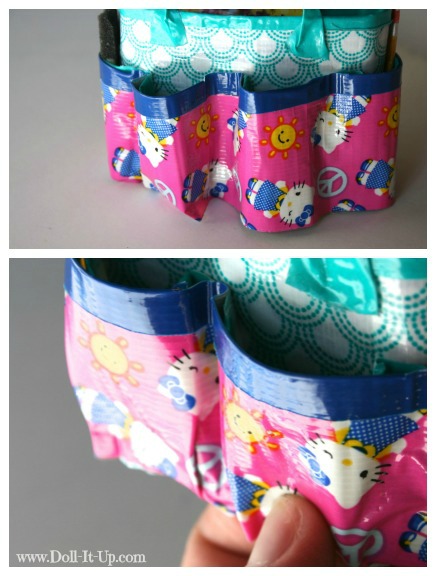
- We need to pinch the bottom of each pocket to actually make them into little pockets. Flatten the bottom of each pocket by pinching it flat.
- Continue flattening the bottoms, until each pocket is done.
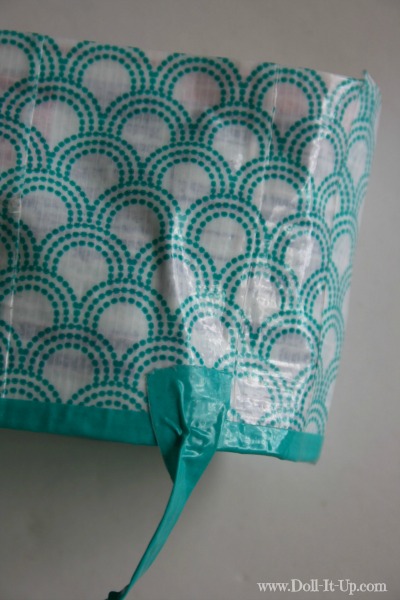
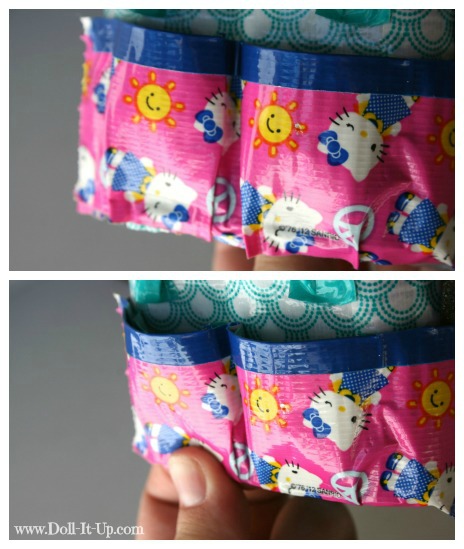
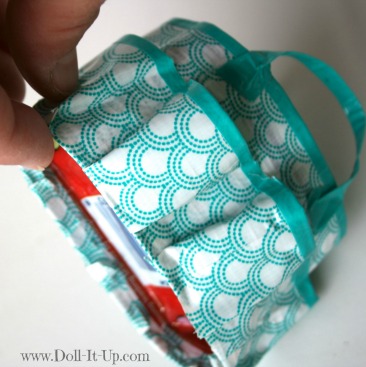
- While placing the pockets we left the tape at the very bottom edge hanging over at least 1/4″. Fold that section of tape under the bottom edge of the bag.
Let’s jump back to the finished bag. Here is another view of folding under the bottom edge.
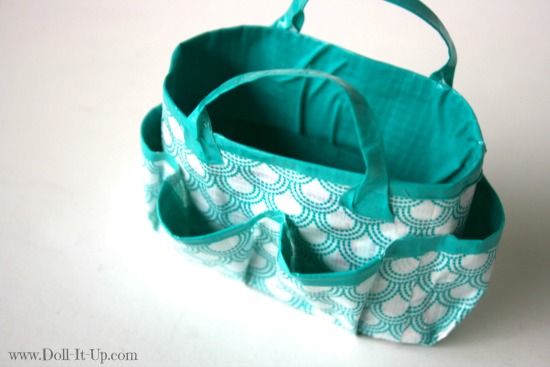
This little craft bag is finished!
It is equipped with lots and lots of pockets all the way around the bag. Lots of pockets to stuff with lots of crafty goodness.
What about my stash of crafty accessories for dolls? I’ll give you all the details of the fun crafty goodness next week!
I hope you will enjoy crafting your own doll sized craft bag! Thanks to that secret little flat bottom packaging (the Craisins bag) it was quick and easy!
Just in case you are interested here is a little more about today’s post.
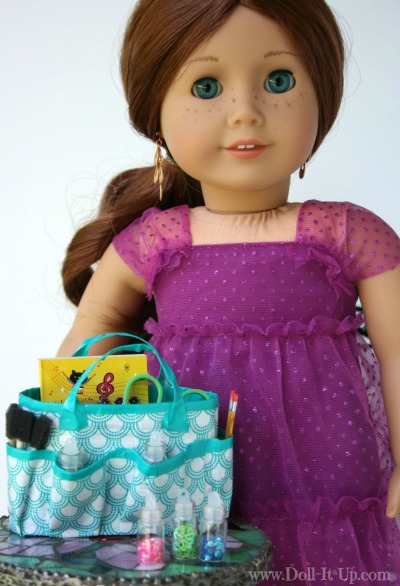
- Doll– Saige, AG GOTY 2013
- Outfit– Dress tutorial is here.
- Scene– Table was made by Anna
Craft for the details, craft for imagination, craft for play!
Anna

Genius, Anna!
Thanks Maxine!
So adorable! I was at the dollar store recently and saw a mini sewing kit with doll-sized scissors! Next time I am there I am totally getting it so I can do this craft! Also how old is your older daughter?
Ella, That’s exactly where I spotted my scissors too! My older daughter is 12.
This is so adorable! I am going to feature this on our blog in the near future and point back to your site…cheers!
Christine, Thanks! I love crafting with duct tape!
We just published a post on our blog featuring this craft. Check it out if you have a chance! http://www.educttapecrafts.com/all-dolled-up-with-duct-tape-4-doll-inspired-duct-tape-crafts/
Awesome! Thanks for sharing! You featured a nice variety of crafts. I will check them all out!
this is so awesome
so cute i love Saiges dress
Cool
I love all the creative things on this website
Thanks Cam!
I used your tutorial to make a tote and it came out so cute! Thanks so much!!
This is so cute! I think Rosie my doll mad 11 year old would love your blog. So many ideas for mini doll things.
I just love this idea! How clever! I am definitely making this craft!
~Kaylyn
I just made this craft bag and it was so much fun! Super easy too!
~Kaylyn