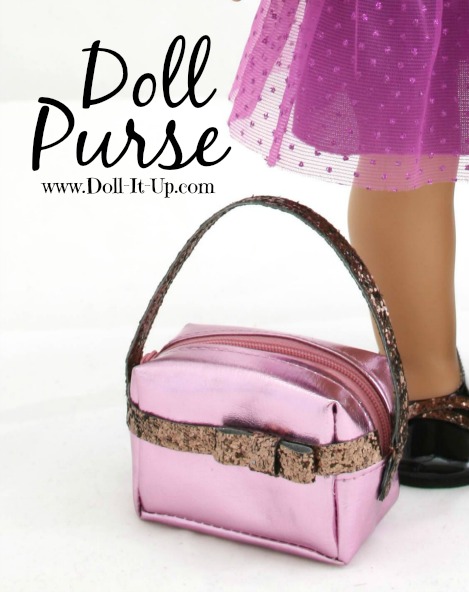
Have you entered the fantastic American Girl Doll and Wardrobe Giveaway? Win this purse! It’s one of the many lovely items in an enormous stash of doll fun you can win! It’s way over the top! Win an American Girl Doll of your choice AND a whole wardrobe to go with it!!!
This little purse will have a new home soon, but the idea lives on! I’m excited to share how it was made so you can make your own! It is definitely a quick and easy project!
Accessories for dolls are fun to complete an outfit and great for play!
Let’s take a closer look at how it’s made!
Supplies:
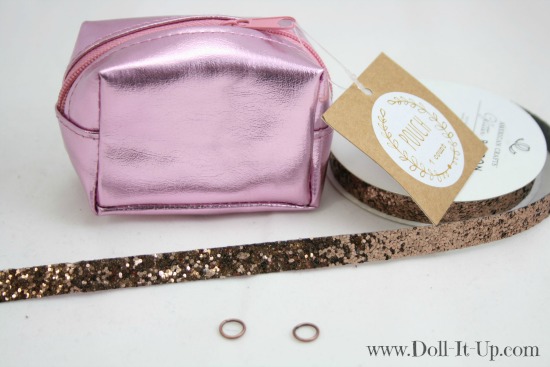
- coin pouch (This one is from Target)
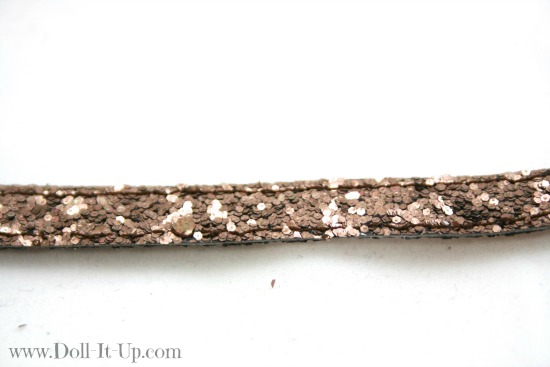
- ribbon (I’m using American Crafts Solid Large Glitter Ribbon )
- jump rings
- scissors
- glue
First let’s talk about the coin pouch. Mine came from the dollar bins at target. They were available in several metallic colors. Small little bags are common to come across and make a great doll purse. Keep an eye out at the thrift store or check dollar bins at your favorite store!
I also need to mention the ribbon on the purse strap. Of course any ribbon you have on hand would work. I looked at many lovely ribbons that would do the job just fine. Sometimes I come across something that is fantastic, so I have to share. It first caught my eye months ago. You know I have something for all things sparkly! This sparkly ribbon is on an American Crafts display at one end of the ribbon isle at my JoAnn’s craft store. When looking for a purse strap ribbon I took a closer look at the different ribbons on the display and swooned over the Solid Large Glitter Ribbon. It comes in many lovely colors but this chocolate brown was the one I needed to complete the look I wanted for the outfit. At the store I was in love with the sparkle and once I came home and started working with it I was truly smitten! First of all as you know, working with glitter, shed can be a problem. This stuff pretty much stays in-tacked. The next thing that makes this awesome for doll size projects is there is no fray when you cut it. It reminds me of the back of faux leather fabric. It is flexible and I had no problem sewing through two layers on the sewing machine. I am in love and have many ideas for it’s use in doll crafts. So be warned you’ll be seeing more of it around here! 🙂
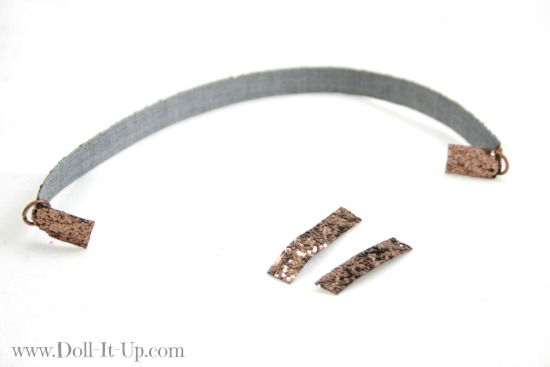
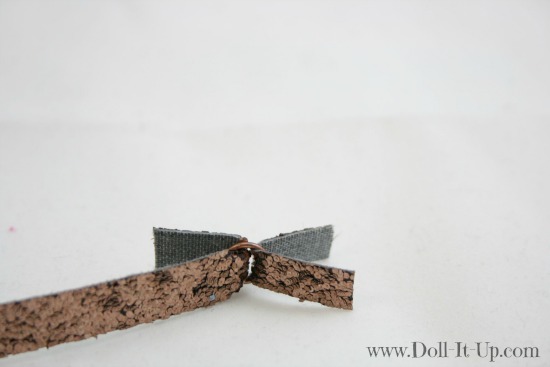
Now let’s get started! First up, the purse strap! Decide on a strap length that will work with the size of purse you are making. Thread a jump ring onto each end of the ribbon. Place the jump ring at least 1/2″ in and fold the ribbon at that point.
Cut two small strips of ribbon to about 1″.
Thread a small strip of ribbon through each jump ring.
The glitter ribbon I am using is not double sided and the grey on the back is distracting. I cut a length of ribbon to cover the grey backside and stitched it together on the sewing machine. I stitched close to the jump ring to attach the fold over flap. If your ribbon is double sided then just glue the flap closed around the jump ring.
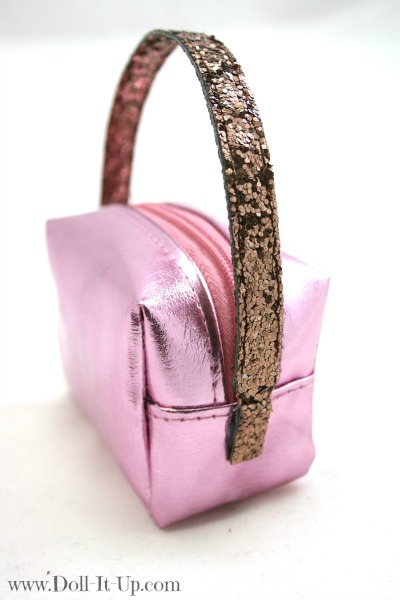
Glue the small ribbon strip together and glue it to the side of the bag, below the zipper.
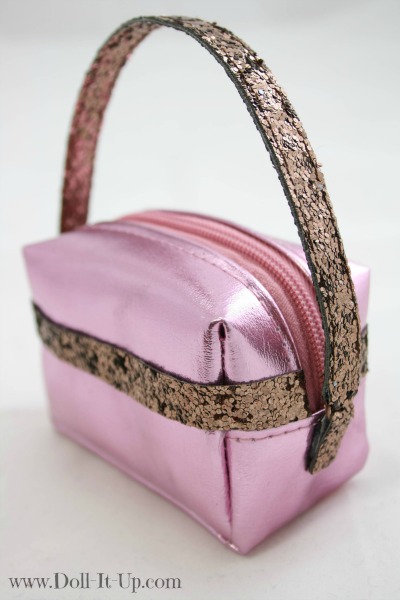
Now add a few decorations! I decided to keep it simple with a strip of ribbon around the outside.
It still needed a little something. In the planning stage I showed my mom what I had so far and she suggested a simple bow. It was just the right decor for this little purse.
There are so many options to get the look you want! Get creative and embellish it with a decorative button, a few sequins, or a jewel.
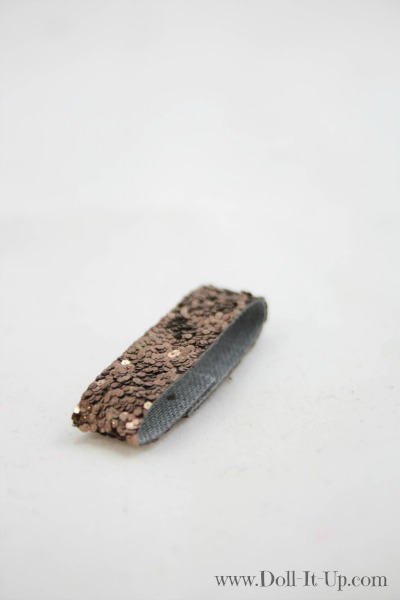
For the bow I made a loop.
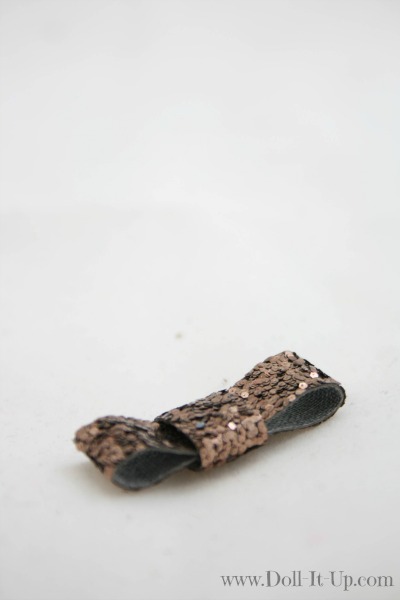
Next I wrapped another piece of ribbon around the center of the loop.
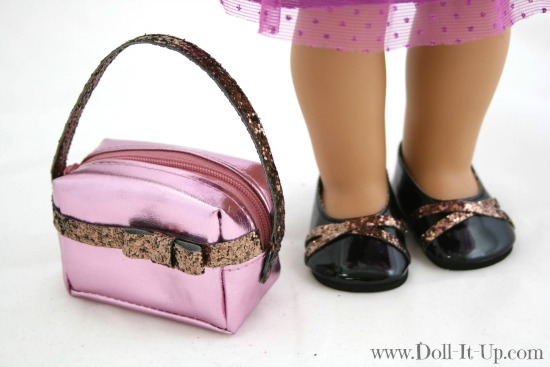
Attach it to one side with a little glue and the purse is finished!
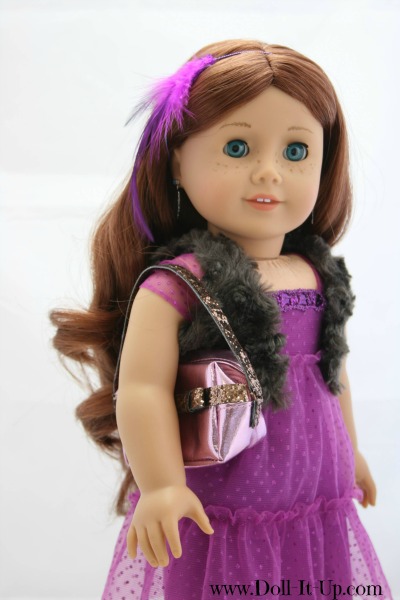
With a strap and a few embellishments this little coin pouch has been transformed into a doll size purse!
This little purse is waiting to find a new home! It is one of the pieces that is part of a whole outfit that I contributed to this fabulous American Girl Doll and Outfit Giveaway! Enter today!
Anna

So beautiful!!!
Thanks Claire!!
Your crafts are too cute! 🙂
It’s absolutely fantastic!
Wow! I love how it turned out.Too style! Thanks for sharing tutorial!
Hope you have a wonderful weekend!
Hugs from Portugal,
Ana Love Craft
http://www.lovecraft2012.blogspot.com