There’s always that moment. You spot something and see beyond what it is. You see what it may become. It’s a glorious moment, and it fuels me on to discover many hidden doll treasures all around us! 🙂 Such was the case with a certain little cosmetic bag I stumbled across the other day.
I was on a personal mission to come up with an easy doll backpack craft (If you missed it, come see the duck tape backpack I made for Doll Diaries!). With doll backpacks on the brain, I spied this little cosmetic bag at the store. It was a repurpose challenge I was itching to try! Beware if you haven’t caught the repurpose bug. It is contagious, very contagious!
Eyeing it at the the store, this is what stood out.
- a zipper-You know, the traditional backpack closure and a bonus, it’s pink! 🙂
- the basic shape-Okay, I know backpacks are NOT circle shaped but this circle has the perfect curve to mimic the top of a traditional backpack! When we’ve added more backpack details I don’t think the circle curve across the bottom will matter.
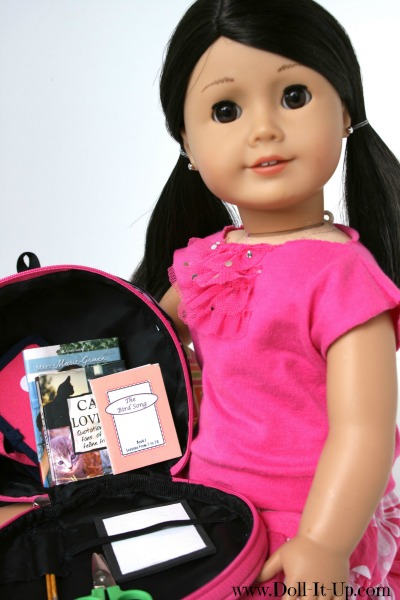
- the basic size-It is a great width to strap on and wear as a doll backpack! It’s definatley roomier than our other backpack brands, but in this case I think it adds to the play value! You can load it up with school supplies, sports gear, or use it for your dolls weekend getaway!
- eye catching colors and pattern-The pattern is to scale for dolls and it’s fresh and modern!
The basics are good and it’s time to add our own details to make the transformation complete! Let’s look at each of the details and then I’ll show you all of the how-to’s so you can transform your own cosmetic bag into a doll backpack!
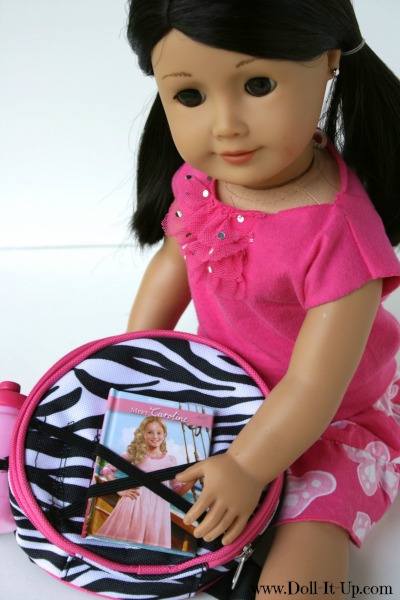
Backpacks always have storage options, so our first detail is a twist on the traditional pocket.
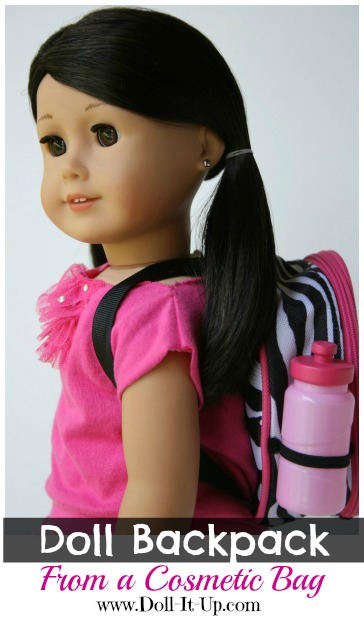
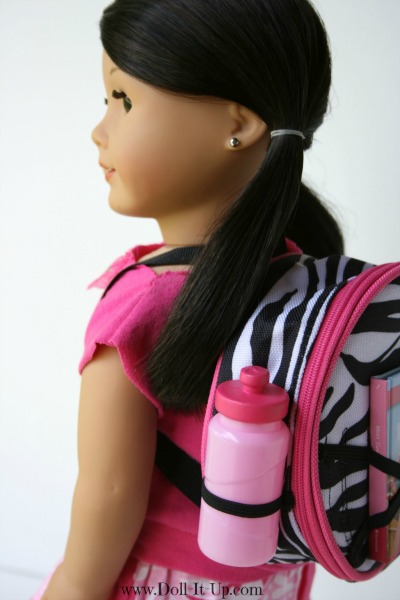
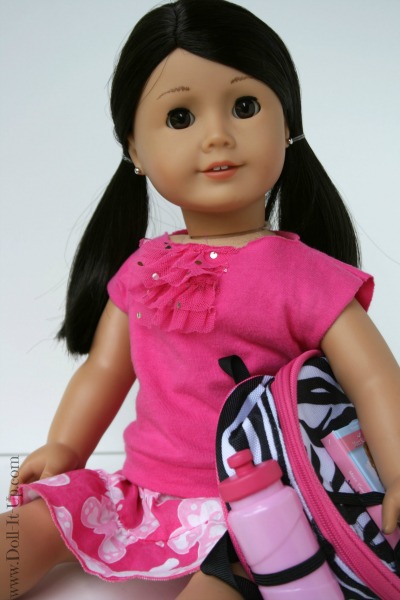
Second up is a water bottle holder on the side of the pack.
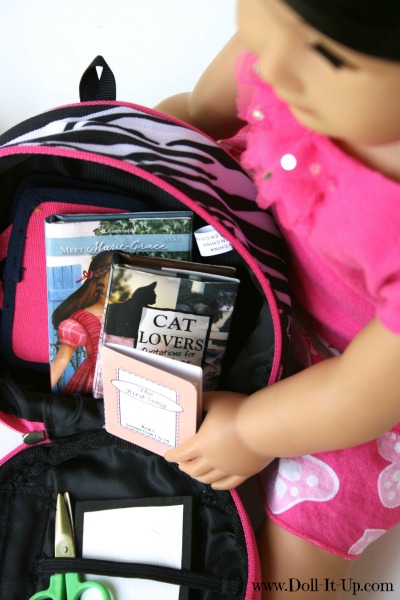
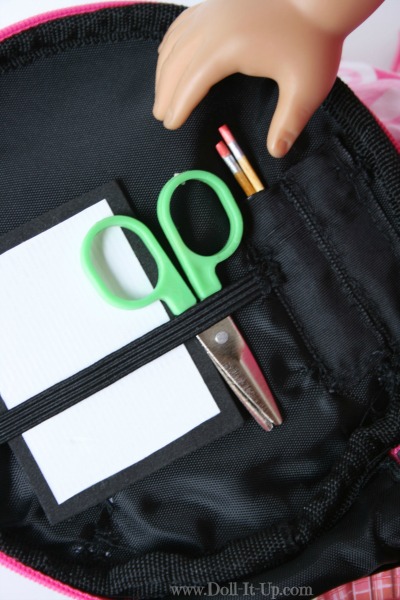
The third detail is a place to organize school supplies.
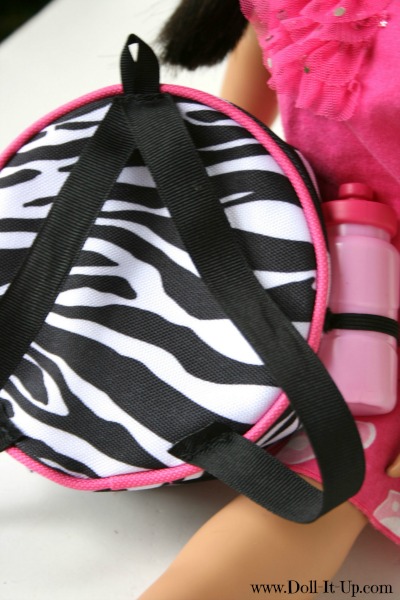
Last but not least, don’t forget the backpack straps!
Now that you’ve had a look at each of the details of this little backpack let’s dive in and make it together!
Here is the little bag. It is a cosmetic bag. To give you an idea of it’s size, it measures 5″ across and is 2 3/8″ deep. 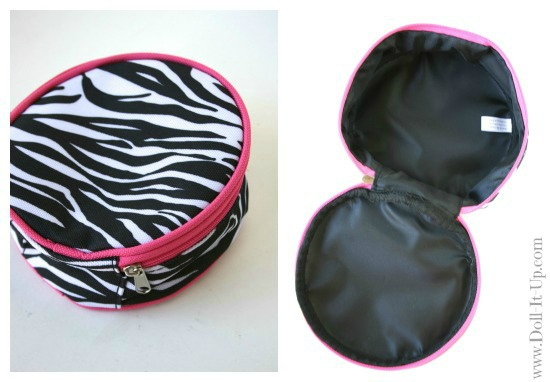
For my cosmetic bag, it made sense to add each detail in a specific order. Otherwise somethings might over lap each other. Now for the how-to’s and tips!
The Straps
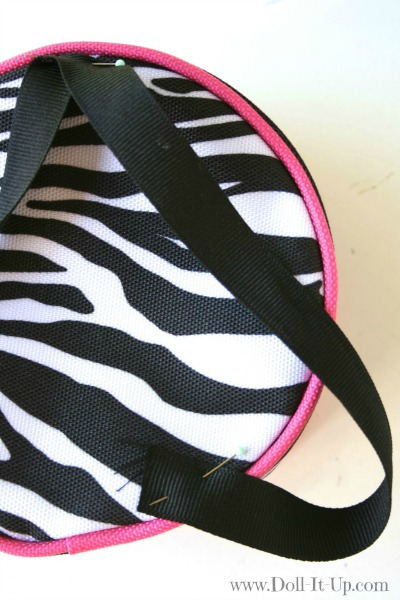
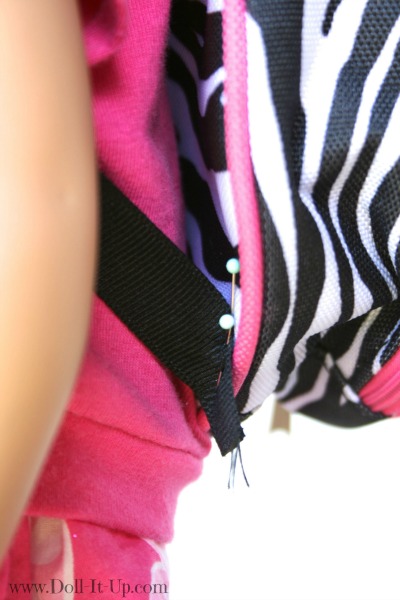
It’s time to do a little planning. For the backpack straps I’m using 18″(1/2 yard) of 5/8″ grosgrain ribbon. Fold the ribbon in the middle and pin it to the center top edge of the backpack. Pin the 2 ends of the ribbon on each side of the bottom edge.
Tip: Try it on the doll and make sure the placement is good and the straps are the right length. Adjust the ribbon if needed!
Let’s take a closer look at the bottom edge of one strap.
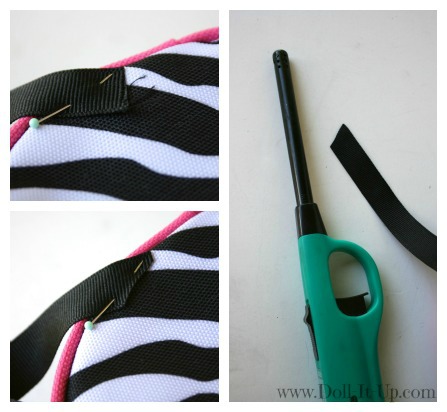
Tip: To keep the ribbon from fraying we are going to seal the edges. Where the ribbon is pinned I trim off any extra ribbon. Unpin the ribbon and using a lighter (ONLY WITH THE HELP OF AN ADULT!!), place the edge of the ribbon close to the flame. The edge will melt and seal the ribbon, preventing fraying.
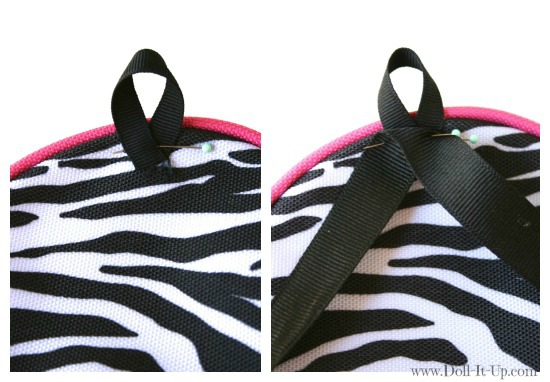
Let’s add a loop to the top. Cut 3/8″ ribbon to 2 1/4″. Loop and pin it underneath the top fold on the ribbon straps. Now stitch everything in place.
Tip: I planned on sewing this on the machine but it turns out the piping around the edge was too stiff to get the foot and needle close enough to the edge. With a needle and thread I stitched where all of the straps connect in no time!
The Inside Flap
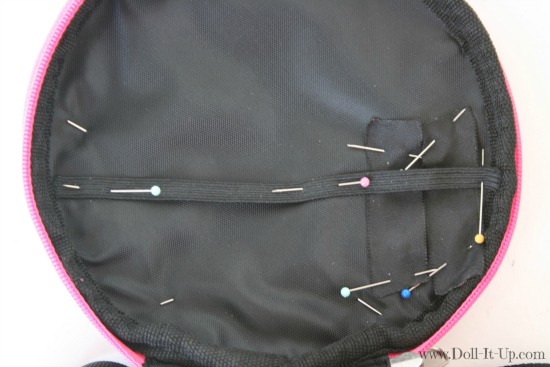
For the inside flap I added two pockets for pencils and a piece of elastic for larger items. The pockets are 5/8″ ribbon. I cut 2 pieces of ribbon, 1 3/4″ long. I then heat sealed each end of the ribbon with a lighter just like I did on the backpack straps. (GET HELP FROM AN ADULT IF YOU WANT TO HEAT SEAL THE RIBBON!!) I stitched the pockets on with the sewing machine. I decided to stitch the elastic down with the sewing machine right at the edge of the pockets. I hand stitched the elastic end that is close to the edge. (There are a few tips in the next section about hand stitching elastic.)
Tips: If I were to do this again, I would have placed the pockets in the middle. The stitching showed a little on the other side. If it was in the middle, the book in the front elastic of the backpack, would cover up the stitching that shows on the front.
A Front Pocket and Water Bottle Holder
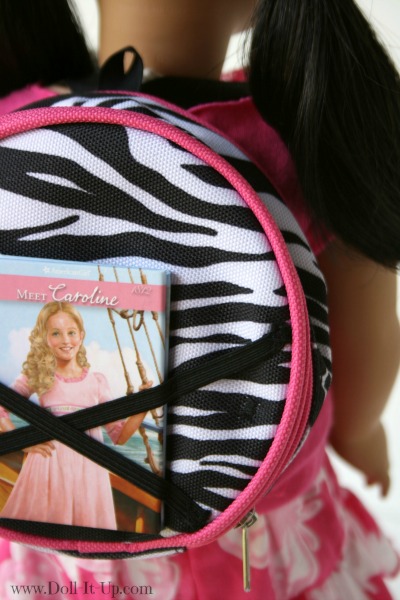
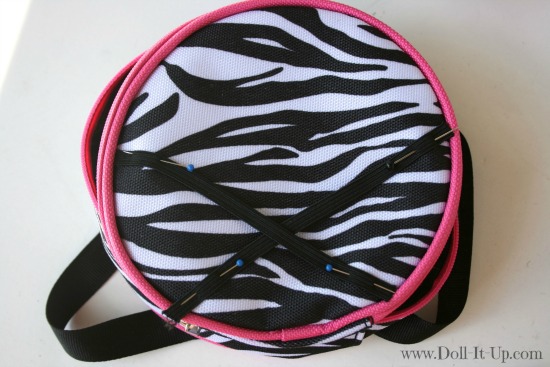
Now let’s add a little detail to the front. I am crossing 1/4″ elastic on the front to hold a little something. Backpacks need pockets and this will work as a sort of elastic pocket.
Tip: I stitched the elastic on a tad loose. The book slipped out easily. I needed a little more tension for holding the book! I placed the book in the elastic and hand stitched the elastic to the backpack, right at the edge of the book. It didn’t change the look of the elastic pocket and now my book is oh-so-snug!
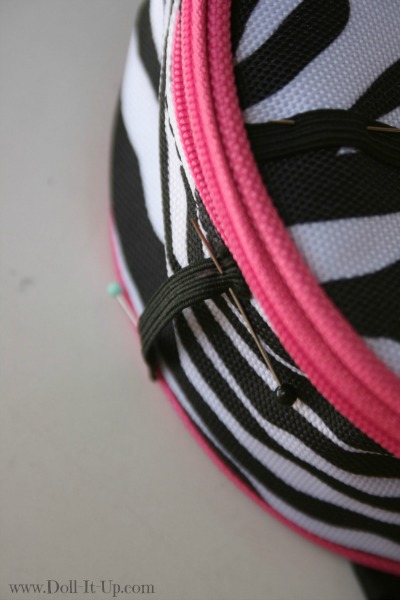
I am also adding a little elastic to one side to hold a water bottle.
Tip: Hand stitching was the way to go with all of the elastic when it’s close to the piping. To avoid the ends fraying, I attached it with stitching an X on the end of the elastic. Not too close to the elastics edge because that just encourages the fray! Then I used a whip stitch right at the elastics edge.
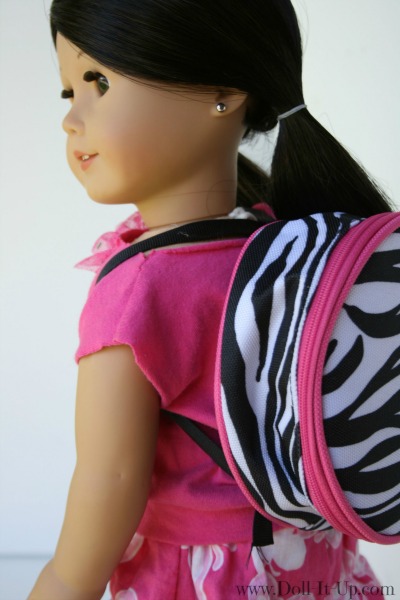
Time to load it up! Morgan’s ready for school with all of her books and school supplies organized!
This was a fun, fun repurpose project! I just love how we added a few details and transformed a little cosmetic bag into doll backpack! Yay!
By the way, I did figure out the backpack craft I set out to make. (Check it out here.) It turns out it is also a repurpose project. Two repurpose projects in one week? Yes, I had an awesome week because repurposing is my fav!!
These backpacks are really quite different, but they have one thing in common…they are repurpose projects!
Craft, REPURPOSE, Play!
Anna




Hi Anna.
I love this doll cosmetic bag!
I nominated you for an award.
http://www.prettylillyanamericangirl.blogspot.nl/2013/09/elegant-blogger-award.html
Xoxo,
Pretty Lilly
Thanks Pretty Lilly!
I am totally going to do this!
I love your doll blog I have one too jloveadollblog.blogspot.com
Thanks Julie!
Is morgan your only doll?
We have many dolls. She is definatley one of my favorites to photograph!
Where did you get the water bottle?
It came with a hiking outfit from My Life As, the Walmart brand of 18″ dolls. I’ve seen it sold with other outfits they offer.
Cool idea!
Super cute!! 💕
Very nice ides!!
Thank you!