This little dress has been finished for 2 months! This little tutorial has been slow to make it out the door! I was working on it gung-ho when my computer died the beginning of March. The week or so it was in the shop set me back on several projects so this little tutorial went on the back burner and it’s been nagging me to be finished since! I’ve receive a lot of compliments and questions about this little dress. Thank you! You also helped me get this project off the back burner!
I like to alter clothing and fit it to dolls. Nothing super complicated! Lots of times with no pattern. I am not an expert seamstress and I have no formal training in such things. I do enjoy the challenge! Most of all I love taking clothing that is already unique or different and making it work for dolls. In the end, most of the time:), I get something that is far better than I could have made from start to finish.
Did I mention how fast it is? There is more thinking it through on the front end but far fewer steps than when I sew from scratch.
So today I’ll walk you through how I made these sweet little doll dresses, each out of a shirt. I’ll show you all the details if you want to try one for yourself. Whether you are a beginner or are experienced at the sewing machine I think you will see how easy it is to make a shirt into a doll dress. 
Here is the sneak peak I shared back in March. It shows the shirt and dress side by side.
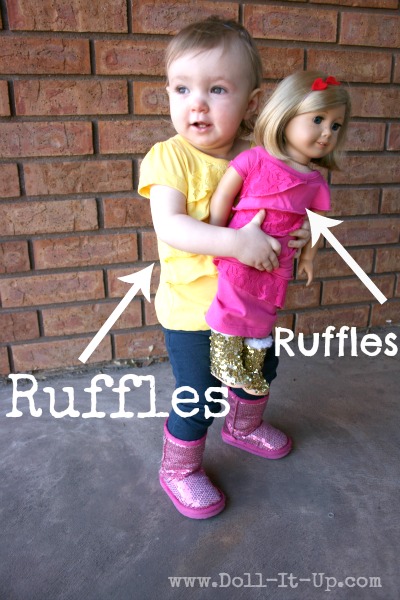
Of course my baby is in heaven with that doll in her arms! The 18″ dolls are usually up out of her reach, so she was thrilled to pack the doll around! 🙂
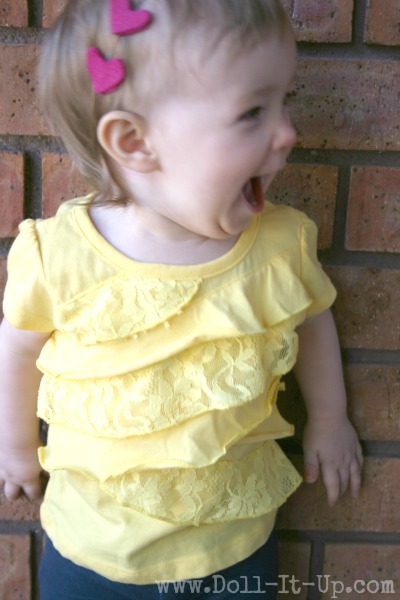
Here is a close up of all those ruffles on the baby…
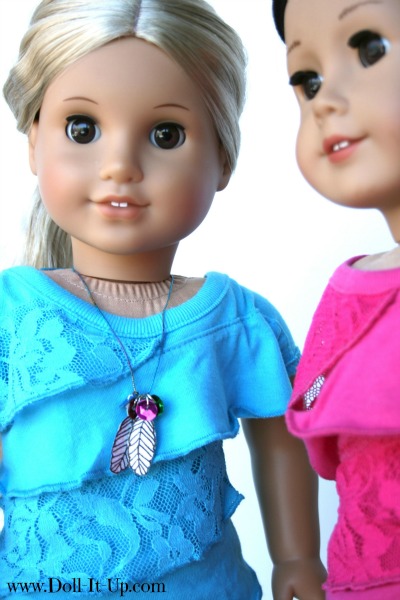
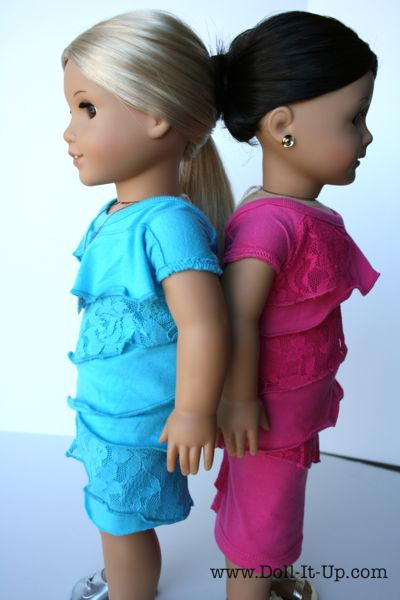
and on the dolls!
If you are looking for a shirt that would be a good candidate to be altered into a doll dress I have a few tips.
- Fabric weight- This is so important. Regular fabrics are too bulky for dolls. You may come across something that would be cute for dolls but if the weight of the fabric is wrong your project will not turn out as good as you had imagined. Luckily lightweight fabrics are popular right now so wait for something lightweight!
- For this particular project I would recommend working with a shirt that has ruffles or some kind of dimension. This is a pretty fitted dress and would look too tight if it was a plain t-shirt.
- It’s so easy working with knits. The only thing that you have to beware of is the stretch on the knit. I used a shirt that stretches like a regular t-shirt. Give the knit a tug and see how it stretches. Sometimes I come across shirts where the stretch seems kind of stiff or another that is super stretchy. All of this will make it fit differently. It is just a good thing to check before you start.
Are you ready? 🙂 Let’s get started!
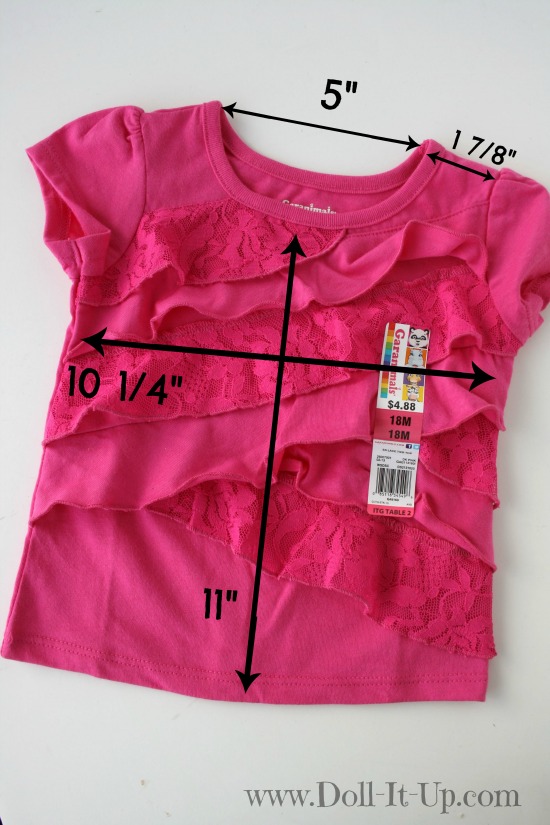
Here is what I started with, a ruffle t-shirt from Walmart, size 18m, for $4.88. I know you may not have the exact same shirt to work with. I am sure this idea would work with other shirts and sizes if you follow the same basic concept. Did I mention I like to sew without patterns? I hope this doesn’t scare you off. It is fun and liberating! You can do this!
I have some measurements if you want to compare your shirt to the one I have.
The first test your shirt needs to pass, after the 3 tips I gave above, is the fitting. Put the t-shirt on the doll. Wrap the front of the shirt around the doll. Do the side seams meet comfortably at the back to be the new back seam? My doll measures about 12″ around the thickest part of her waist/hip area. The fabric on the front of the shirt only measures about 10 1/4″ but it easily stretches to fit around the doll.
Are you ready to take the leap and transform this shirt!!!
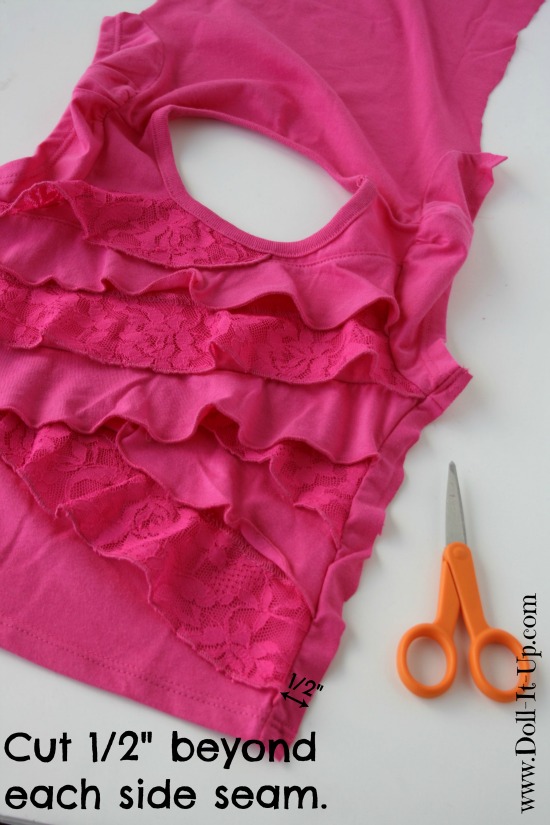
First separate the front from the back of the shirt. Follow the side seams as your guide cutting 1/2″ beyond the side seam on the back of the shirt. Cut through the sleeve opening the shirt all the way up.
Trim off the sleeves, trimming close to the seam.
In this photo I am showing the plan. With the front panel of the shirt wrapped around the doll you can see the side seams almost meeting up in the back as a back seam. Then I check the basic fit in the front.
We need to connect the front to the back. See the shoulder seam on the shirt? Starting from the shoulder seam, measure toward the back panel of the shirt. The outside measurement should be 1 1/4″ and the inside measurements should be 1 1/2″. Line up the pins so they can be your cutting guide.
Before we cut we need to open up the neckband ribbing around the neck, so don’t cut through it yet! Lay out the shirt in front of you similar to how it is shown in the pictures. With a seam ripper take off the stitches and neckband from the shoulder seam on the left to about 1″ before the shoulder seam on the right.
Now cut in a line along the pins you marked on each side. Take care not to cut through the neckband yet.
Now we are ready to join the 2 side seams together into a back seam. Line up the two seams and carefully pin. When joining the two seams you want to sew right along the existing seams. In the picture I pinned the extra 1/2″ beyond the seam. I had to adjust the pins before sewing. To match up the seams I used my thumb and finger to feel for the two seams and pin all along the edge. Take care to also match up any rows of ruffles that meet up. That will give it a nice polished look! When I pinned it right, it ended up that the serged seam edge was flipped towards the fabric edge as shown in the last picture. Now that you have everything carefully pinned in place sew it together! After trying it on you can trim off some of the extra fabric along this edge to reduce bulkiness.
Try the dress on the doll. The neckline is just hanging there. In order to plan how to finish the shoulders I pulled the neck line up to basically where I want it and push a pin into the soft body of the doll at each side of the neckline to hold it.
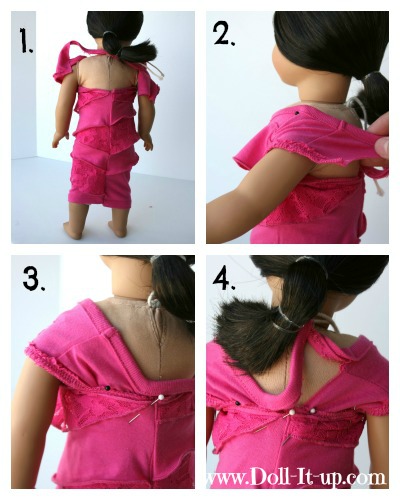
I am going to walk you through the process of attaching the front to the back over the shoulders.
- This is a view of the back of the dress before we begin. The dress comes up to the dolls armpits.
- Looking at the back of the dress take the shoulder fabric on the left and pull it diagonally towards the back center seam. Hold in place and remove the pin at the top of the shoulder.
- With the white pin I pinned it right before it met up with the back seam. Pin the outer seam to the back (shown with a black pin). Take care to make sure the arm has enough room to move freely.
- Repeat with the right side. Ignore the neckband ribbing.
Before moving on we need to adjust the pins. Instead of joining the fabric together we are going to use the pins as markers. We are going to remove the pins one at a time and mark with a pin where the fabric should be pinned together. Let’s start with the outside seam near the armpit marked with a black pin. With a finger hold the spot and remove the pin, repinning on the back of the dress where the sleeve edge should meet up. Place another pin close to the back seam where the inside edge was. Repeat on the right side.
Now carefully turn the dress inside out. Repin the seams together lining it up with the pins you used as a marker. Sew along the edge and remove the pins. Take care that the neckband is still loose.
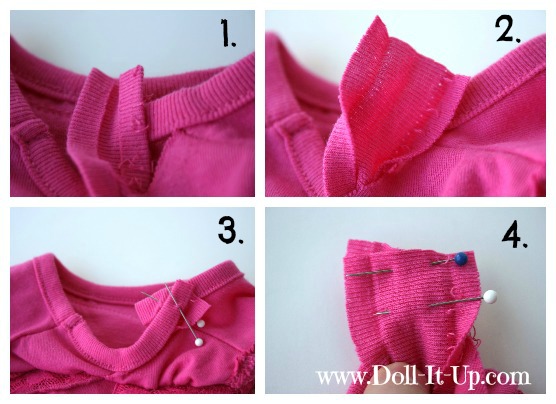
Turn the dress right side out. We are going to finish the neckband. Lay the neckband along the seam edge. We are going to have the seam match up with the old shoulder seam from the shirt. Cut the neckband and leave 1/2″ extra neckband on each side to overlap.
- Unfold the neckband ribbing. Overlap the two ends and match up where the seam will line up. Stretch the neckband slightly as you place it. It will keep the neckband snug to the dolls body.
- Open the ribbing all the way up, keeping a finger on the spot where you want the seam.
- Pin the spot on each side where you want the seam.
- Line up the two ends and pin them together where you had marked it.
Sew the neckband ribbing together. Trim off the extra neckband.
Turn right side out and refold the neckband. Pin the neckband along the edge of the fabric. Stitch in place.
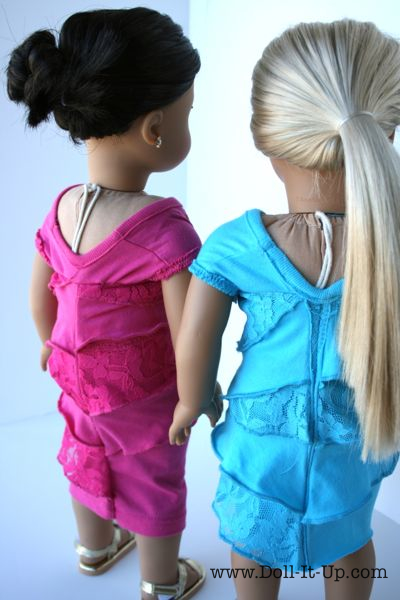
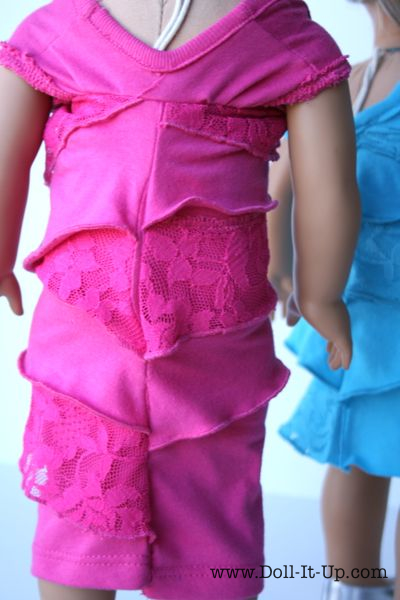
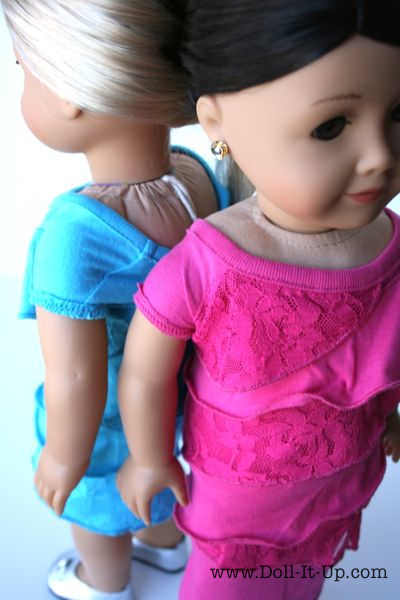
All finished! We finished it with a v-neck in the back. This makes the neck area large enough to get the dress on and off through the top. That means we didn’t have to fuss with closures!
I kept the original shirt hem for the pink dress. For the blue dress I cut the skirt length to just below the knee. Since this is knit and it won’t fray, you can leave the hem unfinished. I think it goes great with the look!
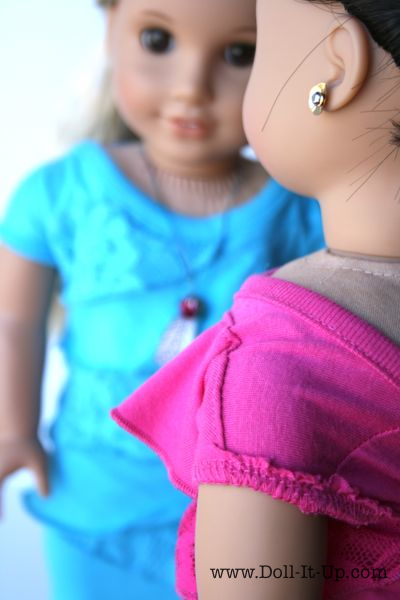
Here is a close up of the sleeve. I did not change it at all after trimming the shirt sleeve off. The seam was already serged and because it is knit it stays put!
This has been a fun addition to our doll wardrobe!
I’m excited to try this on another shirt or two. It sews up so quickly and looks so cute!
It was hardly any work because the cute t-shirt does all the work for you!
I hope you’ll give it a try!
Anna
Just in case you are interested here are a few more details from today’s post:








Very nice thanks for neat ideas.
That’s really cute! Thnk you for the tutorial!