This week there’s a new pattern in the shop, the Kylie Party Dress. This new pattern has sparked a variety of topics to share with you. Today I am going to show you how to cut tulle into strips. For the Kylie Dress we use strips of tulle to make the ruffles on the skirt. Whether you are making the Kylie Dress or have your own project that calls for strips of fabric this technique is useful.
If you’ve worked with tulle you might be thinking that cutting even, straight, strips of tulle sounds daunting. Tulle has volume and is super lightweight. This makes it challenging to manage. I will walk you through the process to cut tulle into strips stress free.
For the Kylie Dress pattern I have included a cutting guide that is the width of the ruffles, so you don’t have to fuss with measurements. You can also use a ruler and the measurement for the width, if you are not using the cutting guide.
Supplies:
- Tulle-1 yard (54″ wide)
- Rotary cutter
- Pattern weights
- Self healing cutting mat
- Ruffle Cutting Guides or Ruler
Before You Start
Work with tulle in smaller segments if you can, 1 yard for example. This will make the tulle a lot easier to manage. Start with tulle that is wrinkle free. Fold tulle when storing, so it does not get wrinkles. Use steam to remove wrinkles. Give yourself plenty of work space to layout the tulle.
Folding Tulle
First we fold the tulle, so that we can make shorter cuts.
1. Fold the tulle in half along the width (from selvage to selvage). Fold it again in the same direction and then fold once more. For example if your fabric is 54″ wide you will fold it to 27″, to 13 1/2″, and then to 7 1/4″.
Note: Since the tulle is transparent you can see through the layers. Tulle has body, so the layers are going to sit independent of each other. The important thing is that the layers are relatively parallel to each other.
Cutting Tulle
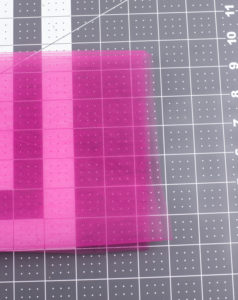
2. Line up the folded edge of the tulle with a horizontal line on the self healing mat.
3. For the first cut you will need to trim the fabric even. Lay the Cutting Guide (or ruler) on the fabric, 1/2″-2″ from the cut edge, also matching the guide (or ruler) with a vertical line on the self healing mat. Be sure the red fold lines on the guide are over the folded fabric on each side.
Note: The sides of the cutting guide with the fold lines are intended to be a little longer than the folded fabric edges. If the folded edges of the fabric are out farther than the cutting guide then fold the fabric once more, so the folded edge is under the cutting guide.
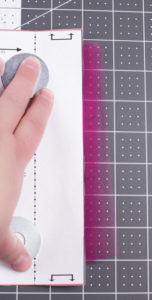
4. Lay pattern weights on the cutting guide. Double check fabric to make sure it is lined up. (Skip this step if you are using a ruler.)
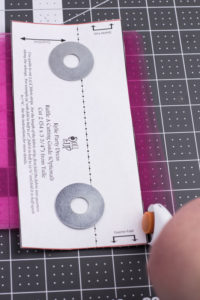
5. Hold the cutting guide (or ruler) with one hand. Trim off the uneven edge of the fabric with a rotary cutter. (Pictured above, this step is a combination of both photos because I was taking the photo and demonstrating.)
6. Since the cutting guide is the width of our fabric strip hold the cutting guide with one hand and make a cut along the other side of the guide.
Note: You need to adjust your hand and shift your position to make the second cut with the cutting guide.
(If you are using a ruler then place the ruler on the measurement of the width of your tulle strip. Hold the ruler with one hand and make the second cut.)
7. Set the strip of tulle aside.
8. With the fabric still folded, place the cutting guide on the edge of the fabric. Be sure the folded edge of the fabric is lined up with a horizontal line on the self healing mat. Continue as before placing the pattern weights on the guide. Hold the cutting guide with one hand and make a cut along the other side of the guide edge. Set the strip of tulle aside.
(If you are using a ruler then place the ruler on the measurement of the width of your tulle strip. Hold the ruler with one hand and make the second cut. Set the strip aside.)
9. Repeat step 8 to cut all the strips of tulle needed for the ruffles.
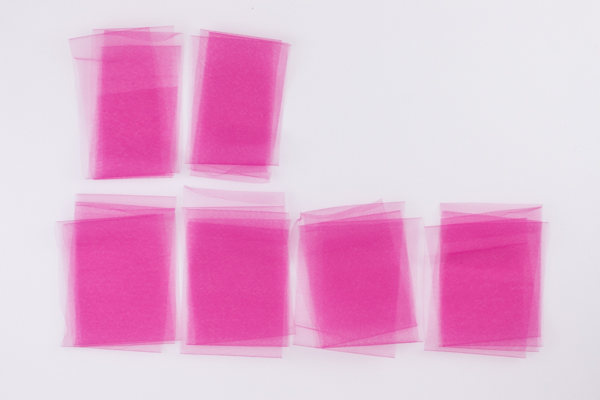
Here are the strips of tulle, freshly cut and ready to go for the project!
If you need the strips cut to a different length, unfold and cut.
I hope you find this useful. With all my patterns and projects I love to empower you to sew beautiful projects. I think the secret is simple techniques that give you consistent results and step by step instruction to walk you though the process. That way your projects go smoothly and you are happy with what you have made! Yay!
-Anna


Thanks for the tips. I love the look of tulle but hate cutting it. Want to try some now.