Note: This post has been edited to include the fireplace measurements at the end! Thanks for your requests!
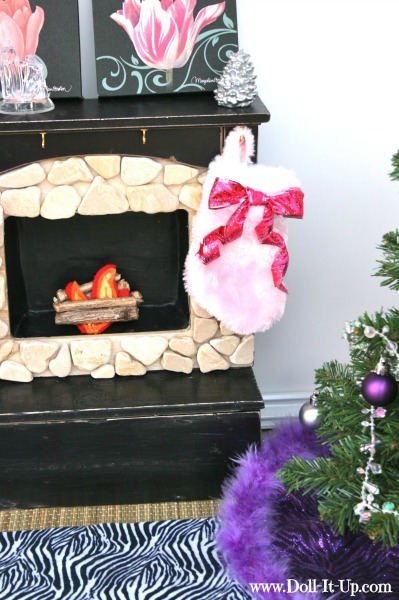
Here’s our doll size fireplace.
Ever since I used it in photos last year I’ve received a lot of questions about it. Today I’d like to answer some of those questions and give you a behind the scenes look at how it was made.
I built the basic structure 2 years ago. It was a christmas present for my daughter. I set out to make something sturdy, with nice details, for the dollhouse. Since it was the days before I blogged, I didn’t take photos of the process. I left the face of the fireplace plain because I couldn’t decide how I wanted to finish it off. It was last year that I made a push to finish it and added the final details! By that time I was blogging and took pictures of the process!
In order to keep the posts less bulky I’m going to divide the information into part 1 and part 2. Today we will take a look at how this little fireplace was made! Next time I will show you how I added the final touches!
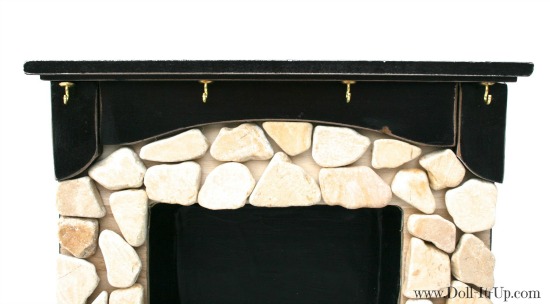
The main elements of this little fireplace are repurposed items. It makes for a finer product than I’m capable of making (I have minimal wood working tools and skills). I started with a little black decorative shelf from the thrift store. I modified the shelf by removing the right and left sides of the shelf skirt. The top back edge of the shelf was also trimmed by at least a 1/2″. That shortened the mantel depth and was probably unnecessary.
I lightly sanded all of the edges of the shelf.
I love the detail of the curved front of the little shelf!
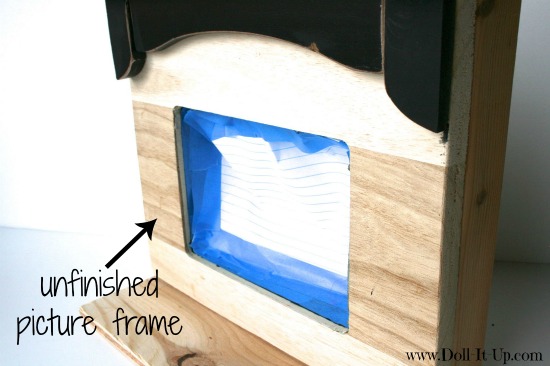
For the front of the fireplace I used an unfinished picture frame from Walmart. It was sold in the craft section with other unfinished wood projects.
The shelf front was placed over the picture frame
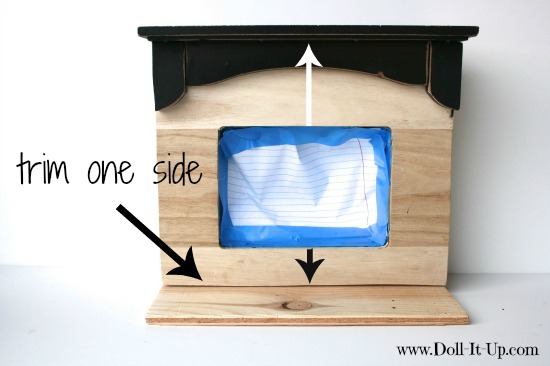
I decided to trim one side of the picture frame to lower the fireplace opening. Originally the opening was centered top-to-bottom in the frame. Now you can see the bottom section is much shorter than the top.
Using scraps of wood I placed wood strips on each side, to frame out the fireplace.
I placed the whole structure on a flat sheet of wood that extended out from the front. This was to create a hearth and also to balance the piece, so it wouldn’t tip over.
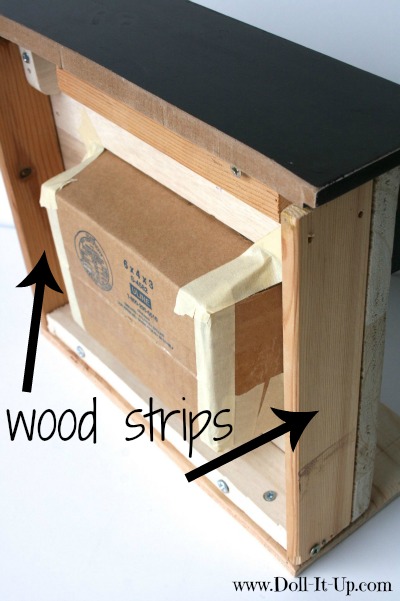
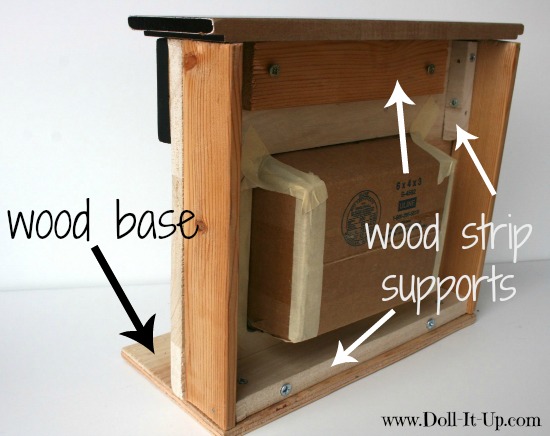
To hold the different elements together I screwed on scraps of wood on the back side of the fireplace. There are strips on the top, bottom and both sides.
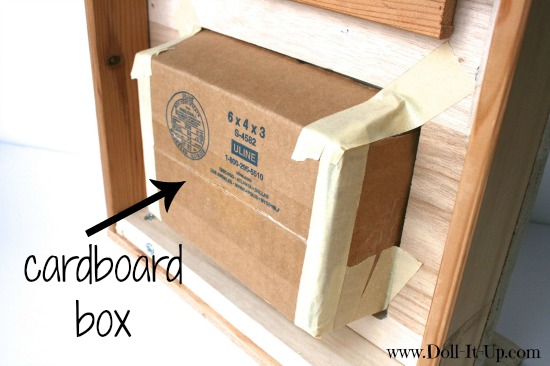
For the fireplace opening I trimmed a box to fit. The box is the depth of the fireplace structure. It is held in place with glue and masking tape.
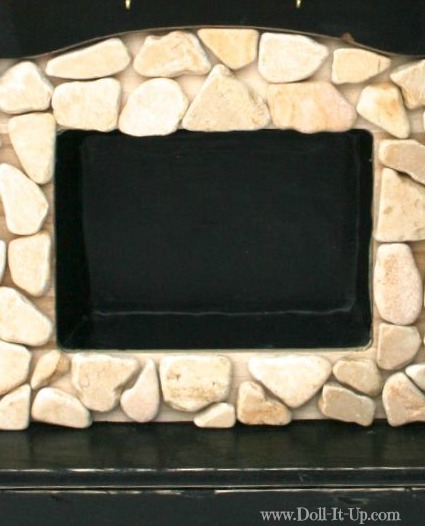
In order to seal the seams the box had, I lined it with black paper and coating it with Mod Podge.
Eventually, I decided that I wanted this little fireplace to have a little height. I set the whole thing on a block of wood made with a 4″x 4″ block and a 1″x 4″ piece of wood, sandwiched together to make it wide enough for the base of the fireplace.
There you have the basics of how I made this little doll fireplace! I hope you enjoyed seeing a little more about how it was made! This repurpose project came out lovely and sturdy and we have enjoyed it as a center piece to our doll living room scenes!
Stay tuned…next time I will highlight the finishing touches of this little fireplace!
Anna
Fireplace measurements: Of course you can make this fireplace in any dimension, depending on the pieces you come across. This is intended as a reference!
The width is the horizontal measurements of the piece and the length is the vertical measurements of the piece. I am using rough measurements, rounding to the nearest 1/4″
- Overall measurements-11″ wide by 13 1/2″ long
- shelf or mantle-11 3/4″ long, 3 1/2″ wide (after trimming)
- picture frame- 9 1/4″ long (estimated 11″ before cut), 11″ wide
- fireplace opening- 6 1/2″ wide by 4 3/4″ long
- box in fireplace opening -2 1/4″deep by 6″ wide and 4″ long (Notice the box is smaller than the opening. The sides of the box meet up with the opening edge. The gaps in the corners are bridged with the black paper and Mod Podge.
- hearth base- 11″ wide by 5″ deep
- hearth height-11″ wide by 3 1/2 long by 5″ deep ( total height is under 4″)
I hope this is helpful, let me know if there are any measurements I missed!



it is so cute i am defenatly going to make it for my dolls!
Thanks lila! Good luck with the project!
Will you please give the measurements of the various components? My “dolly eyes” don’t always work well!
Thanks so much for sharing.
Marty, Thanks for your request! I added the measurements at the end of the post!
thank you for the tutorial. I like the idea of using the picture frame and the shelf as a starting point.
Now I just need some time…more time! thanks for your answers last week and for listening to our request!
Morgane, I appreciate the feedback! It’s good to get requests and hear what readers are interested in seeing!
I have one more question, could you give us the overall size of your fire place and the size of the picture frame?
thanks
Morgane, I just added the measurements to the end of the post!
thank you!
I hope to start today….
Good luck! I hope your project goes well!
well it took a while but I finally did it! I made one and I think it turned out pretty good.
thanks for a great tutorial.
here is the link to my post if you are interested:
http://beardollyandmoi.blogspot.com/2014/12/day-1-ag-doll-fireplace.html
Your fireplace is adorable! I love the tiles you used and your overall design! Thanks for sharing!
Brilliant. this kind of thing inspires me to get into the mini scene. maybe with Elena…
Thanks Maren! Everything is cute on the mini!
Where did you purchase the “stones” and how were they applied to the wooden picture frame surface? This is absolutely adorable!! You are so creative!!
Lynette, The stones were from the tile section of Home Depot. I glued them on! Thanks for asking!