Ooooo, I’ve been sewing! All kinds of sewing, for Christmas and for dolls! I knew things would be busy around here with the holidays plus I’ve been pattern drafting behind the scenes. (Eek, more sewing patterns for dolls!!) So I saved a few fun projects to share over the next few weeks!
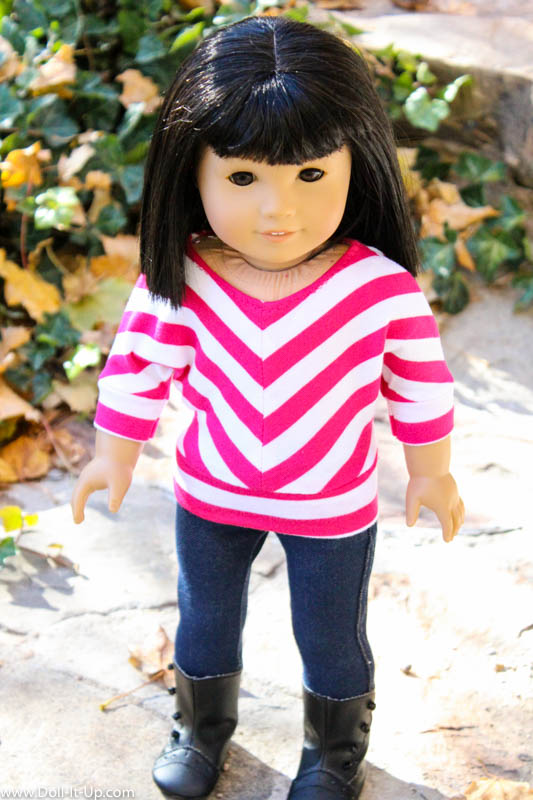
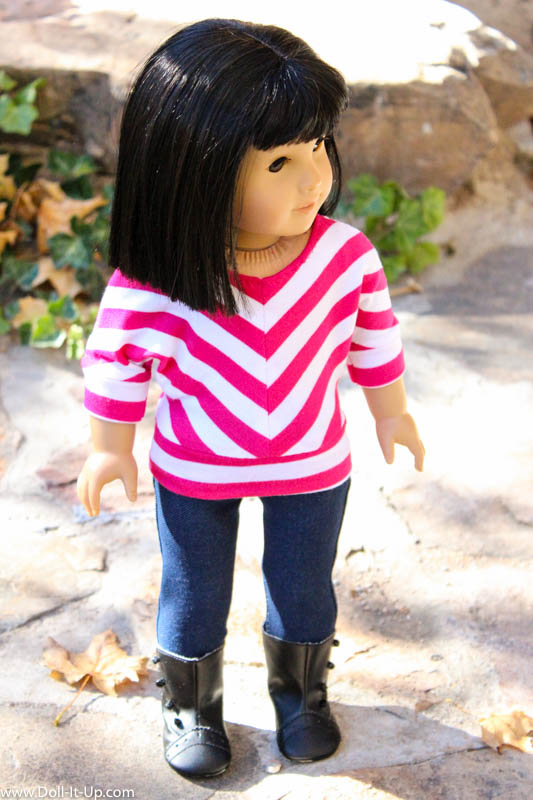
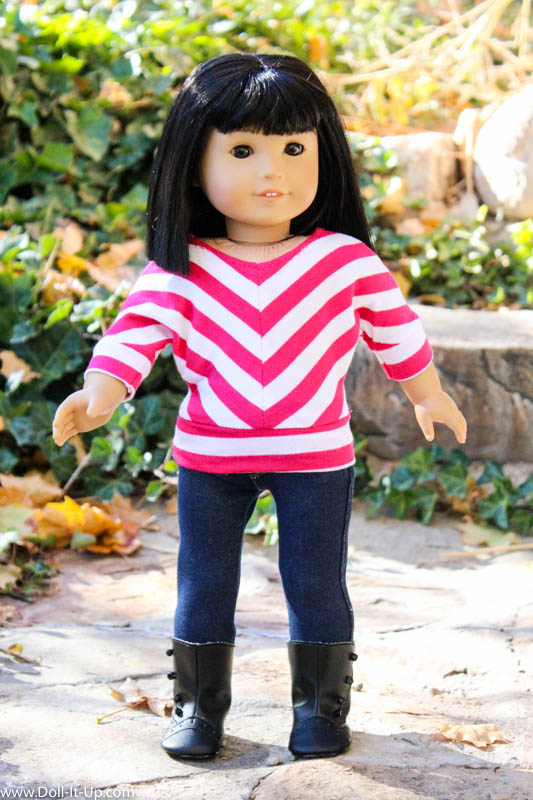
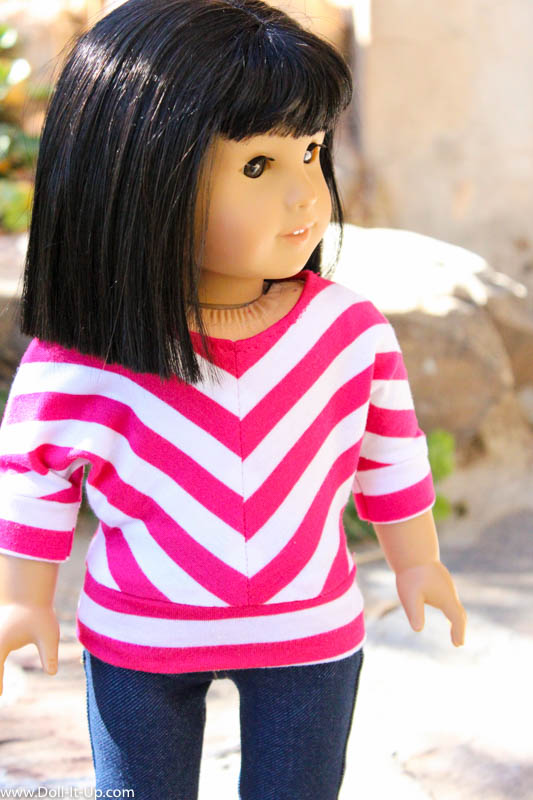
Today I have another fun sewing project for dolls! Another variation on the Banded Dolman Shirt pattern! Same pattern, fresh look. The trendy V striped shirt!
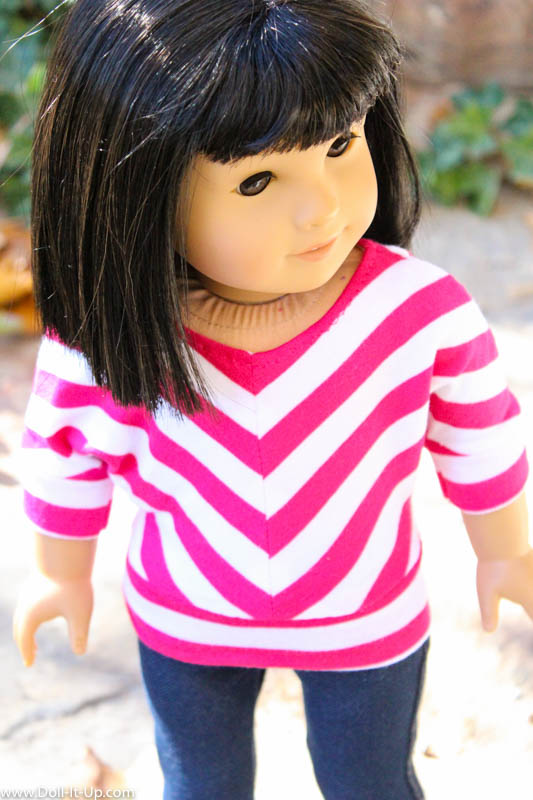
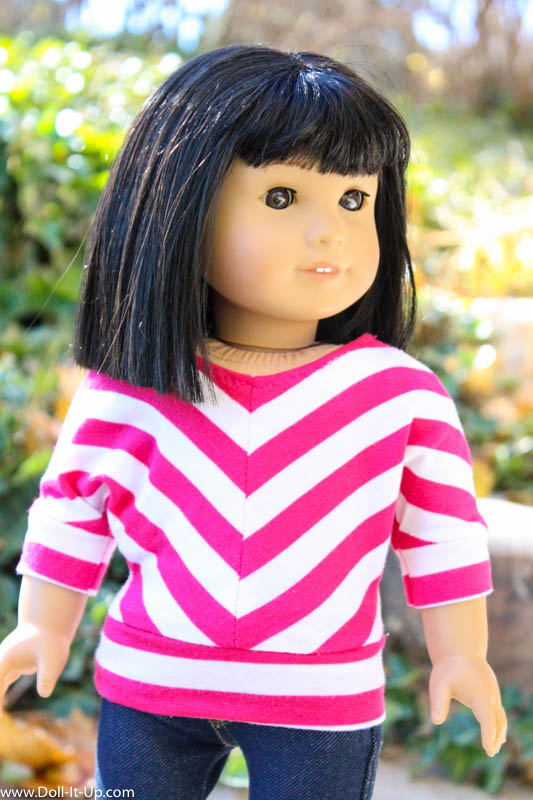
I’m calling this the V-dolman. Sounds cool. Ha! 🙂 More importantly it looks cool and on-trend, I might add!
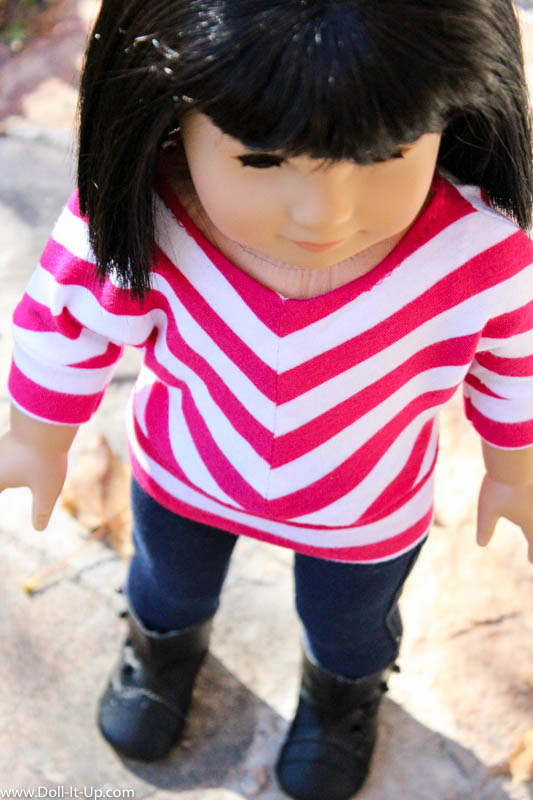
It features a V mitered stripe down the front and back by incorporating a seam on each side and arranging the pattern pieces on the striped fabric.
It is finished with the same bands at the sleeve and waistband.
Keep in mind you will still need a stretchy 4-way stretch knit fabric for this project. If you don’t have luck at your local fabric store look for girl’s or women’s clothing from the clearance aisle or thrift store that would work for this project. The most fabulous knits are readily available as clothing and ready to be refashioned into doll clothes! I made this shirt from a hi-lo summer dress on clearance for $3-$5. Being a dress originally there was a lot of fabric, so there is still enough fabric for several other projects!
Let’s get to it!
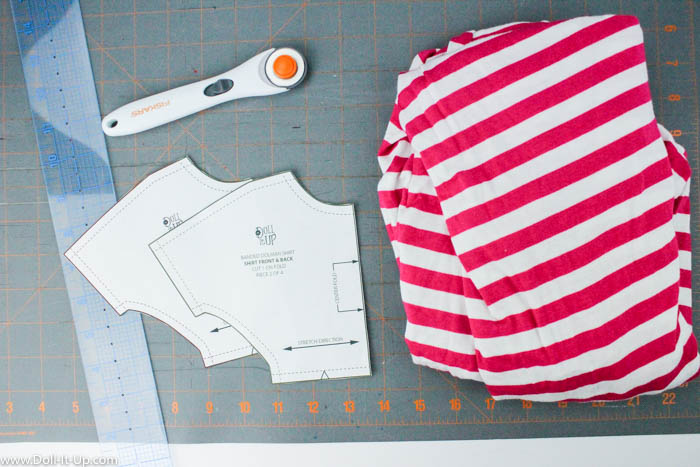
Supplies:
- ruler
- rotary cutter and cutting mat (or use the scissors and freezer paper method-see the Banded Dolman Shirt pattern and guide.)
- Banded Dolman Shirt pattern
- striped stretch knit (in a 4-way stretch)
- paper and tape (optional)
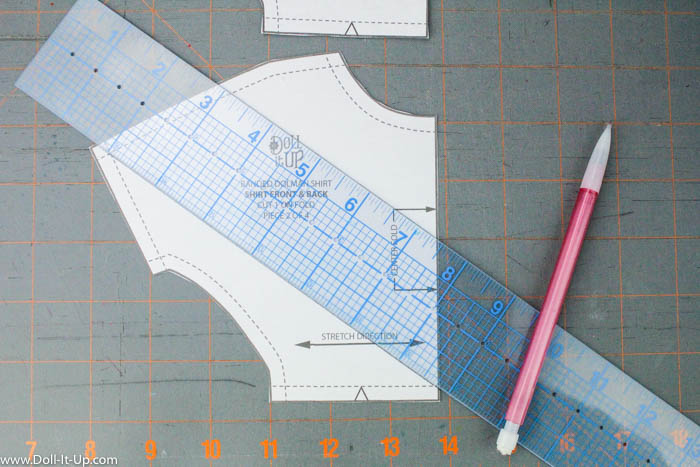
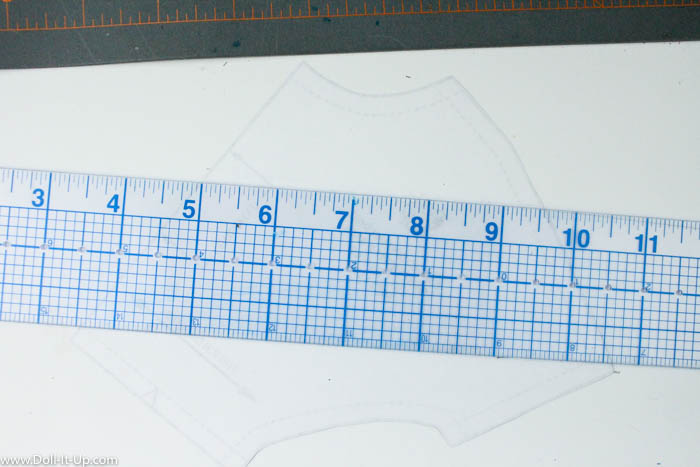
First we are going to decide on the orientation and angle of the stripes and mark a guide on the pattern. I laid the ruler on the pattern and simply drew a line on each side of the ruler.
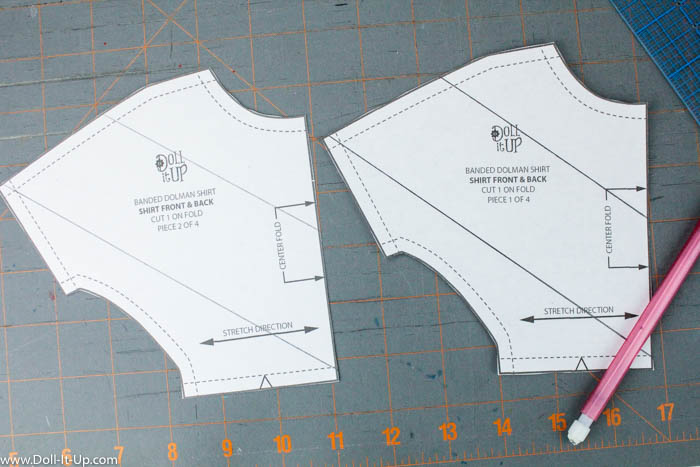
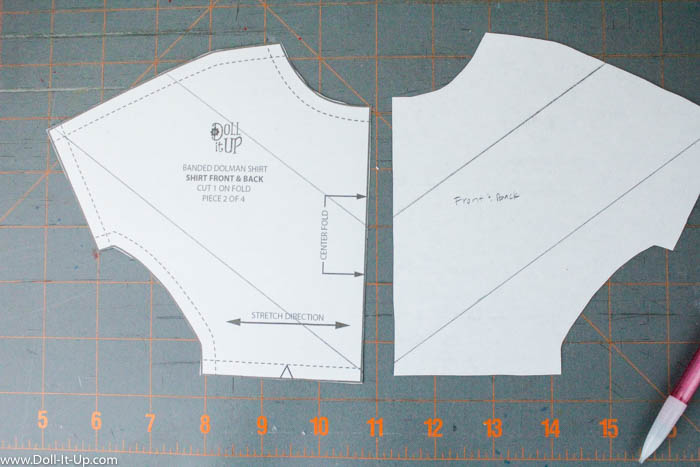
Make sure the guide lines are the same on each pattern piece by tracing or measuring. Using a fine sharpie may help you trace or you can put the pieces onto a light table or you can even tape them on a clear window when it’s light outside to easily trace. It’s important that they are the same because we will use the guides to match up the stripes.
Flip one of the pattern pieces over and trace the lines onto the back.
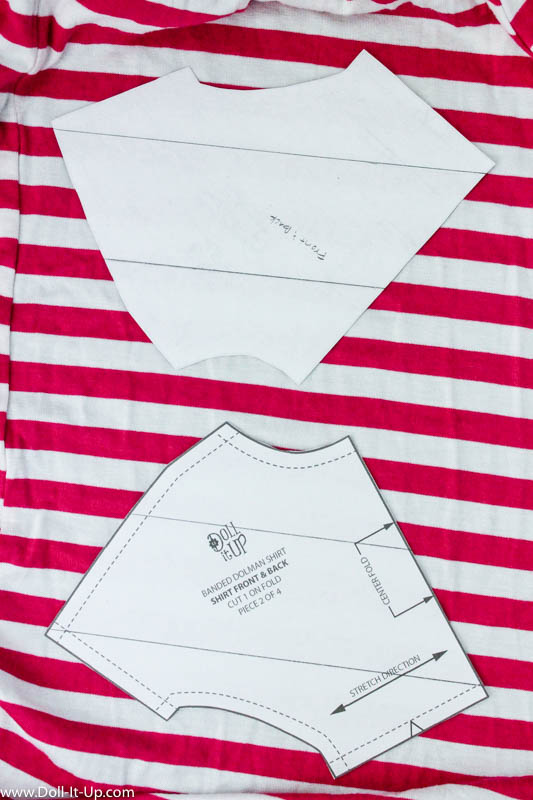
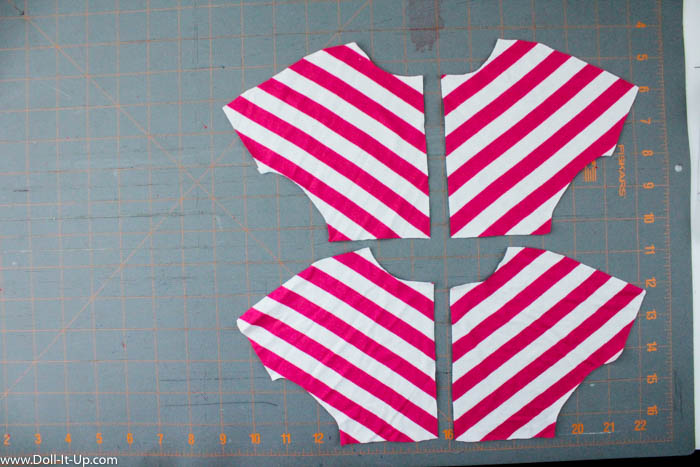
Lay the pattern pieces out opposite each other like pictured below. Our new shirt will have a seam down the middle so these pattern pieces will now be the right and left front and back. Be sure to not lay the fabric on a fold (as the pattern piece says!).
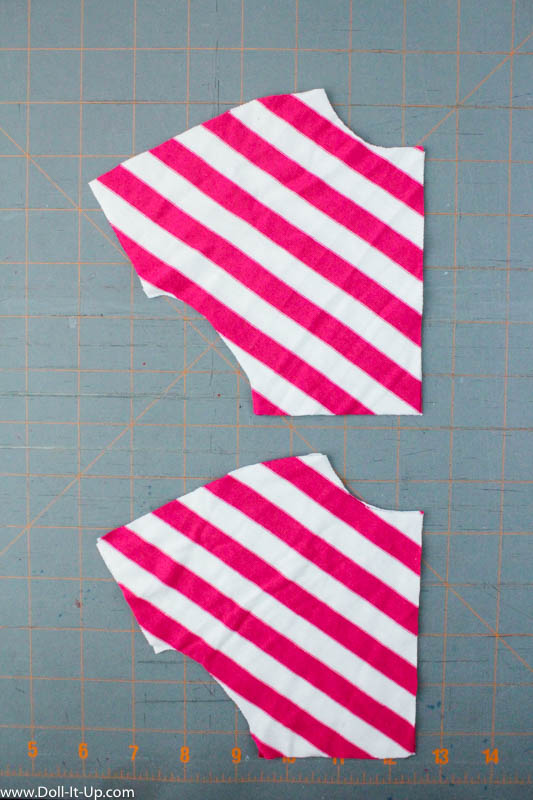
First arrange the front left and right. Use the matching diagonal lines to lay each pattern piece out on the correct stripe.
This was a little mind blowing to me. To make sure my stripes matched up I went through a little checklist for the right and left pattern piece.
- Is the stripe angled toward the center front?
- Is the bottom guide line matched up with the bottom edge of a red stripe?
- Check the second guide line to make sure the lines are hitting the same spot on the red line.
By simplifying what you are looking for and using a few markers (guides) to check, it is easier to check and double check they are on the right stripe before you cut. If your stripes don’t match up exactly it’s not the end of the world. I have seen these done mixed up with stripes in different directions, so you can’t go wrong!
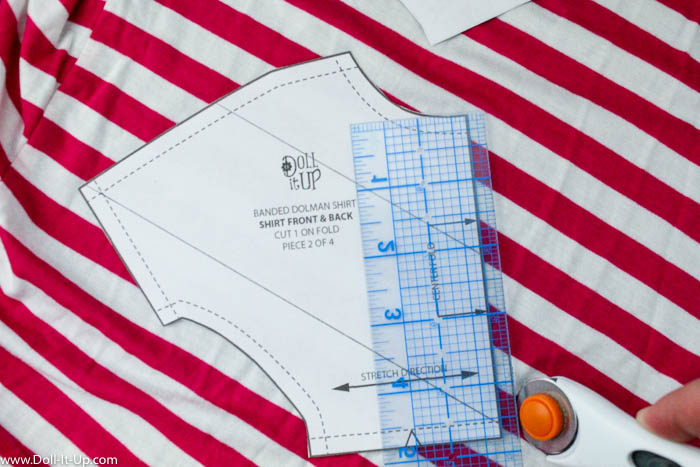
Time to cut out the pieces! I think pinning the fabric will make it shift too much. I would use a rotary cutter or the freezer paper method. Both of these methods I thoroughly explain in the Banded Dolman Shirt pattern instructions and the sewing guide, so be sure to check it out if you are unfamiliar with either!
Before you cut be sure to add a 1/4″ to that center seam. You can add it right at the time of cutting by laying a clear ruler over the pattern piece and lining it up with 1/4″ at that center seam. You can also add the 1/4″ directly to the pattern piece with a strip of paper and tape. Tape a larger strip of paper under that center seam. Measure and cut it to 1/4″ past that center seam.
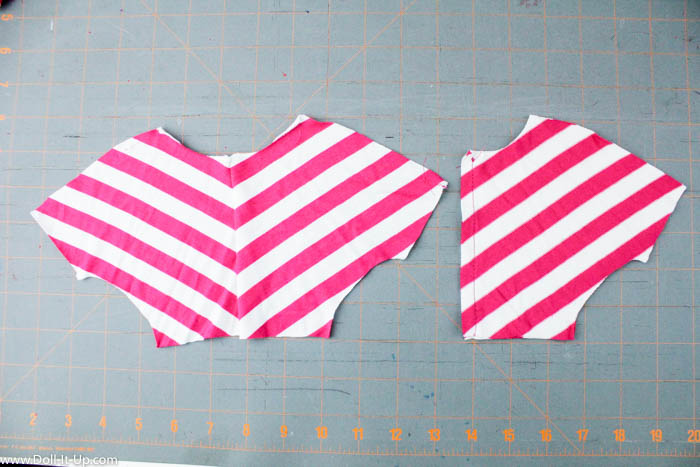
Cut out four pieces, two right and two left. If you are able to line up the pattern guides you drew with the fabric stripes then all the stripes will match up at the center seam and on the shoulder seams. You can see that below.
First we will sew the center seam for the shirt front and shirt back. With right sides together, match up the center seam and stripes.
Pin in place and sew with 1/4″ seam allowances. Open them up and you now have a shirt front and a shirt back piece with that cool V-pattern.
Sew the shirt following the directions in the pattern.
Such a simple change and a cool effect!
The V stripe is awesome with the dolman style but it is a fun technique you could use on any shirt! I hope you enjoy this variation to the Banded Dolman Shirt pattern!
I still have one more trendy variation to share! Keep an eye out for it!
Hope you are having a wonderful Christmas season!
Anna

So cute, thank you! Ive made several regular dolman tops already and I can’t wait to try some v-dolman stripes.
Thanks Rhonda! I’m so glad you are enjoying the dolman shirt! 🙂
This is adorable! I’m going to give this a try as soon as I get some sewing time! Looking forward to your new pattern as well!
Thanks Jessica! I’m glad you like it! I absolutely loved your variations on the dolman pattern! And thanks for your encouragement!! Eek, I’m excited for the new pattern too!
That is adollable! I have made two of the doleman shirts already! My only problem is getting it on. It stretches the top and breaks the seam. I love them, but I don’t know what to do!
Chloe
Hi Chloe, Sorry to hear you are having trouble with the stitches on the neckline breaking! Are you using a small zigzag stitch? That is a stretchy stitch and it has been plenty of stretch for the shirts I have made. If you are already using a zigzag stitch and are still having trouble, test out different sizes of zigzag stitches on a scrap of fabric. Pull the fabric to stretch the stitches to see how they handle stretch. Once you have a zigzag stitch you feel has enough stretch you can sew it up.!
I did have one more thought about stretch. Be sure your fabric has enough stretch and is a 4-way stretch. I go over this in detail in the sewing guide accompanying the pattern but it is so important for how the shirt will fit and go on over the head.
Good luck I hope this helps! Boo to popping stitches!
having trouble downloading the pattern any suggestions
Hi Linda, I emailed you to help you figure this out.
Your download of the pattern did not work, kept putting me in a loop. I tried to put in my email several times.
Thanks
Theresa, I sent you an email to help work through the trouble you are having!
Hi, I haven’t been able to download the pattern today either. You’re stuff is super cute!
Hi Wendy, I wanted to share a few basics for getting the Banded Dolman Shirt pattern. I do cover these in detail in the FAQ tab at the top if you need even more details. The pattern comes as a link in the email newsletter. You can sign up for the newsletter here. Keep in mind that if you don’t want to receive the newsletter you are welcome to unsubscribe after you receive the pattern. There is an unsubscribe link at the bottom of each email. I will email you to make sure you don’t have further questions!
Hello! This is such a cute pattern. Im having trouble receiving the link for the download. I submit my email, but nothing happens. Please help! Thanks!
I emailed you Jess. I’m having technical difficulties with some of the links. I am more than happy to help!
I have tried signing up for the newsletter many times and I can’t get it to work. I’ve checked my spam and inbox.
I too have tried signing up for your newsletter. seem I get caught in a loop that sends me back to the sign up location to sign up again. I have also checked my email and junk mail for response and found Nothing
Marlena, I am working to resolve technical issues I’m having with the link. I’ve emailed you so you can get the pattern!