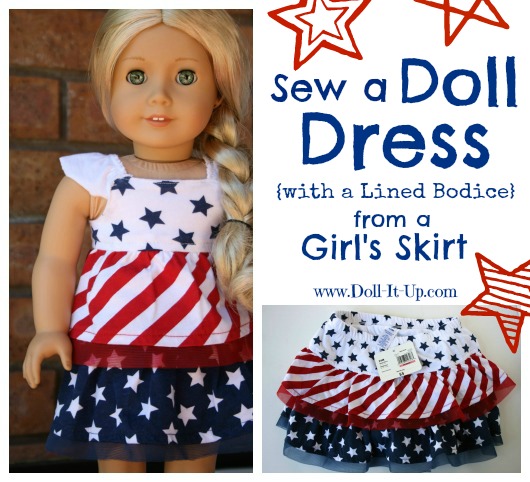
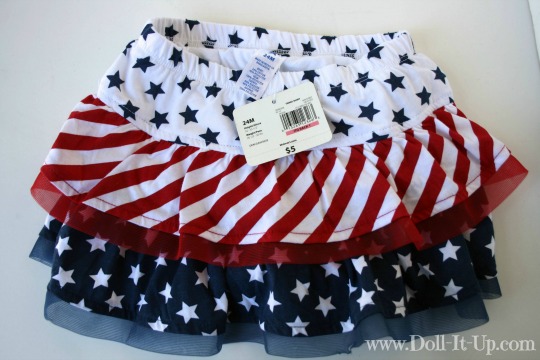
The baby of the family (Yes, 17 months is still a baby!), frequently sends me to the baby section of the clothing department. That’s where I stumbled on this adorable stars and stripes skirt. Baby dearest already had her 4th of July outfit, so the skirt caught my eye for a doll sized dress. I’d rather pick up something like this at the thrift store for an even better price, but at $5 it is still reasonable for a doll outfit. Seasonal clothing is just fun for dolls!
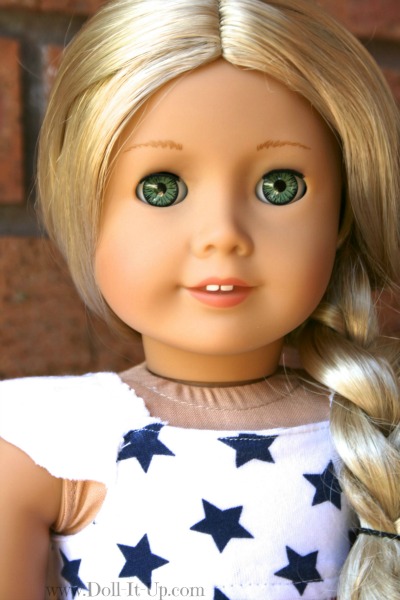
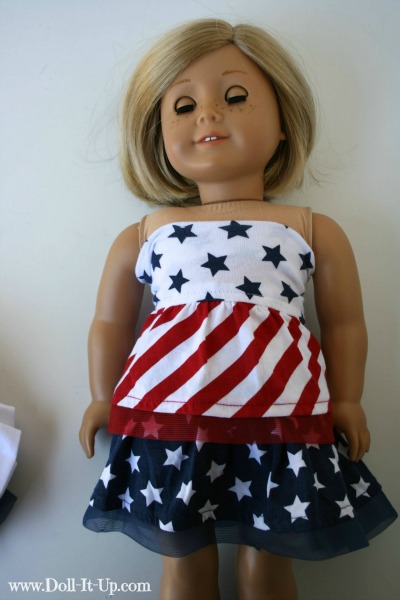
Add armholes and line the bodice and it looks like it was originally made for dolls!
This skirt may have caught my eye with all of it’s fun stars and stripes but there is nothing fancy about it. It is just a simple ruffle skirt. I see them in every color at the store these days!
I’ll show you how to add a simple sleeve perfect for a summery dress.
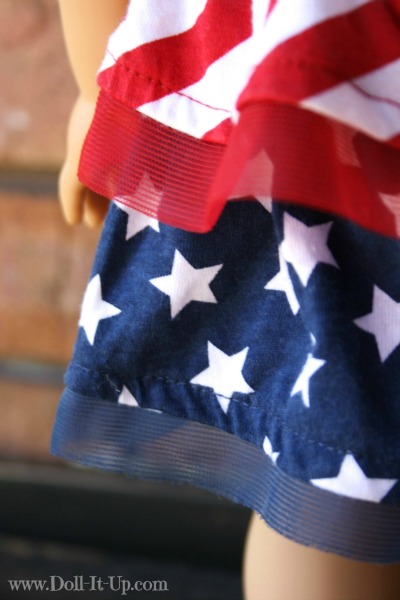
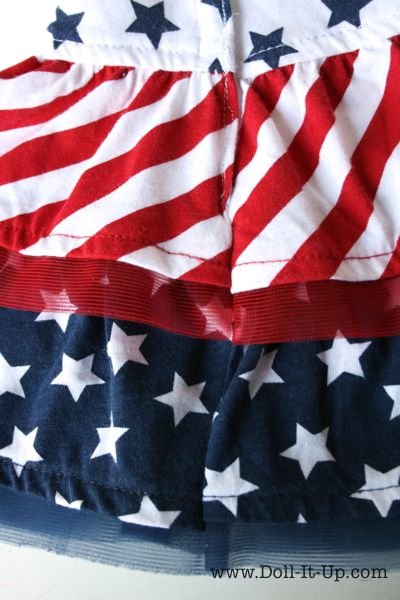
My favorite part of re-purposing is the details that are already there. In this case it is the adorable coordinating knits and the netting detail at the bottom of the ruffles! It would be HARD to find all of these cute fabrics for this project if I set out to make it from scratch, and I dare say a lot more expensive!
A bonus, it turns out it only took 1/2 the skirt to make one dress so I’ll get 2 dresses out of this one skirt! That’s $2.50 each! Wow!
Would you like to give it try, to make a little dress like this, for your dolls? Follow along and I will show you how!
The skirt I’m using is size 24m. Check to see if the skirt you have has enough fabric to make a doll dress. Wrap the front half of the skirt around the doll. If the 2 side seams meet in the back, it is big enough!
Cutting Out the Dress Panel
I only need 1/2 of this little skirt to make one doll dress. Half of the skirt looks like it’s going to be a perfect fit, so I don’t have leeway with extra fabric. I need to maximize the fabric I have to work with, while cutting off half of the skirt.

To ensure I will have enough fabric for the overall length of the dress, I removed stitches with a seam ripper at the waistband.
Next I cut along each side seam up to the waistband.
When I opened up the waistband I also discovered that the skirt was sewn to the elastic and the lining, which happens to be a little pair of shorts. I cut along the seam where those meet.
With the front panel of the skirt removed you can see the little pair of shorts that I’ll be using to line the bodice and for the sleeves. If your skirt has no lining you can use a lightweight knit to line the bodice and make the sleeves.
A Fitting Session
Since there is no pattern to make this little dress we need to fit the dress using a doll. Start by wrapping the fabric panel around the doll and pinning it in the back. We will continue to adjust the fabric in the front and in the back to adjust how the dress will fit the doll.
Let’s start with the front.
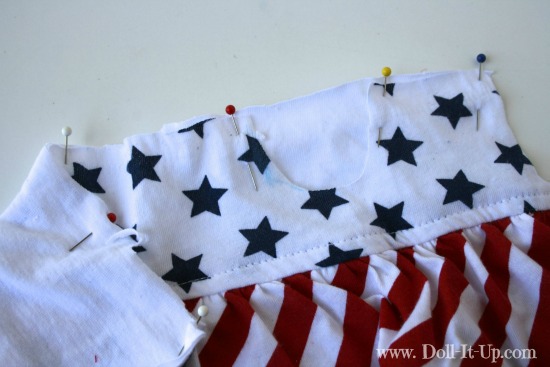
Skirt Length- Fold the top part of the panel under (mine is white with blue stars) to adjust the skirt length.
Front Neckline- Adjust the neckline to where you want it to lay. Be aware that the neckline is pulled down a little by the armpits. The armpits are lower than the dress neckline on 18″ dolls.
Now for the back.
Skirt Length- Fold down the top of the panel to adjust the skirt length, just like we did in the front. Make sure the skirt length in the front and the back are the same.
Back Neckline– Adjust the neckline to where you want it to lay. Be aware that the panel is pulled down a little by the armpits. The armpits are lower than the back neckline on 18″ dolls.
Plan for a Closure- This dress is going to have a velcro closure. Overlap the 2 sides in the back a half inch. Put the left side edge in the middle of the back. Account for another 1/4″ on both the right and left side for seam allowances. Mark with pins if there is extra fabric to trim off.
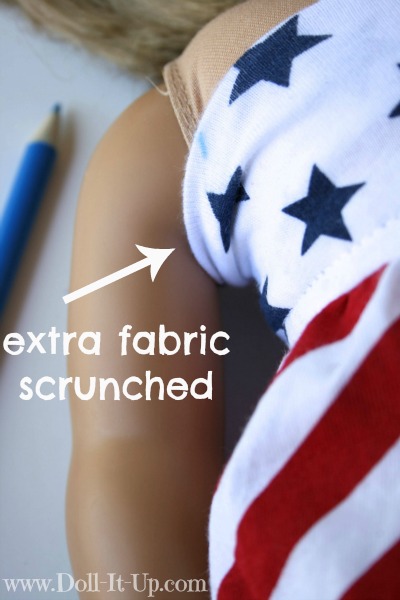
With the neckline in place, extra fabric has scrunched under the arms. We are going to cut armholes, remove the extra fabric, and get a better fit.
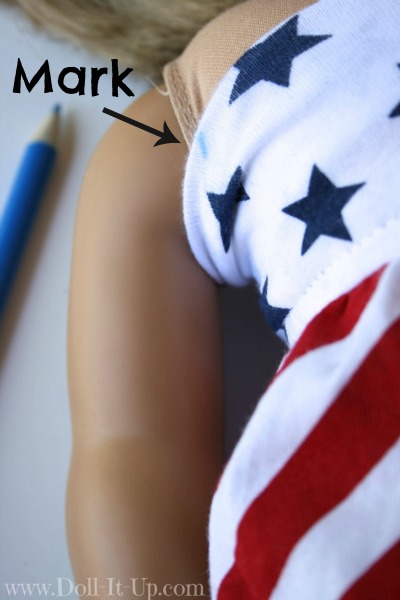
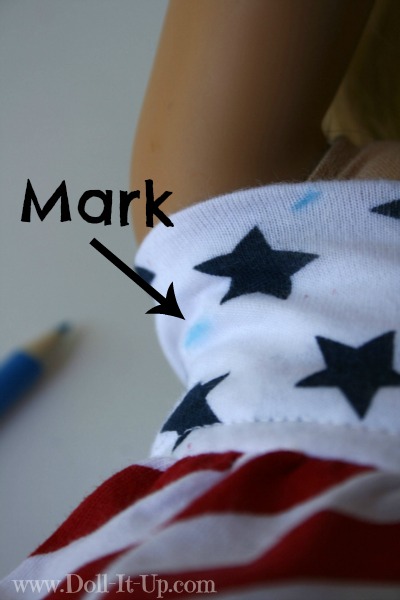
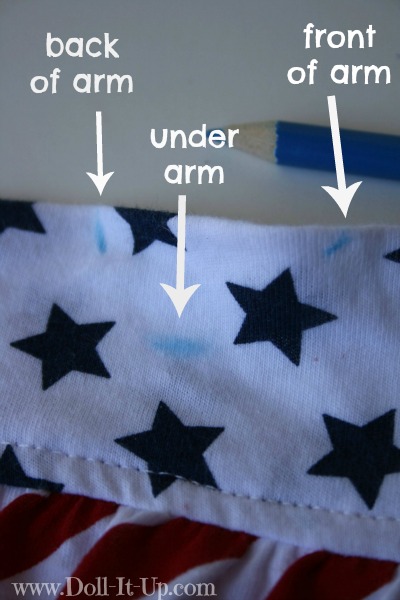
Now to figure out where to put those armholes! Get your fabric marking pencil ready! Remember where ever you decide to mark, the finished dimensions will be smaller because of the 1/4″ seam allowance. For the front and back marks, I made a mark right where the cloth body meets the vinyl arm. I would recommend marking 1/8″ further than I did at each point because the finished armhole was a little too roomy in my opinion.
For the third mark, lift the dolls arm. I marked where the cloth body meets the vinyl arm. Again I would recommend marking 1/8″ beyond that to get a little better fit.
Notice that the front and back marks are also at the fold. This also marks the top of the bodice. That will be important to remember when it comes time to trim the extra fabric. After both armholes have been marked, it’s time to take the fabric panel off the doll. Trim the left and right side if you marked it with pins to be done. Mine was a perfect fit so I didn’t need to do any trimming on the right and left sides.
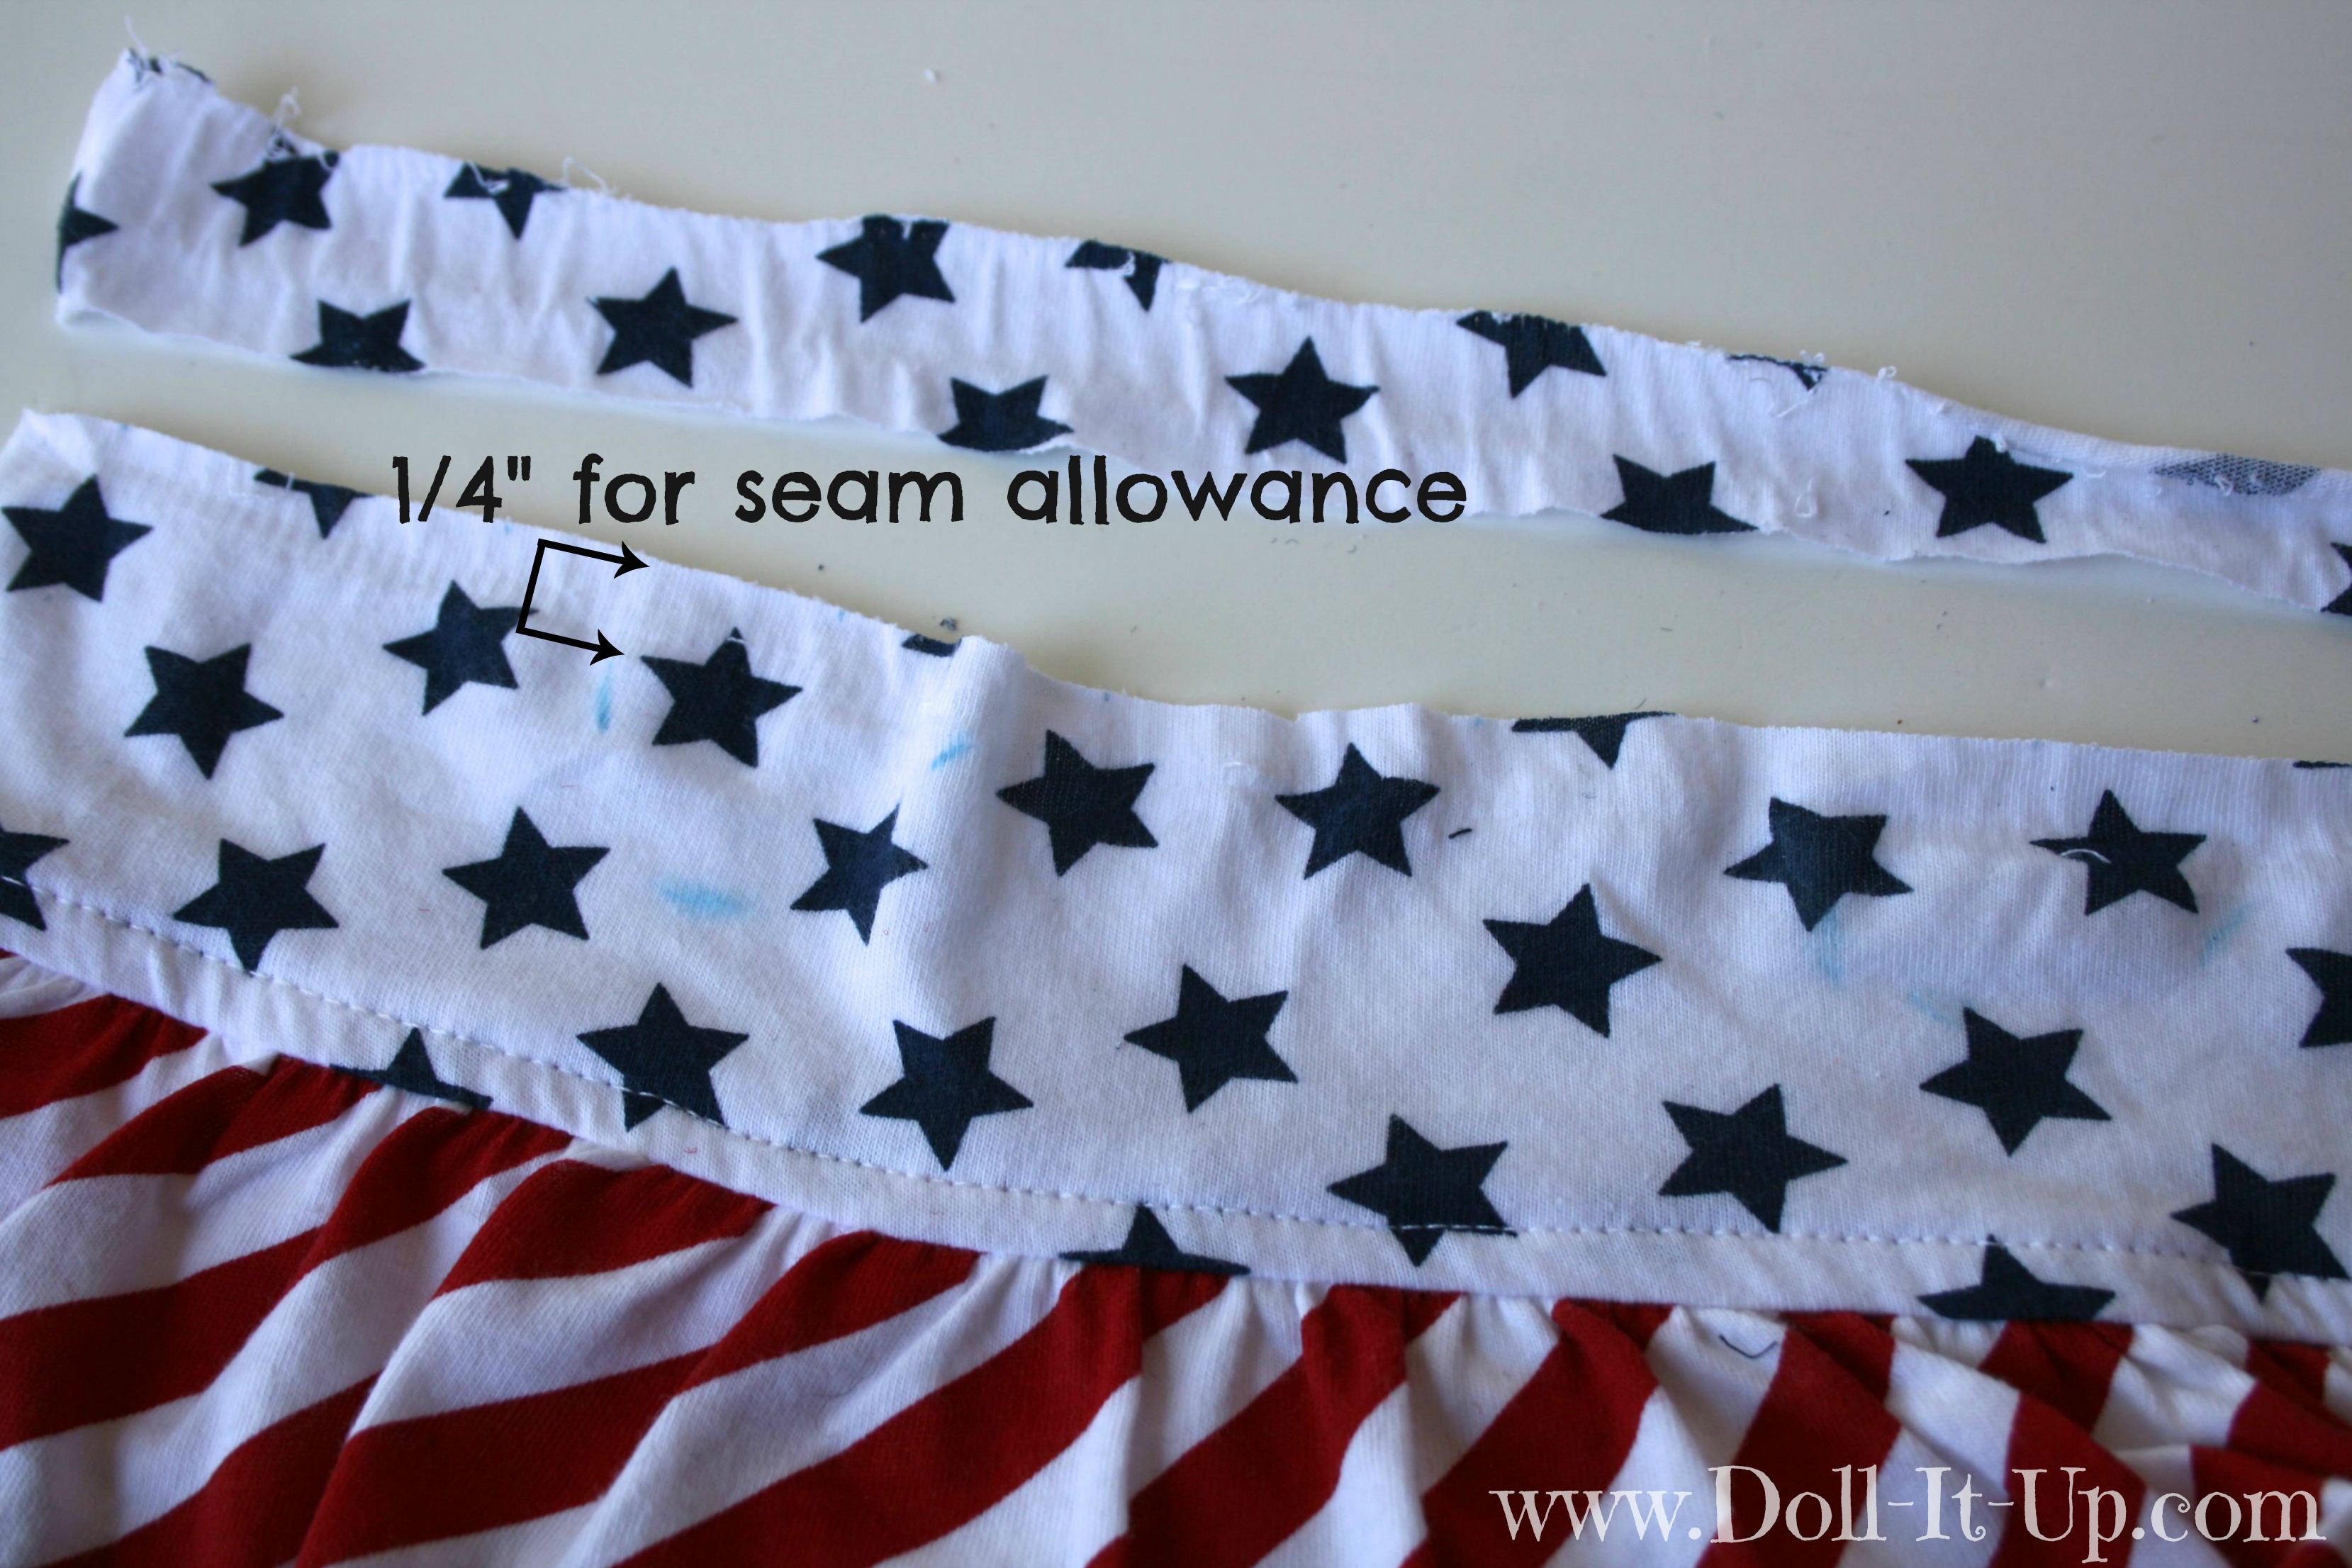
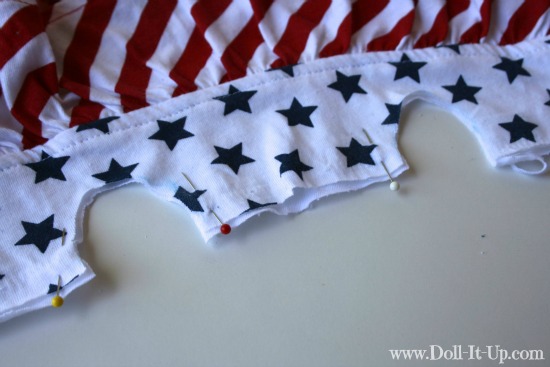
Unfold the fabric that was folded down. Remember the marks on the front and back of each arm that also marked the top of the bodice? Mark a line and cut 1/4″ beyond those marks. This will be the seam allowance.
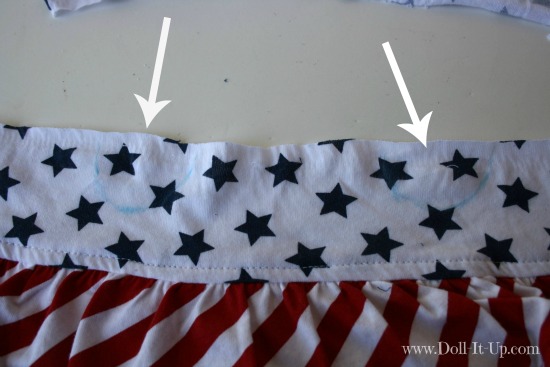
With the pencil, connect the marks and sketch the 2 armholes all the way to the fabric edge. They are faint, so arrows are pointing them out in the photo above.
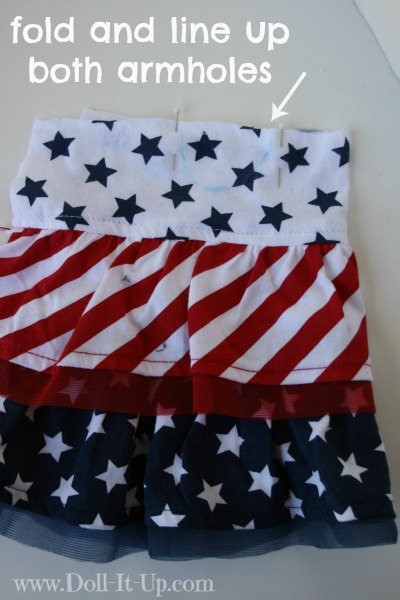
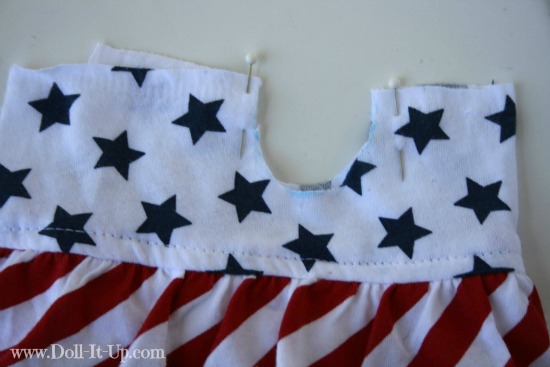
Those 2 armhole sketches are pretty close, but there is still a slight difference. To make make sure they are the same, fold the fabric, line up the 2 armhole sketches, and pin the two together.
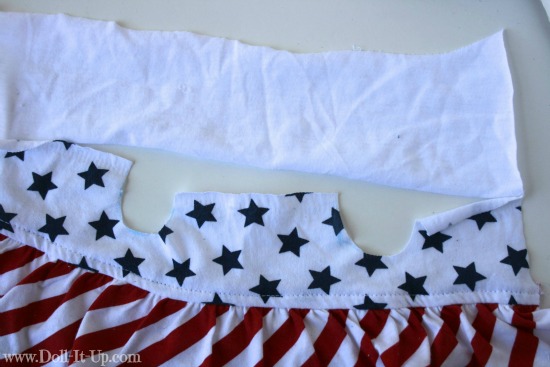
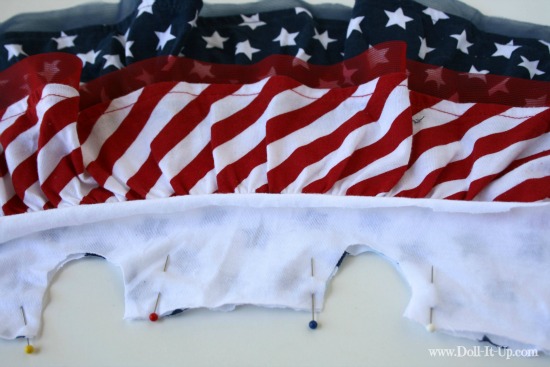
Cut the two out together. You can see clearly that one side of the fabric is longer than the other. That is extra fabric we accounted for the velcro closure.
Now it is time to cut the lining. I used the fabric from the little shorts that were under the skirt. If your skirt has no lining use a light weight knit. Cut a rectangle the length and width of the top of the bodice. I used the white with blue stars as my guide.
Pin the two fabrics together.
Cut the armholes out of the lining fabric.
Re-pin the fabric lining so that right sides are together. Stitch starting with the side seam, across the top, including the armholes and down the other side seam. Clip the curves and corners and turn right side out.
Now for the sleeves!
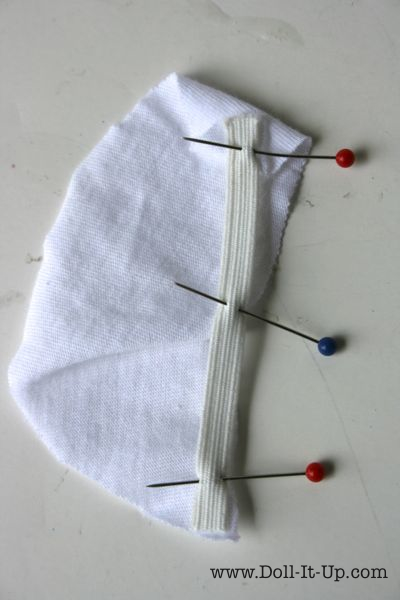
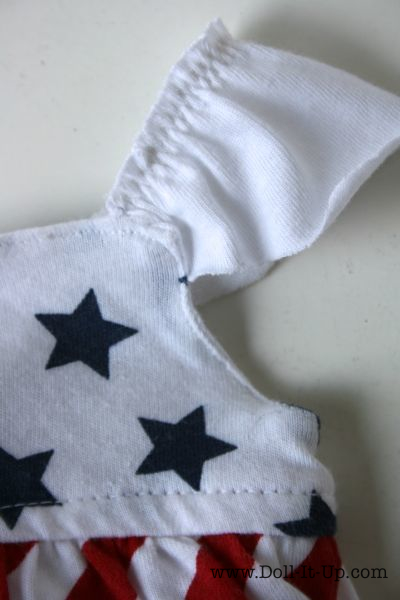
I’ve included the measurements if you would like to make similar sleeves. Make a pattern out of paper. Cut 2 sleeves out of a lightweight knit. The elastic is 1/4″x 3″.
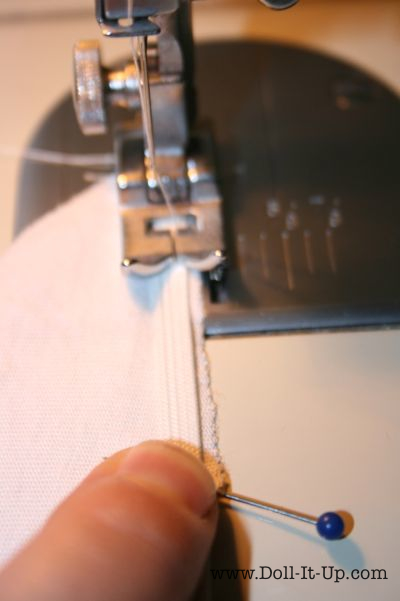
Pin the elastic to the sleeve at each end and in the middle.
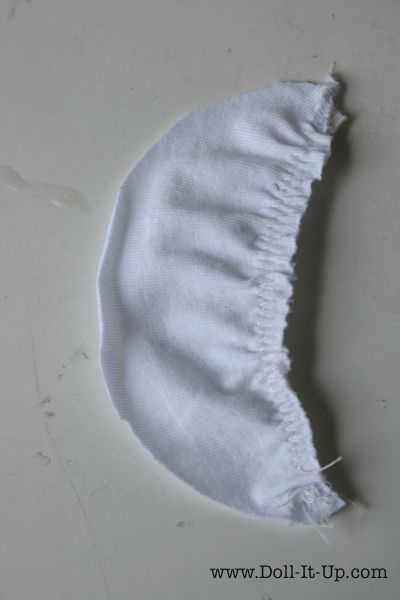
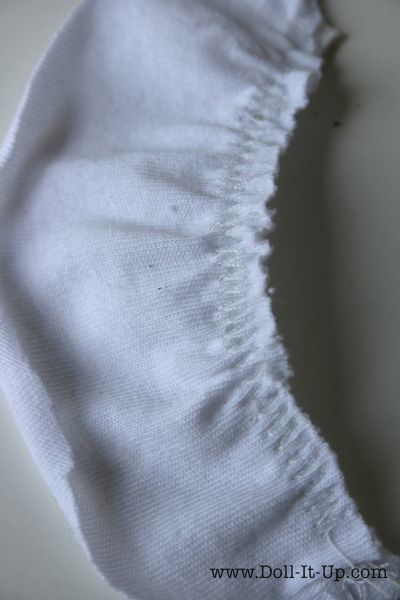
Using the zigzag stitch put in a few stitches. Then gently pull the elastic so the elastic is the same length as the fabric, from pin to pin. Pull gently so the fabric will still feed through. Sew the two layers together. The photo above and the photo below show the difference, before the pull (top) and after the pull (bottom).
Now the sleeve has a little gather.
Let’s talk about attaching the sleeve.
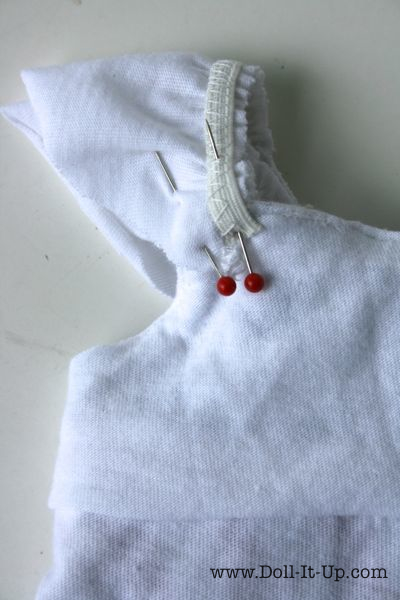
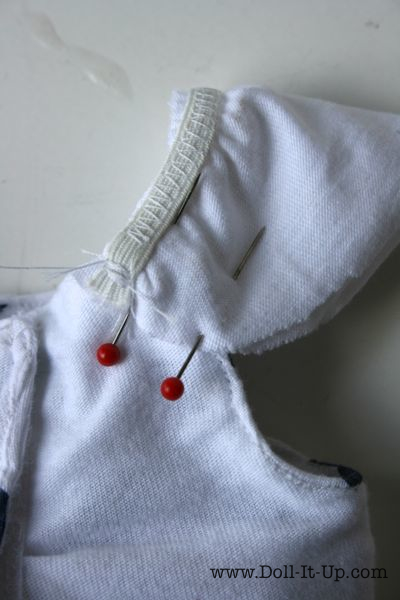
One option is to turn the bodice wrong side out and pin each sleeve to the front and back.
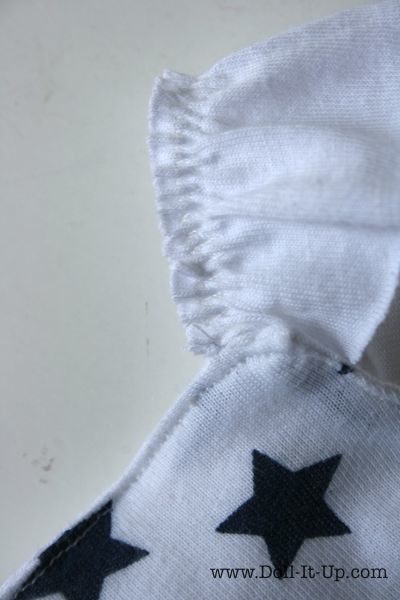
When pinning, be sure to catch part of the sleeve in the armhole area. It helps the sleeve lay better.
Turn the dress right-side-out and stitch close to the edge.
Putting in the sleeve option 2.
Now we are backing up to the point where you pin the bodice and lining right sides together. If you add the sleeves in between the two layers, when you stitch, the sleeves will be sandwiched between the bodice and lining.
Unfortunately I have no pictures of this process. It is the way I put my sleeves in though, so you can see the finished product. Here is the inside.
And here is the outside. I always try to show lots of pictures, so all of you, whether experienced or new to sewing, will be able to follow along. Unfortunately I got caught up in sewing and failed to take pictures of this part! If this step is confusing and some of you are interested I would be happy to take a closer look at this in a future tutorial. Just let me know through comments or email!
I do love this type of sleeve for knits. It is quick, easy and very forgiving! The little gathers are a cute little touch. No hemming and no casings, so it is quick!
It is very versatile for any summery dress or shirt.
Adding a closure.
Usually I sew the hook side of the velcro on the dress and the loop side on the flap. Oops, I switched it! I like it better the other way, but it’s not a big enough deal to pick it out and put it on the other side!
Cut a 4″ segment of hook and loop velcro. Stitch the hook side (not the loop like pictured), to the right side of the dress.
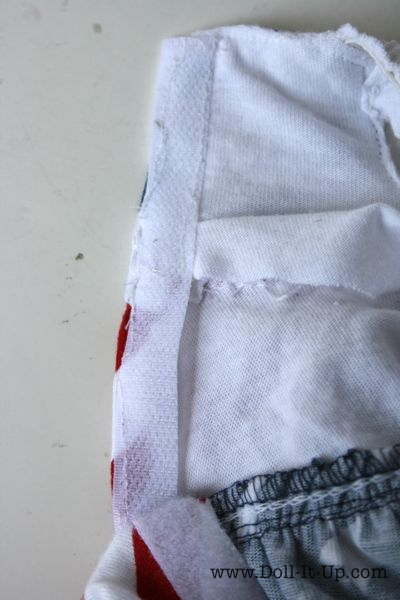
Sew the loop section of velcro to the inside of the left side.
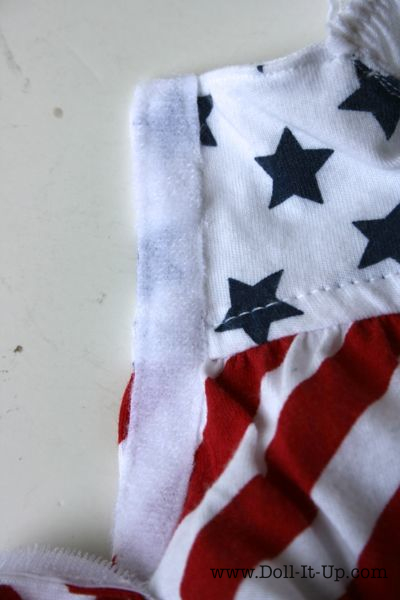
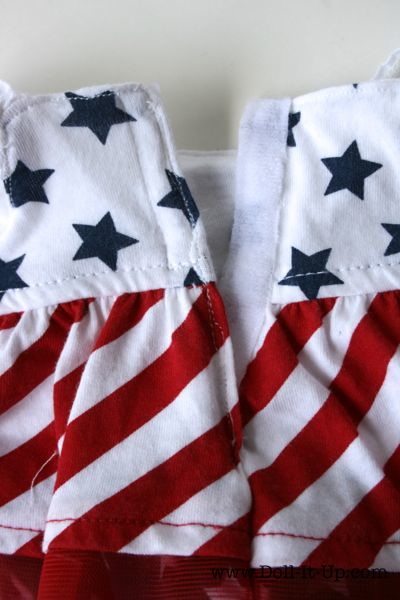
As a side note let’s take a closer look at the stitching on the left side velcro. Sometimes I make modifications from a usual method. Here is a perfect example.
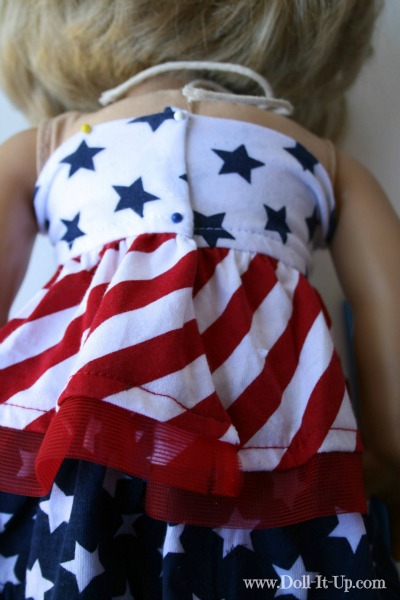
On the left side I only stitched in the star area and on the edge of the stripe. This is not a usual for me, usually I just stitch around the velcro all the way. I made this modification because I didn’t want to stitch on the red stripe ruffle. There would have been no harm done, just that I wanted to preserve the cuteness of the ruffle! I’ve stitched enough around the velcro so that it holds nicely!
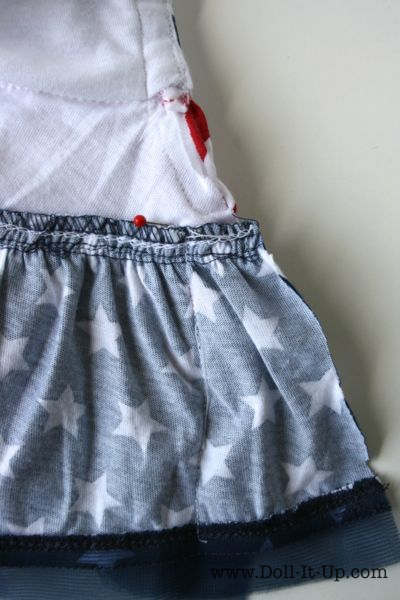
To finish off the back of the skirt below the closure, I simply pinned and stitched it from the bottom up to where the red pin is below the velcro. To get the spacing right I closed the velcro closure and used that as a guide for how far to pin the remaining fabric together. You can see how much fabric I ended up taking in.
Trim the extra fabric and turn it right side out. Just right!
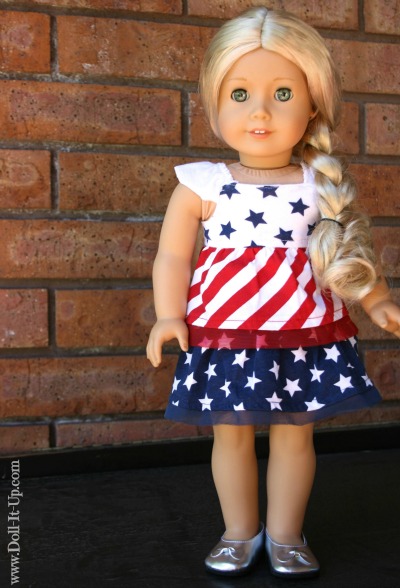
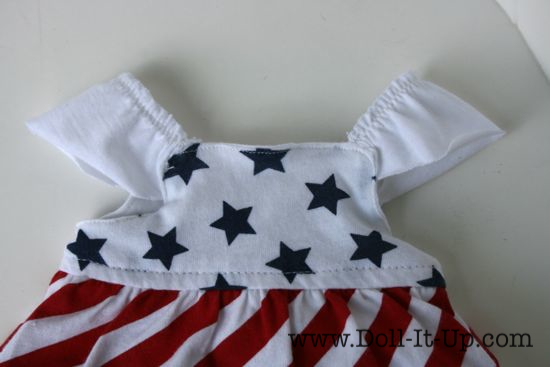
There you have it, a sweet little summery dress. Complete with a lined bodice.
Who new it was once a little girl’s skirt! Cutting armholes and lining the bodice gives it a finished touch and truly customizes it to fit your doll!
If you haven’t already, I hope you catch the repurpose clothing bug! It is such a fun, quick, inexpensive way to make doll clothes! If you have any questions or ideas about sewing for dolls I would love to hear from you! Leave a comment or send me an email at anna@doll-it-up.com.
Until next time!
Anna




this is so cute!!!!!!!!!!!
i love it.
oh and i love your blog.
Lila, Thanks! I’m loving the 3 prints together!
I love it! I simply love it. Next time I happen to find a ruffle skirt, I’m defiantly going to do this. Caroline looks darling in it, to, by the way. :3
Jeneca, Thanks! I hope you give it a try!
I had fun photographing Caroline. She is a beautiful doll!
I remember seeing that skirt in a store and can’t for the life of me remember where? Do you remember where you bought it? I was thinking that it may go on clearance soon and may jump start sewing for my granddaughters for next 4th of July. I love it, thank you!
Anny- Thank you! The skirt is from Walmart. Good luck!
I remembered seeing this adorable little skirt at Walmart. Today I whipped up 1 dress for my daughter’s doll and another for a friend. Thanks for the fabulous tutorial!
Leslie- How fun! So glad to hear about your project! 🙂 Yay for cute and quick doll clothes!
I love to sew and have 5 dolls (Julie, Kanani(or however you spell it)Sage, and 2 look alikes (Miranda and Sadie) ) but anyway I am sooooooooooo glad you made this cause as I said I love to sew (especialy dresses) so thanks for the new style idea!!!!!!!!;)
Love this and can’t wait to try it. My granddaughter has one AG doll. She is getting one for birthday (Nov.), one for Christmas and one on last day of school.
It sounds so fun to sew for a granddaughter! I bet she will love what you make for her dolls!
Ohmy! I can’t thank you enough for this tutorial! I love to sew, but sometimes making clothing for the dolls is frustrating because the teeny tiny details are complicated. This takes it to a whole new level of simplicity! Wonderful!
Thanks Virginia! I’m glad you love simplicity too! It’s just so fun to whip up a project and have such cute details on it!